


Securing a web server is a continuous, multi-layered process known as defense-in-depth. This is not a one-time setup but a strategic discipline. Similar to fortifying a castle with walls, a moat, and internal guards, server security involves hardening the operating system, configuring strict firewall rules, and encrypting data in transit. This guide provides actionable, step-by-step instructions for implementing these critical layers of protection.
Laying the Groundwork for Server Security
Learning how to secure a web server is about building a fundamentally resilient security posture. A proactive strategy focuses on minimizing the attack surface, the sum of all potential entry points an attacker could exploit. This approach prevents breaches rather than just reacting to them.
This strategy is built on two foundational IT security principles:
- The Principle of Least Privilege: Every user account, application, or system process must be granted only the absolute minimum permissions required to perform its function. This principle effectively contains the damage if a component is compromised.
- Defense-in-Depth: Security must not rely on a single control. Instead, it involves creating overlapping layers of protection. If one layer fails, subsequent layers are in place to mitigate the attack.
The Core Layers of Server Defense
Effective security requires a holistic view of your entire infrastructure. Before deploying specific tools, it is crucial to understand the importance of cybersecurity in any technical environment. The required security measures also depend on the server’s role; a server in a shared environment has different requirements than a dedicated virtual private server. Our guide on the differences between shared hosting and a VPS provides further context.
This diagram illustrates the defense-in-depth model, showing how security controls are layered from the network up to the application.
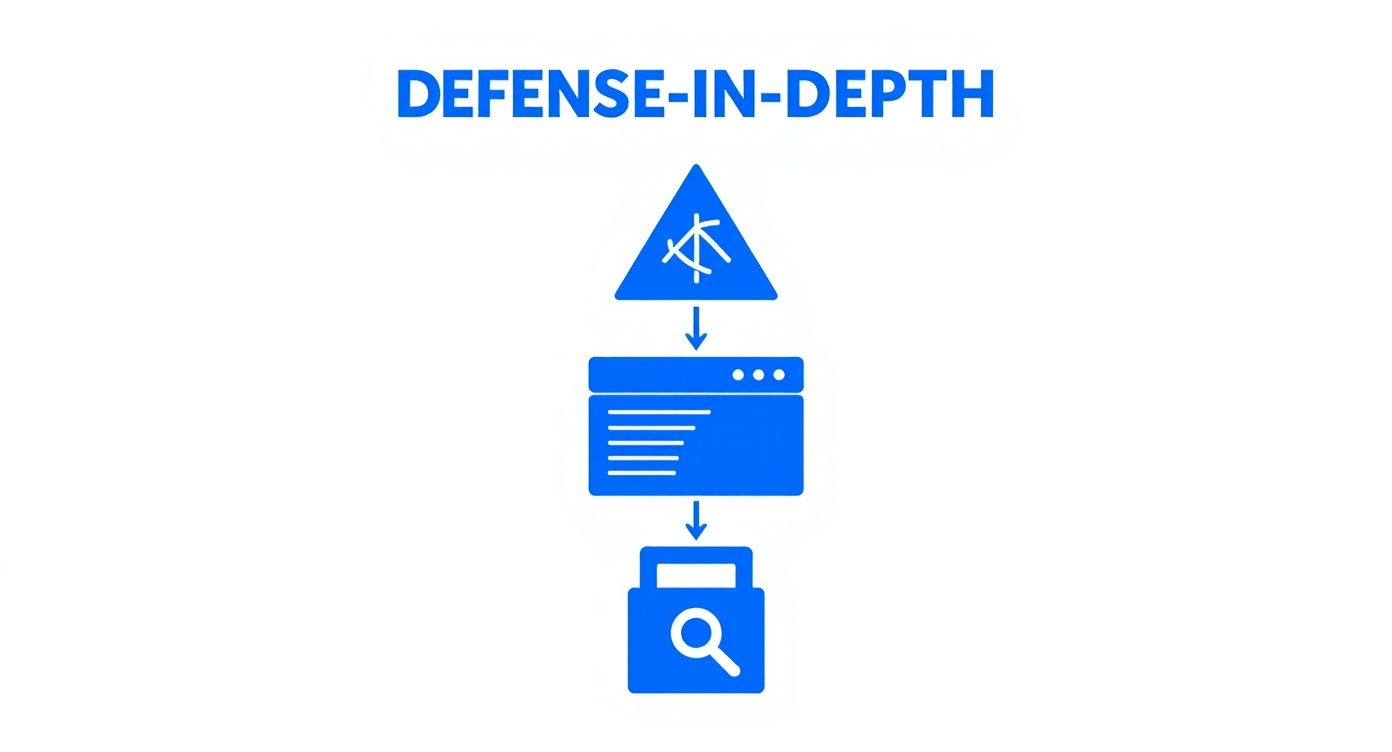
A breach at the application level can still be thwarted by robust OS and network security, demonstrating the value of this layered approach.
Building a solid security posture means implementing controls at every level. Here is a technical breakdown of what this involves.
Core Security Layers for Web Servers
| Security Layer | Objective | Key Actions |
|---|---|---|
| Network Security | Control traffic in and out of the server | Configure host-based firewalls (UFW, iptables), implement network segmentation, and deploy DDoS mitigation. |
| Operating System | Harden the core server environment | Apply security patches, disable unnecessary services and ports, enforce strong password policies, and configure file permissions. |
| Application Security | Protect the software running on the server | Perform regular code audits, deploy a Web Application Firewall (WAF), and sanitize all user inputs to prevent injection attacks (e.g., SQLi, XSS). |
| Data Security | Safeguard sensitive information | Encrypt data at rest (e.g., LUKS) and in transit (SSL/TLS), and implement robust backup and disaster recovery plans. |
| Monitoring & Logging | Detect and respond to threats | Implement host-based intrusion detection systems (HIDS), centralize logs for analysis, and configure real-time security alerting. |
Each layer functions in concert to create a defense far stronger than any single component can provide.
Focusing on Real-World Threats
The threat landscape is dynamic, but certain attack vectors persist. According to the IBM X-Force Threat Intelligence Index, exploitation of public-facing applications remains the primary initial access vector, accounting for a significant 40% of incidents in North America.
This statistic underscores a critical point: infrastructure security alone is insufficient. The web applications themselves are often the most vulnerable link. By starting with a solid foundation built on these core principles, you can create a formidable defense against both automated bots and targeted, sophisticated attacks.
Hardening Your Operating System and Access
A server’s operating system is its foundation. A compromised OS renders all other security measures, from firewalls to application logic, ineffective. OS hardening is the essential process of securing this foundation by removing non-essential software, tightening permissions, and locking down remote access protocols.
The primary objective is to reduce the “attack surface.” Every running service, open port, and user account represents a potential vector for an attacker. By disabling or removing any component not critical to the server’s function, you minimize potential vulnerabilities.
Minimizing the Attack Surface
A default Linux installation often includes services unnecessary for a web server, such as printing services (cups) or a local mail transfer agent (postfix). These services, if not required, introduce needless risk. The first step is to identify and disable them.
On modern Linux distributions like Ubuntu or CentOS using systemd, you can list all running services and disable those that are not required.
# List all active and running service units
sudo systemctl list-units --type=service --state=running

# Example: Disable the CUPS printing service if not needed
sudo systemctl stop cups.service
sudo systemctl disable cups.service
Review the list of running services and apply the same stop and disable commands for any that are not directly related to web hosting, database operations, or core system functions.
Enforcing Secure File Permissions
Proper file permissions are a direct application of the principle of least privilege. No user or service should have more access to files and directories than is absolutely necessary for its operation. Overly permissive file settings are a common configuration error that can lead to severe security breaches.
The chmod and chown commands are fundamental tools for this task. For a typical web application’s document root, files should be owned by the web server’s user (e.g., www-data on Debian/Ubuntu) with strict permissions.
- Directories: Set to
755(drwxr-xr-x). The owner has full control, while the group and others can only read and execute (i.e., traverse the directory). - Files: Set to
644(-rw-r--r--). The owner has read/write access, while the group and others have read-only access.
Best Practice: Never use
777permissions on a production server. It grants write access to everyone, creating a critical vulnerability. Proper permission management is a core competency detailed in guides on how to manage dedicated servers.
Locking Down SSH Access
Secure Shell (SSH) provides administrative access to the server, making it a primary target for brute-force attacks. The default SSH configuration is insufficient for a production environment. Hardening the sshd_config file, typically located at /etc/ssh/sshd_config, is a mandatory security step.
First, disable direct root login via SSH. Administrators should log in with a standard user account and elevate privileges using sudo. This provides an audit trail and an additional layer of security.
# Inside /etc/ssh/sshd_config
PermitRootLogin no
Next, disable password authentication in favor of public key authentication. SSH keys are cryptographically secure and resistant to brute-force attacks that can crack even complex passwords.
# Inside /etc/ssh/sshd_config
PasswordAuthentication no
PubkeyAuthentication yes
After modifying the configuration, restart the SSH service to apply the changes: sudo systemctl restart sshd.
Automating Brute-Force Protection with Fail2ban
Despite hardened SSH settings, automated bots will continuously attempt to log in. This generates log noise and consumes server resources. A tool like Fail2ban provides an effective, automated defense.
Fail2ban monitors log files for patterns indicating malicious activity, such as repeated failed login attempts from a single IP address. It then dynamically updates firewall rules to block the offending IP for a configurable duration.
This log excerpt shows Fail2ban identifying repeated failures and issuing a ban. Configuration is straightforward. After installation, create a local configuration file at /etc/fail2ban/jail.local to define your rules and override defaults.
Here is a standard configuration to protect SSH:
[sshd]
enabled = true
port = ssh
filter = sshd
logpath = /var/log/auth.log
maxretry = 3
bantime = 3600
This rule instructs Fail2ban to monitor /var/log/auth.log. If an IP address fails to authenticate 3 times, it will be banned for 3600 seconds (one hour). This simple, automated system is highly effective at mitigating brute-force attacks.
Building a Strong Network Defense with Firewalls
With the operating system hardened, the next layer of defense is the network. A properly configured host-based firewall acts as a packet filter, inspecting all incoming and outgoing traffic and permitting or denying it based on a predefined ruleset. It is the first line of defense against unsolicited network scans and connection attempts.
Without a firewall, all running services are exposed to the public internet, inviting reconnaissance and attacks. Firewall implementation is a non-negotiable step in any server security strategy.
Adopting a Default-Deny Policy
The most robust firewall posture is a default-deny policy. This model inverts the traditional approach: instead of blocking known bad traffic, it blocks all traffic by default and explicitly allows only what is necessary. This strategy significantly reduces the attack surface by ensuring that no unintended services are exposed.
For a standard web server, this typically means allowing inbound traffic on only a few essential ports:
- Port 22: For SSH (it is a best practice to move this to a non-standard port).
- Port 80: For standard HTTP traffic.
- Port 443: For secure HTTPS traffic.
All other 65,535 potential TCP/UDP ports should remain closed unless a specific operational requirement justifies opening them. This is the principle of least privilege applied at the network level.
Implementing Firewall Rules with UFW
For Debian and Ubuntu systems, the Uncomplicated Firewall (UFW) provides a user-friendly interface for managing iptables rules. It simplifies the process of establishing a secure, default-deny configuration.
Follow these steps to configure a basic firewall for a web server:
- Establish the default policies. Block all incoming traffic and allow all outgoing traffic.
sudo ufw default deny incoming sudo ufw default allow outgoing - Explicitly allow traffic for required services.
sudo ufw allow ssh sudo ufw allow http sudo ufw allow https - Enable the firewall. UFW will prompt for confirmation as this may disrupt active connections.
sudo ufw enable
These commands establish a strong baseline defense. You can verify the active rules at any time with sudo ufw status verbose.
Advanced Configuration: Rate-Limiting for DoS Mitigation
Firewalls can also mitigate certain types of network attacks, such as brute-force attempts and low-volume Denial-of-Service (DoS) attacks. UFW includes a built-in rate-limiting feature that blocks IP addresses making an excessive number of connection attempts in a short period.
To protect the SSH port from automated password-guessing scripts:
sudo ufw limit ssh
This command configures UFW to block any IP that attempts to initiate more than 6 connections in 30 seconds. While this is not a defense against large-scale Distributed Denial-of-Service (DDoS) attacks, it is highly effective against automated brute-force tools. For comprehensive protection against high-volume attacks, consider specialized solutions like our dedicated hosting with DDoS protection.
Firewalling Management Interfaces like Proxmox VE
When managing virtualized environments like Proxmox VE, it is critical to secure the management interface. The Proxmox web UI, typically on TCP port 8006, should never be exposed directly to the public internet.
Best Practice: Restrict access to the Proxmox management interface to trusted IP addresses only, such as a corporate office IP or a VPN gateway. This prevents unauthorized actors from even reaching the login page.
This level of control can be achieved with iptables for more granular rules.
Here is an example ruleset:
# Allow access to port 8006 only from a specific trusted IP
iptables -A INPUT -p tcp --dport 8006 -s YOUR_TRUSTED_IP -j ACCEPT

# Drop all other connection attempts to port 8006
iptables -A INPUT -p tcp --dport 8006 -j DROP
This configuration ensures that the hypervisor’s control panel is accessible only to authorized administrators, adding a vital security layer to your private cloud infrastructure.
Encrypting Data in Transit With SSL TLS
Transmitting unencrypted data over the internet is inherently insecure. Implementing SSL/TLS (Secure Sockets Layer/Transport Layer Security) certificates to enable HTTPS is a fundamental requirement for securing a web server. HTTPS creates an encrypted tunnel between the server and the end-user’s browser, protecting sensitive information like login credentials, personal data, and financial details from interception and man-in-the-middle attacks.

HTTPS is now the industry standard, with 88% of websites using it by default, according to recent web hosting statistics. This trend reflects a commitment to protecting users from network-level threats.
Choosing the Right SSL TLS Certificate
SSL/TLS certificates vary based on the level of validation performed by the Certificate Authority (CA). The appropriate choice depends on the level of trust your application requires.
- Domain Validated (DV): The CA verifies only that the applicant controls the domain name. This is the most common type and is suitable for blogs, personal websites, and applications not handling highly sensitive data.
- Organization Validated (OV): The CA verifies the legal identity of the organization. This is a good choice for businesses and non-profits that need to provide an additional layer of trust.
- Extended Validation (EV): The CA performs a rigorous validation of the organization’s identity. Although modern browsers have de-emphasized the visual indicators for EV certificates, they remain the standard for e-commerce, banking, and financial institutions where trust is paramount.
Implementing and Configuring Modern TLS
After obtaining a certificate, you must configure your web server (e.g., Apache or Nginx) to use it correctly. This involves not only installing the certificate but also enforcing modern, secure cryptographic protocols and redirecting all traffic to HTTPS.
For an Nginx server, a typical configuration involves creating a server block listening on port 443 that specifies the certificate and private key paths.
server {
    listen 443 ssl http2;
    server_name your_domain.com;

    ssl_certificate /path/to/your/fullchain.pem;
    ssl_certificate_key /path/to/your/privkey.pem;

    ssl_protocols TLSv1.2 TLSv1.3;
    ssl_ciphers 'ECDHE-ECDSA-AES128-GCM-SHA256:ECDHE-RSA-AES128-GCM-SHA256';
    ssl_prefer_server_ciphers off;

    # ... rest of your server configuration
}
Key Takeaway: The
ssl_protocolsdirective is critical. It explicitly enables the modern, secure protocols TLS 1.2 and TLS 1.3 while disabling older, vulnerable versions like SSLv3 and TLS 1.0/1.1. This is a non-negotiable hardening step.
To ensure all visitors use the encrypted connection, you must redirect all insecure HTTP traffic to its HTTPS equivalent.
server {
    listen 80;
    server_name your_domain.com;
    return 301 https://$server_name$request_uri;
}
This block enforces HTTPS by issuing a permanent (301) redirect for any request made to port 80.
Comparison of TLS Protocols
Selecting the correct TLS protocols is critical for security. The best practice is to enable only modern, secure versions.
| TLS Protocol | Security Status | Recommendation |
|---|---|---|
| TLS 1.3 | Secure (Current Standard) | Enable. Offers superior performance and the strongest security. |
| TLS 1.2 | Secure (Widely Compatible) | Enable. Serves as the baseline for modern security and is compatible with most clients. |
| TLS 1.1 | Deprecated (Insecure) | Disable. Contains known cryptographic weaknesses. |
| TLS 1.0 | Deprecated (Insecure) | Disable. Contains known cryptographic weaknesses. |
| SSLv3 & Older | Broken | Disable Immediately. Fundamentally insecure and vulnerable to attacks like POODLE. |
Disabling legacy protocols is as important as enabling new ones, as it protects users from downgrade attacks where an attacker forces the connection to use a weaker, compromised protocol.
Automating Certificate Management With Lets Encrypt
Manual renewal of SSL/TLS certificates is error-prone and can lead to service disruptions and loss of user trust. Let’s Encrypt provides a solution by offering free, automated DV certificates.
The certbot client automates the entire lifecycle of a certificate: it can request a certificate, configure the web server to use it, and handle renewals. A simple cron job ensures that certificates are renewed before they expire.
# Example cron job to attempt renewal twice daily
0 12,0 * * * /usr/bin/certbot renew --quiet
This automated, “set-it-and-forget-it” approach ensures continuous encryption without manual intervention, a significant operational benefit for any system administrator.
Automating Updates and Vulnerability Scans
Securing a web server is an ongoing process, not a one-time configuration. A server hardened today may be vulnerable tomorrow due to a newly discovered exploit. The only scalable and effective approach is to automate security maintenance, shifting from a reactive to a proactive security posture.

Relying on manual patch management is a significant risk. A critical vulnerability could be exploited before an administrator has a chance to apply the fix. Automated systems apply security patches as soon as they are available, minimizing the window of exposure.
Configuring Automated Security Updates
For Debian-based systems like Ubuntu, the unattended-upgrades package is the industry standard for automated patch management. It can be configured to automatically install critical security updates, ensuring the server is protected from known vulnerabilities without manual intervention.
To configure unattended-upgrades, first ensure it is installed:
sudo apt-get install unattended-upgrades apt-listchanges
Next, edit the configuration file to specify which updates to apply automatically.
sudo nano /etc/apt/apt.conf.d/50unattended-upgrades
For production systems, it is a best practice to enable updates only from the security repositories. This prevents major version upgrades that could introduce breaking changes to applications while ensuring critical vulnerabilities are patched.
Uncomment the security origin line in the configuration file:
Unattended-Upgrade::Allowed-Origins {
        "${distro_id}:${disto_codename}-security";
};
Finally, enable the service using the configuration tool.
sudo dpkg-reconfigure --priority=low unattended-upgrades
This automates a critical component of server maintenance. Note that this only covers OS-level packages; application-level dependencies and frameworks must be managed separately. For complex codebases, professional Ruby on Rails upgrade services can manage framework-level security.
Proactive Vulnerability Scanning
Patch management addresses known vulnerabilities. Vulnerability scanning tools like OpenVAS (Open Vulnerability Assessment System) identify unknown weaknesses, such as misconfigurations, weak credentials, or outdated software components.
By scheduling regular, automated scans (e.g., weekly), you create a continuous feedback loop on your server’s security posture. OpenVAS generates detailed reports that prioritize vulnerabilities by severity, allowing you to proactively identify and remediate weaknesses before they can be exploited.
Expert Insight: An automated vulnerability scanner is a strategic tool. It provides a measurable baseline of your server’s security posture, enabling you to track improvements over time and justify necessary security investments.
Monitoring File Integrity with Intrusion Detection
While prevention is the primary goal, detection is also essential. A Host-based Intrusion Detection System (HIDS) functions as a digital tripwire, monitoring critical system files for unauthorized modifications. Tools like AIDE (Advanced Intrusion Detection Environment) or Tripwire excel at this.
AIDE operates by creating a database of cryptographic hashes (digital fingerprints) for important system files. You can then run AIDE on a schedule to re-scan these files and compare their current hashes against the baseline.
Any change to a file’s hash is flagged in a report. This could indicate a legitimate change from a package update or a malicious modification, such as the installation of a rootkit or web shell.
A sample AIDE configuration snippet in /etc/aide/aide.conf might include:
# Define rules for different file types
NORMAL = R+sha512
PERMS = p+i+u+g+sha512

# Directories and files to monitor
/bin NORMAL
/sbin NORMAL
/etc PERMS
/var/log NORMAL
This configuration directs AIDE to monitor core system binaries for content changes and the /etc directory for permission changes. By running aide --check via a cron job and regularly reviewing the reports, you transform passive monitoring into an active defense mechanism.
Frequently Asked Server Security Questions
Implementing server security measures often raises common questions. Addressing these is key to building a defense that is both technically sound and operationally practical. Here are answers to some of the most frequent queries from system administrators.
https://www.youtube.com/embed/nDe9kLnDmsk
Understanding these distinctions is crucial for deploying effective, real-world security.
How Often Should I Audit My Server’s Security?
Regular security audits are non-negotiable, but their frequency depends on the environment. An audit is a manual, in-depth review of configurations, logs, access controls, and procedures—it is distinct from an automated scan.
For servers handling business-critical or sensitive data, a quarterly audit is a recommended baseline. For lower-risk systems, a semi-annual or annual audit may be sufficient.
Factors that should determine your audit schedule include:
- Compliance Requirements: Regulations like PCI-DSS or HIPAA often mandate specific audit frequencies.
- Rate of Change: Environments with frequent changes to configurations, applications, or user access require more frequent audits.
- Risk Profile: The potential impact of a breach should directly influence audit frequency. High-impact systems demand more rigorous oversight.
Expert Insight: Do not confuse audits with vulnerability scans. Audits are deep, manual reviews. Automated vulnerability scans should run much more often—weekly is a good cadence—to detect newly disclosed vulnerabilities.
What Is the Most Critical First Step to Secure a New Server?
The most critical initial action is to harden remote access and eliminate default credentials. As soon as a server is connected to the internet, it is subjected to automated scans for open SSH ports and default logins.
The first five minutes of provisioning a new server should be dedicated to securing administrative access:
- Create a new, non-root user with
sudoprivileges for administrative tasks. - Immediately modify the SSH configuration to set
PermitRootLogin no. - Disable password authentication and enforce the use of public key authentication.
These actions neutralize the most common automated brute-force attacks that target newly provisioned servers.
Do I Need a WAF if My Network Firewall Is Correct?
Yes. A Web Application Firewall (WAF) and a network firewall are distinct security controls that operate at different layers of the OSI model. Relying on only one creates a significant security gap.
A network firewall (e.g., iptables, ufw) operates at the network and transport layers (Layers 3 and 4). It filters traffic based on source/destination IP addresses and ports. It cannot inspect the content of encrypted HTTPS traffic; to a network firewall, it is simply legitimate traffic destined for port 443.
A WAF operates at the application layer (Layer 7). It inspects the content of HTTP/S requests and responses, identifying and blocking malicious patterns indicative of common web attacks, such as:
- SQL injection (SQLi)
- Cross-site scripting (XSS)
- Remote file inclusion (RFI)
In summary: the network firewall protects the server from unauthorized network access, while the WAF protects the web application from application-layer exploits. Both are necessary for comprehensive security.
Is Changing My SSH Port from 22 Really a Security Measure?
Changing the default SSH port is a form of security through obscurity. While it is not a robust defense against a targeted attacker, it is an effective method for reducing log noise from automated, indiscriminate bots that exclusively scan for port 22.
A skilled adversary can easily discover the new SSH port with a simple port scan. However, the goal of this measure is not to stop a determined attacker but to filter out the high volume of low-effort, automated attacks that flood system logs. By moving the port, you achieve cleaner logs, making it easier to identify a genuine, targeted attack that requires investigation. This technique should always be combined with strong security controls like public key authentication and a tool like Fail2Ban.
At ARPHost, LLC, we understand that infrastructure security is a continuous discipline. Our managed hosting solutions provide the technical expertise required to implement these best practices, from initial server hardening and firewall configuration to proactive monitoring and patch management. Let us manage the complexities of server security so you can focus on your core business. Explore our managed hosting services to build a secure, resilient foundation for your applications.
[…] This discipline is essential for maintaining a secure and resilient web presence. You can learn more about how this applies to server security and its role in a layered defense […]