

True security isn't about building one impenetrable wall; it's about creating a series of smart, overlapping defenses. This is the core principle behind the defense in depth, or layers of security, model. If one defense fails, another is already in place to stop the threat. This guide provides actionable, step-by-step best practices for implementing this strategy across bare metal servers and Proxmox VE environments.
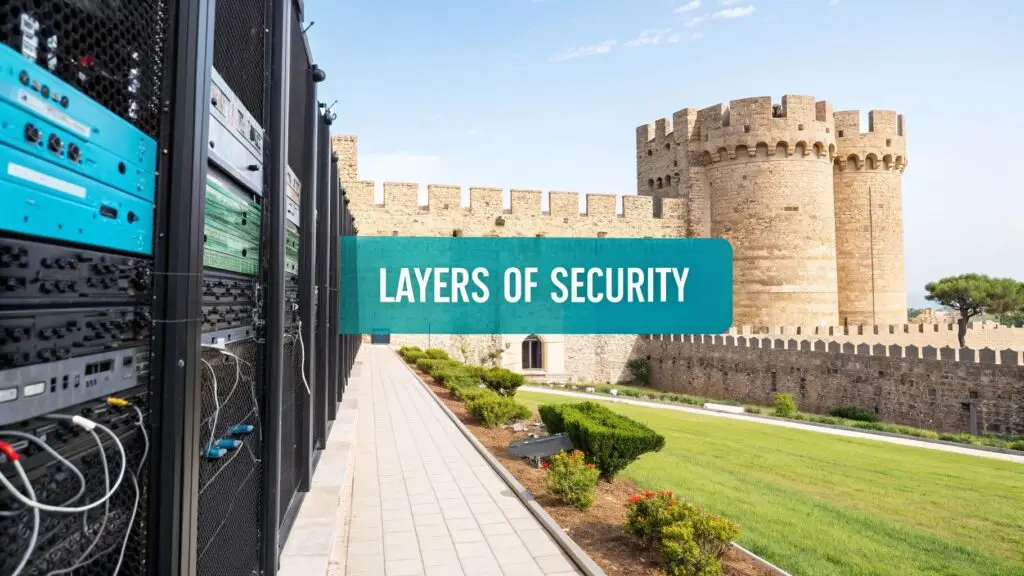
Building Your Digital Fortress
In today's IT landscape, a single perimeter firewall is no longer sufficient. A modern strategy demands a multi-layered security posture that protects every component of your infrastructure—from the physical what is a bare metal server in a data center to the encrypted data inside a Proxmox virtual machine. This approach is critical for protecting everything from a simple KVM virtual server to a complex private cloud deployment.
Think of it like securing a medieval castle. An attacker must first cross the moat (perimeter security), then scale the high walls (network firewalls), and then bypass the guards patrolling the towers (host-based intrusion detection). Only after overcoming these obstacles can they attempt to breach the final keep (data encryption). Each layer is designed to slow down, deter, and ultimately defeat an attack.
Why a Single Defense Is a Recipe for Disaster
Relying on a single security measure creates a critical point of failure. A skilled attacker who bypasses your primary network firewall would gain unrestricted access to your entire environment. By stacking multiple layers of security, you build a resilient system where one component's failure does not compromise the entire infrastructure. This strategy is vital for businesses of any size and is a cornerstone of a layered approach to data center security.
The Layers of Security: A Technical Breakdown
To understand how this works in practice, let's break down the core layers. Each serves a distinct purpose, creating a comprehensive defensive web that protects your assets from different attack vectors.
Here’s a technical overview of the primary layers in a typical Proxmox or bare metal hosting environment.
| The Core Layers of a Defense in Depth Strategy | ||
|---|---|---|
| Security Layer | Primary Function | Example in a Hosting Environment |
| Physical | Secures physical access to hardware infrastructure. | Locked server racks, biometric access controls, and 24/7 video surveillance in a Tier III data center. |
| Perimeter/Network | Controls traffic flowing in and out of the network fabric. | Juniper hardware firewalls, DDoS mitigation services, and Intrusion Prevention Systems (IPS). |
| Host/OS | Protects individual servers and their operating systems. | OS hardening (e.g., CIS Benchmarks), ufw/iptables configuration, and automated patch management. |
| Virtualization | Secures the hypervisor and isolates virtual workloads. | Proxmox VE firewall for micro-segmentation, secure VM/LXC configurations, and RBAC for hypervisor access. |
| Application | Defends against vulnerabilities in software and custom code. | Web Application Firewalls (WAF) like ModSecurity, secure coding practices (e.g., OWASP Top 10), and vulnerability scanning. |
| Data | Protects the data itself, at rest and in transit. | ZFS native encryption for data at rest, TLS 1.3 for data in transit, and secure data backup protocols. |
| Identity & Access | Ensures only authorized users can access resources. | Multi-Factor Authentication (MFA) for SSH/Proxmox GUI, Role-Based Access Control (RBAC), and strong password policies. |
| Monitoring & Detection | Identifies and alerts on suspicious activity in real-time. | Centralized logging with tools like Graylog, fail2ban for brute-force prevention, and Security Information and Event Management (SIEM) systems. |
| Backups & Recovery | Ensures data can be restored after a security incident. | Proxmox Backup Server with immutable, encrypted, and off-site backups, plus regular restoration testing. |
| Policies & Training | The human layer; educates users on security best practices. | Security awareness training, documented incident response plans, and phishing simulations. |
As you can see, these layers work in concert, providing a defense that is far stronger than the sum of its parts. If a threat bypasses one layer, another is waiting to contain it.
Layered Defenses Are Now the Standard
The shift toward this model is a market reality. In the current threat landscape, businesses are stacking security layers to build resilient infrastructure. Global cybersecurity spending is projected to rocket to $213 billion in 2025—a hefty 15% increase from 2024. This massive investment highlights the widespread adoption of multi-layered strategies, from firewalls and endpoint protection to AI-powered threat intelligence.
This diagram helps visualize how the foundational layers—Physical, Network, and Data—form the core of your digital fortress.
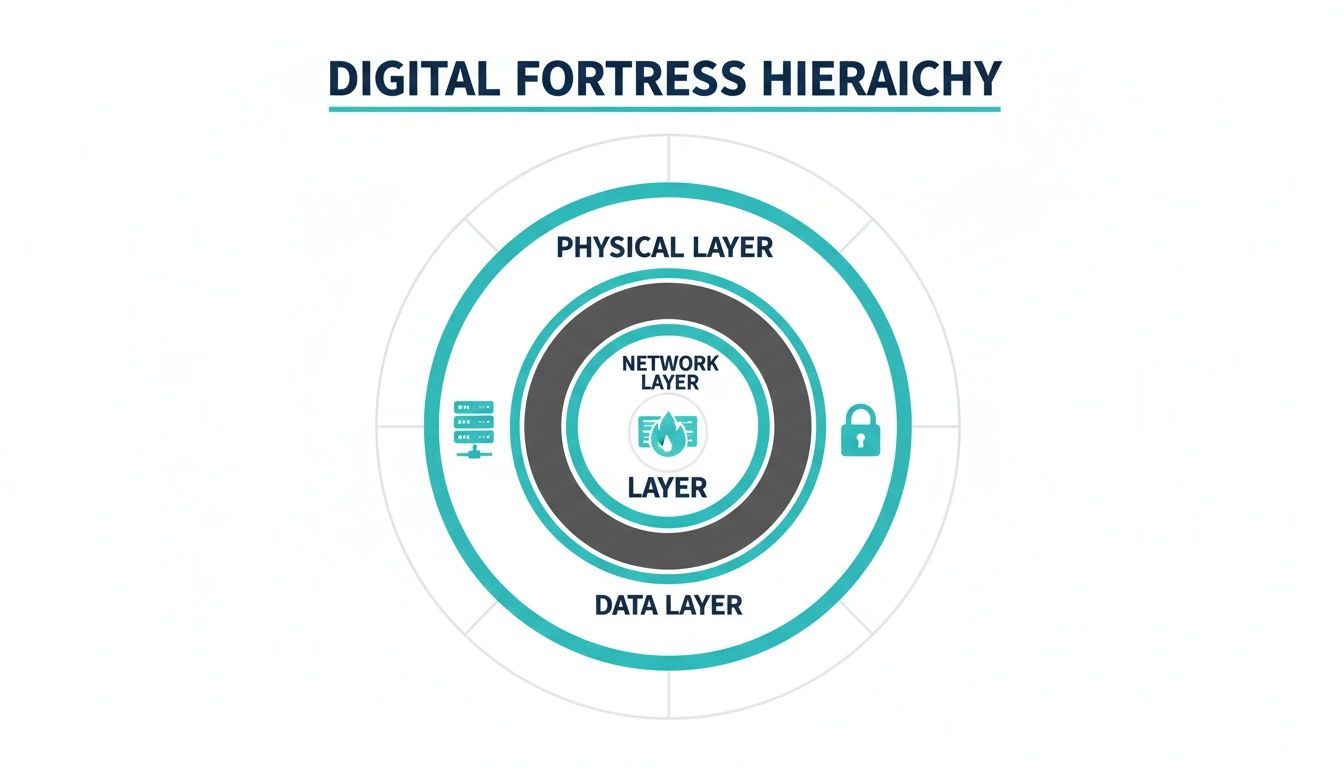
It’s clear that real security starts with the physical hardware and builds outward. Each new layer adds a distinct, yet interconnected, form of protection.
Hardening Your Physical Network and Host Foundation
Effective security starts from the ground up, with the physical hardware and the host operating systems. Before you can secure applications or data, you must lock down the physical servers, network infrastructure, and OS installations. These layers are the literal foundation of your digital fortress—if this foundation is weak, no other control will be effective.

This section provides a technical walkthrough of hardening the first three essential layers: physical, network, and host.
Starting with the Physical Layer
The first layer is the one you can’t SSH into—the physical environment itself. When you utilize a managed hosting solution, you are entrusting a data center to handle this critical layer. A secure facility is more than a locked room; it’s a purpose-built environment engineered for resilience and protection.
Robust physical security includes:
- Access Control: Multi-factor authentication, including biometric scanners, to ensure only authorized personnel can access server cages.
- Surveillance: Continuous 24/7 video monitoring covering every entry point and server aisle, providing a clear audit trail.
- Environmental Stability: Redundant power from UPS systems and backup generators, plus strict climate control to prevent downtime from power outages or overheating.
By choosing a managed hosting provider with certified data centers, you offload the capital expenditure and operational complexity of maintaining this critical layer, allowing your team to focus on software and system administration.
Fortifying the Network Perimeter
With physical hardware secured, the next battleground is the network. This layer acts as the primary gatekeeper, controlling all ingress and egress traffic. A poorly configured network is akin to leaving the main gate of your castle open.
A strong network defense is built on key best practices:
- Hardware Firewalls: A dedicated hardware firewall, such as a Juniper SRX Series device, inspects and filters traffic based on defined security policies. This is your first line of defense against automated attacks and unauthorized access attempts.
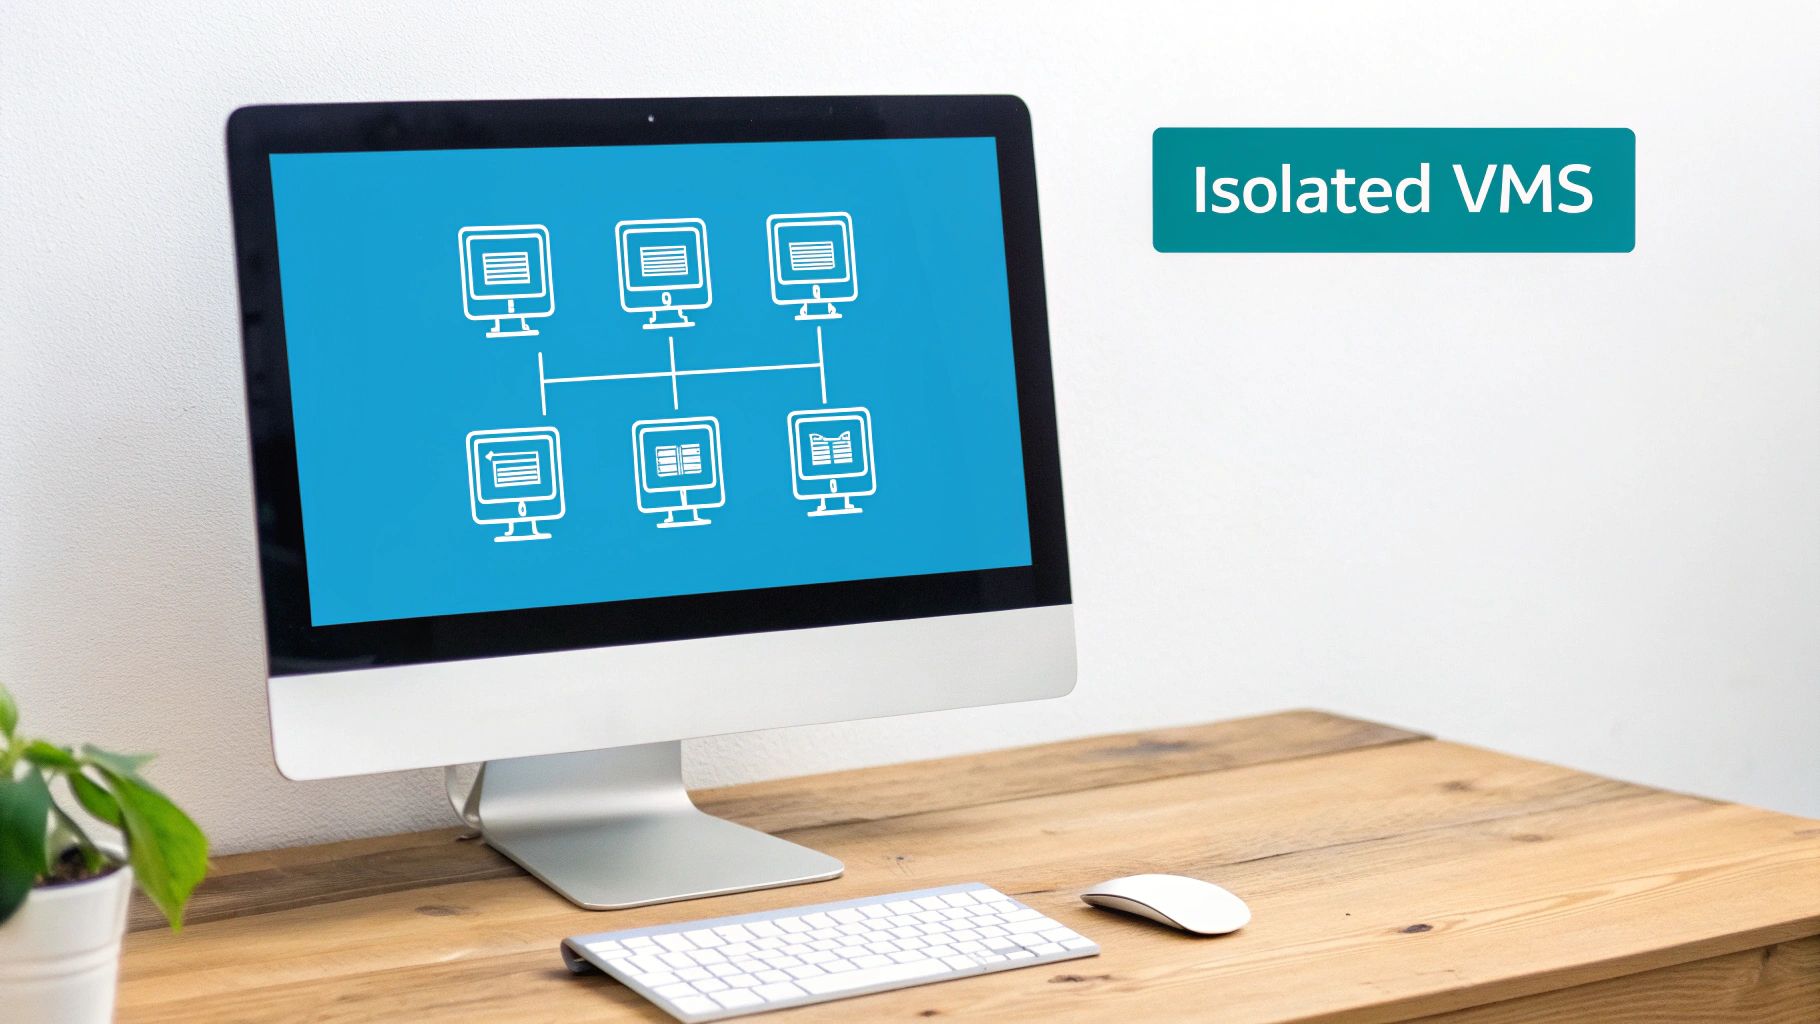
- Network Segmentation: Using Virtual LANs (VLANs) is critical, especially in a virtualized environment like Proxmox VE. Segmenting your network creates isolated pockets for different workloads. For example, place production KVM virtual servers on one VLAN, development servers on another, and management interfaces on a completely separate, restricted VLAN. This containment strategy ensures that a compromise in one segment does not spread to the rest of your infrastructure.
- DDoS Mitigation: Distributed Denial of Service (DDoS) mitigation is non-negotiable. Modern DDoS attacks can easily saturate a server's connection, causing a complete service outage. A professional managed service provider will have automated DDoS detection and scrubbing systems that filter malicious traffic before it reaches your server.
Hardening the Host Operating System
The host layer is where your direct administrative control is paramount. This involves securing the operating system of your what is a bare metal server or Proxmox VE hypervisor. A default OS installation is never secure enough for a production environment and requires systematic hardening.
Step-by-Step Host Hardening:
- Minimize the Attack Surface: Uninstall or disable any services, applications, and packages that are not essential for the server's function. Every running service is a potential attack vector.
- Configure a Host-Based Firewall: While the network firewall protects the perimeter, a host-based firewall like Uncomplicated Firewall (
ufw) on Debian-based systems (including Proxmox VE) adds a crucial second layer of defense. It allows you to create granular rules for each server.
For example, to allow SSH access only from a trusted admin IP while blocking all other incoming traffic, use the following ufw commands:
# Block all incoming traffic by default, allow all outgoing
sudo ufw default deny incoming
sudo ufw default allow outgoing

# Allow SSH access only from your specific IP address
sudo ufw allow from YOUR_ADMIN_IP to any port 22

# Enable the firewall
sudo ufw enable
This simple configuration ensures that even if an attacker bypasses your network firewall, the server itself will reject their connection attempts. Applying these foundational hardening techniques across the physical, network, and host layers creates a formidable and resilient security base.
Securing Your Virtualization and Application Tiers
Once you've established a solid foundation with hardened physical, network, and host layers, your focus must shift up the stack to the virtualization and application tiers. These are the layers where business logic and customer-facing services reside. If an attacker bypasses initial defenses, this is where they will strike. Protecting these layers of security requires a granular, workload-centric approach.
In environments running Proxmox VE, the hypervisor is a critical control point, managing all virtual machines (VMs) and containers. Its security is non-negotiable; a compromised hypervisor grants an attacker complete control over the entire infrastructure.
Best Practices for Proxmox VE Security
Securing your Proxmox environment involves two key objectives: isolating workloads and fortifying management access. The goal is to contain potential threats and eliminate unauthorized administrative pathways. A compromised VM should never be able to affect its neighbors or the underlying host.
Here are actionable security measures for Proxmox VE:
- Enforce Multi-Factor Authentication (MFA): The Proxmox web interface is a high-value target. Secure it by enabling MFA (e.g., TOTP or YubiKey) for all administrative accounts. This simple verification step is highly effective at preventing credential theft.
- Leverage the Built-in Firewall: Proxmox VE includes a powerful, cluster-aware firewall. Utilize it to create strict, granular traffic rules for each VM and container, defining exactly what they can communicate with. This practice, known as micro-segmentation, contains breaches by design.
- Utilize LXC for Minimalist Deployments: When a full VM is not required, use a Linux Container (LXC). LXC containers share the host's kernel, resulting in a much smaller attack surface and lower resource consumption compared to a full KVM virtual machine.
By treating each VM and container as an isolated entity with strict access rules, you create a highly resilient virtual environment. This approach ensures that a security incident in one workload remains a localized problem, not a catastrophic system-wide failure.
Hardening the Application Layer
The application layer is often the most exposed and relentlessly targeted of all the layers of security because it directly faces the public internet. Common applications like WordPress are under constant assault from automated bots and attackers searching for known vulnerabilities. Understanding key cloud computing security risks is crucial here.
This multi-layered focus is driving a significant shift in security spending. In fact, 77% of global business leaders plan to increase their cybersecurity budgets for 2025, with 30% expecting hikes of 6-10% alone. This is a strategic move toward defense-in-depth strategies that protect every tier, from bare metal to the application interface. You can explore more of these cybersecurity budget trends on Statista.com.
Practical Steps for Application Defense
Securing an application requires a multi-pronged strategy combining server configuration, protective filtering, and secure development practices.
- Harden Web Server Configurations: For a server like Nginx, this involves disabling unused modules, enforcing strong TLS/SSL ciphers, and setting proper file permissions. For example, explicitly block web access to critical files like
wp-config.phpin your Nginx configuration:location ~* /wp-config.php { deny all; } - Deploy a Web Application Firewall (WAF): A WAF like ModSecurity acts as a dedicated bodyguard for your application. It inspects incoming HTTP requests and filters out malicious patterns associated with common attacks like SQL injection and Cross-Site Scripting (XSS), stopping them before they reach the application code.
- Adopt Secure Coding Practices: For custom development, always validate and sanitize all user input. Use prepared statements for database queries to prevent SQL injection and properly escape all output to defend against XSS. Regular code reviews and vulnerability scans are essential components of the development lifecycle.
By meticulously securing both the virtualization platform and the applications running on it, you add two more formidable layers to your defense-in-depth strategy, making an attacker's job exponentially more difficult.
Protecting Your Crown Jewels: Data and Identities
After fortifying the outer layers, we arrive at the core of your digital infrastructure. The Data and Identity layers are where your most valuable assets reside and represent the final, most critical lines of defense. If an attacker bypasses all other controls, these innermost layers are the only thing standing between them and a catastrophic breach.
This section provides a technical walkthrough of encrypting data at rest and in transit and implementing ironclad identity controls.
Securing the Data Layer
Your data exists in two states: at rest (stored on a disk) and in transit (moving across a network). Both must be protected.
For data at rest, Proxmox VE users can leverage the native encryption capabilities of ZFS. When creating a ZFS pool, you can enable encryption, which automatically scrambles all data written to that disk, including VM images and container files. This is your primary defense against physical theft; if a drive is stolen from your data center, the data on it remains unreadable gibberish without the decryption key.
Creating a new ZFS pool with native encryption is straightforward via the CLI:
# Create a new mirrored ZFS pool named 'securepool' with AES-256-GCM encryption
zpool create -o ashift=12
-O encryption=on
-O keyformat=passphrase
-O keylocation=prompt
securepool mirror /dev/sda /dev/sdb
This command creates a new pool named securepool, activates encryption, and prompts for a passphrase each time the pool is mounted. This means even a server reboot requires manual intervention to unlock the data, adding a powerful physical security checkpoint.
Protecting Data in Motion
For data in transit, Transport Layer Security (TLS) is the industry standard. Every service exposed to the web must have a valid TLS/SSL certificate to encrypt the connection between the server and the end-user. This prevents attackers from intercepting sensitive information like login credentials or session cookies. With free, automated tools like Let's Encrypt, there is no longer any excuse for serving traffic over unencrypted HTTP.
Mastering Identity and Access Management
The final layer before an attacker can access your data is Identity and Access Management (IAM). This layer is focused on answering two questions: "Who are you?" (authentication) and "Are you allowed to do that?" (authorization). Poor IAM practices are a leading cause of major security breaches.
An attacker with stolen credentials does not need to bypass firewalls or exploit software vulnerabilities; they can simply log in through the front door. A robust IAM strategy is a fundamental security requirement.
A solid IAM strategy is built on three pillars:
- Role-Based Access Control (RBAC): Proxmox VE includes a granular RBAC system. You can create specific roles with fine-grained permissions. For example, create a "Jr-Admin" role that can start and stop VMs but is forbidden from modifying network settings. This enforces the principle of least privilege, granting users only the minimum access required for their duties.
- Strong Password Policies: Enforce password complexity requirements across all systems: minimum length, a mix of character types, and a blocklist of common passwords. This simple step makes brute-force attacks significantly more difficult.
- Multi-Factor Authentication (MFA): MFA is non-negotiable. It requires users to provide a second factor of authentication—such as a code from an authenticator app—in addition to their password. MFA must be enabled on all management interfaces (Proxmox GUI, SSH) and critical applications. It is one of the most effective controls for preventing unauthorized access.
Building Resilience with Monitoring, Recovery, and Policy
Blocking attacks is only half the battle. True security involves building operational resilience—the ability to detect, respond to, and recover from an attack. This is where the final, and arguably most critical, layers of security come into play: monitoring, recovery, and policy. These are not just technical controls; they are your security operations center, your emergency response plan, and your organizational rulebook.
These layers provide the visibility to detect threats, the procedures to recover from an incident, and the discipline to prevent human error.
Proactive Monitoring and Detection
You cannot defend against threats you cannot see. Proactive monitoring and detection transform vast amounts of raw server logs into actionable security intelligence. The goal is to identify the subtle indicators of an attack before it escalates into a major incident.
A simple yet powerful tool for this is fail2ban. It actively scans log files for malicious patterns, such as repeated failed login attempts, and automatically updates your firewall to block the offending IP address. This provides an automated, real-time defense against brute-force attacks.
The next step is to centralize your logs. By streaming logs from all your servers—Proxmox hosts, VMs, and bare metal machines—into a single, unified platform like Graylog or an ELK stack, you gain a panoramic view of your entire infrastructure. This makes it far easier to correlate events and detect sophisticated, multi-stage attacks that might otherwise go unnoticed.
Ransomware-Proof Backups and Recovery
In an era of persistent ransomware threats, your backup strategy is a core security layer. A well-designed disaster recovery plan is your ultimate safety net, ensuring you can restore operations without paying a ransom.
Proxmox Backup Server offers features specifically designed to thwart modern attacks:
- Immutable Backups: These are read-only snapshots. Once a backup is written, it cannot be altered or deleted, even by an administrator with compromised credentials. This is a critical defense against ransomware that attempts to encrypt or delete your backups.
- End-to-End Encryption: Backup data should be encrypted from the moment it leaves the source server until it is stored at its final destination. This ensures that even if an attacker compromises your offsite storage, the data remains unreadable.
- Offsite and Air-Gapped Copies: The 3-2-1 rule remains the gold standard: maintain three copies of your data on two different media types, with at least one copy offsite. An air-gapped copy is physically disconnected from the network, making it invulnerable to an attack on your live systems. Our detailed guide explains more about how to prevent data loss with a modern strategy.
The Human Layer: Policies and Training
The final, and often most unpredictable, layer is your people. Advanced technical controls can be rendered useless by a single employee clicking on a phishing link. For this reason, clear security policies and continuous staff training are non-negotiable.
Security policies establish a baseline for secure behavior, defining rules for password complexity, data handling, and acceptable use. Training empowers your team to recognize and report threats like phishing attempts, transforming them from potential liabilities into your first line of defense.
The human element is critical when considering the financial impact of cybercrime. Global cybercrime is projected to cost $10.5 trillion by 2025—a 31% year-over-year increase from $8 trillion in 2024. These costs have tripled since 2015 and now exceed the economic impact of natural disasters and the global drug trade combined.
To ensure your defenses remain effective, consider implementing a comprehensive security audit. For many businesses, leveraging expert 24/7 support from a managed service provider acts as a powerful extension of their own team, providing around-the-clock monitoring and incident response that is difficult to maintain in-house.
Frequently Asked Questions About Layered Security
Understanding the theory of defense in depth is one thing, but applying it in a real-world hosting environment raises practical questions. Here are common queries from IT professionals implementing layers of security.

What Is the Most Important Security Layer for an SMB on a VPS?
For a small or medium-sized business (SMB) on a Virtual Private Server (VPS), the Application and Host/OS layers are the most critical areas of direct responsibility. Your hosting provider manages the physical data center and core network, but you are responsible for securing everything inside your VPS.
This includes keeping the operating system patched, hardening server configurations (e.g., SSH, web server), and securing your web application (e.g., WordPress). Actionable steps like enforcing strong passwords, using a Web Application Firewall (WAF), and regularly updating all software components are non-negotiable. For the assets you directly manage, these layers provide the greatest return on your security investment.
How Does Proxmox VE Enhance a Layered Security Strategy?
Proxmox VE is a powerful tool for implementing a defense-in-depth strategy. It strengthens the virtualization layer by design, isolating workloads in separate VMs and LXC containers. A breach in one container does not automatically compromise its neighbors.
Its built-in, cluster-aware firewall enables micro-segmentation by allowing you to enforce traffic rules between individual VMs right out of the box. At the host layer, the underlying Debian OS can be hardened using standard Linux best practices.
The real game-changer is Proxmox VE's native integration with Proxmox Backup Server. This combination creates a robust data recovery layer, offering scheduled, encrypted, and immutable backups—your most effective defense against ransomware.
This tight integration across multiple security layers makes the Proxmox ecosystem an excellent foundation for a secure private cloud.
Is a Defense in Depth Strategy Too Complex for a Small Business?
Not at all. "Defense in depth" is a flexible mindset, not a rigid checklist of expensive enterprise tools. A small business can implement this strategy pragmatically through smart, incremental improvements.
- Physical Layer: Solved by choosing a reputable hosting provider with secure data centers.
- Network Layer: A managed cloud firewall service can handle this effectively.
- Host & Application Layers: Covered by the discipline of keeping your OS and applications updated.
- Identity Layer: Secured by enforcing strong passwords and enabling Multi-Factor Authentication (MFA).
- Recovery Layer: Handled by configuring automated, offsite backups.
Many of these critical steps are low-cost or already included in the services you use, making the layers of security model accessible and achievable for any organization.
What Are the First Three Steps for Securing a New Bare Metal Server?
When a new bare metal server is provisioned, it's a race against time to secure it before automated scanners discover it on the network. A default OS installation is highly vulnerable. Your first three priorities should be:
- Host Hardening: Immediately secure the base OS. This includes removing unnecessary software, configuring a host-based firewall (e.g.,
ufw), setting up SSH key-only authentication, and disabling direct root login. - Network Isolation: Place the server behind a dedicated hardware firewall and ensure only the absolute minimum necessary ports are open to the internet. Plan for internal network segmentation if the server will host multiple services.
- Automated Patching and Monitoring: Configure a process to automatically apply security updates to the OS and critical software. At the same time, set up basic monitoring and log forwarding to receive alerts for any unusual activity.
Executing these three steps establishes a strong security baseline, dramatically reducing the server's initial attack surface and making it far more resilient from day one.
Ready to build a stronger, more resilient infrastructure with a defense in depth strategy? ARPHost, LLC provides a full suite of managed hosting solutions, from secure bare metal servers and KVM VPS to Proxmox private clouds with immutable backups, all backed by 24/7 expert support. Secure your digital assets and scale with confidence by visiting https://arphost.com.