

Setting up a RAID system is a foundational task for building high-performance, resilient server storage. The process involves logically combining multiple physical disks to function as a single unit, achieving either improved performance, data redundancy, or an optimal balance of both. The workflow moves from selecting the implementation method, hardware vs. software RAID, to choosing the appropriate RAID level for your specific workload, physically installing the drives, and finally, using either a dedicated controller or operating system utilities to configure and initialize the array.
Executing this process correctly establishes the bedrock of a reliable and efficient server, crucial for any IT infrastructure.
Understanding Core RAID Concepts and Architecture
Before provisioning disks, a firm grasp of RAID principles is essential. RAID, an acronym for Redundant Array of Independent Disks, is not a single product but a set of storage virtualization techniques. At its core, RAID engineering is a strategic trade-off between performance (I/O speed), capacity, and fault tolerance.
This technology is more critical than ever in modern IT. With exponential data growth, the global RAID market, valued at USD 6.129 billion, is projected to reach USD 9.164 billion by 2031. This growth is driven by the relentless demand for reliable storage solutions in private cloud infrastructure, big data analytics, and enterprise virtualization. For sysadmins deploying RAID in larger environments, understanding the broader context of data center infrastructure is a valuable prerequisite.

The Building Blocks of RAID
Every RAID level is constructed from three fundamental techniques. Understanding these concepts simplifies the process of selecting the optimal configuration for a given application.
- Striping: This technique is engineered for performance. Striping divides data into blocks and writes them concurrently across multiple drives. This parallel operation dramatically increases read and write throughput, much like opening multiple checkout lanes to process a single queue of customers faster.
- Mirroring: As the name implies, mirroring creates an identical, real-time copy of data on one or more separate disks. If a primary drive fails, the mirrored drive provides immediate failover with no data loss. This offers excellent redundancy at the cost of capacity, as effective storage is halved.
- Parity: Parity is a more space-efficient method for achieving fault tolerance. Instead of a full data duplicate, the system calculates a checksum from the data blocks and stores this “parity” information. In the event of a drive failure, the system can use the parity data and the data from the remaining drives to mathematically reconstruct the lost information.
Common RAID Levels Explained
The combination of these techniques yields the standard RAID levels used in enterprise IT, each optimized for different workloads. An incorrect choice can lead to performance bottlenecks or inadequate data protection.
Key Takeaway: RAID is not a backup. It is a high-availability technology designed to protect against physical disk failure. It does not protect against file deletion, data corruption, or malware attacks. A robust, independent backup and disaster recovery strategy is non-negotiable.
To facilitate an informed decision, the following table compares the most common RAID levels encountered in professional environments.
Comparison of Common RAID Levels
This table outlines the essential characteristics, requirements, and optimal use cases for each major RAID level.
| RAID Level | Minimum Drives | Primary Use Case | Performance | Fault Tolerance |
|---|---|---|---|---|
| RAID 0 | 2 | Non-critical, high-speed storage (e.g., video scratch disk) | Excellent read/write speed (highest) | None. One drive failure results in total data loss. |
| RAID 1 | 2 | OS boot drives, critical small databases | Excellent read speed, normal write speed | Excellent. Can tolerate the loss of one drive. |
| RAID 5 | 3 | File servers, general-purpose application servers | Good read speed, moderate write speed (parity overhead) | Good. Can tolerate the loss of one drive. |
| RAID 6 | 4 | Mission-critical storage, large arrays | Good read speed, slower write speed (dual parity) | Excellent. Can tolerate the loss of up to two drives. |
| RAID 10 | 4 | High-transaction databases, performance-critical VMs | Excellent read/write speed | Excellent. Can lose one drive per mirror without data loss. |
The optimal RAID level is dictated by the specific requirements of the workload. RAID 0 is suitable for high-throughput, non-critical data. RAID 1 is the standard for OS volumes. For general-purpose server workloads, RAID 5 or RAID 6 provide a balanced solution, while RAID 10 is the superior choice for applications demanding both high I/O performance and strong redundancy.
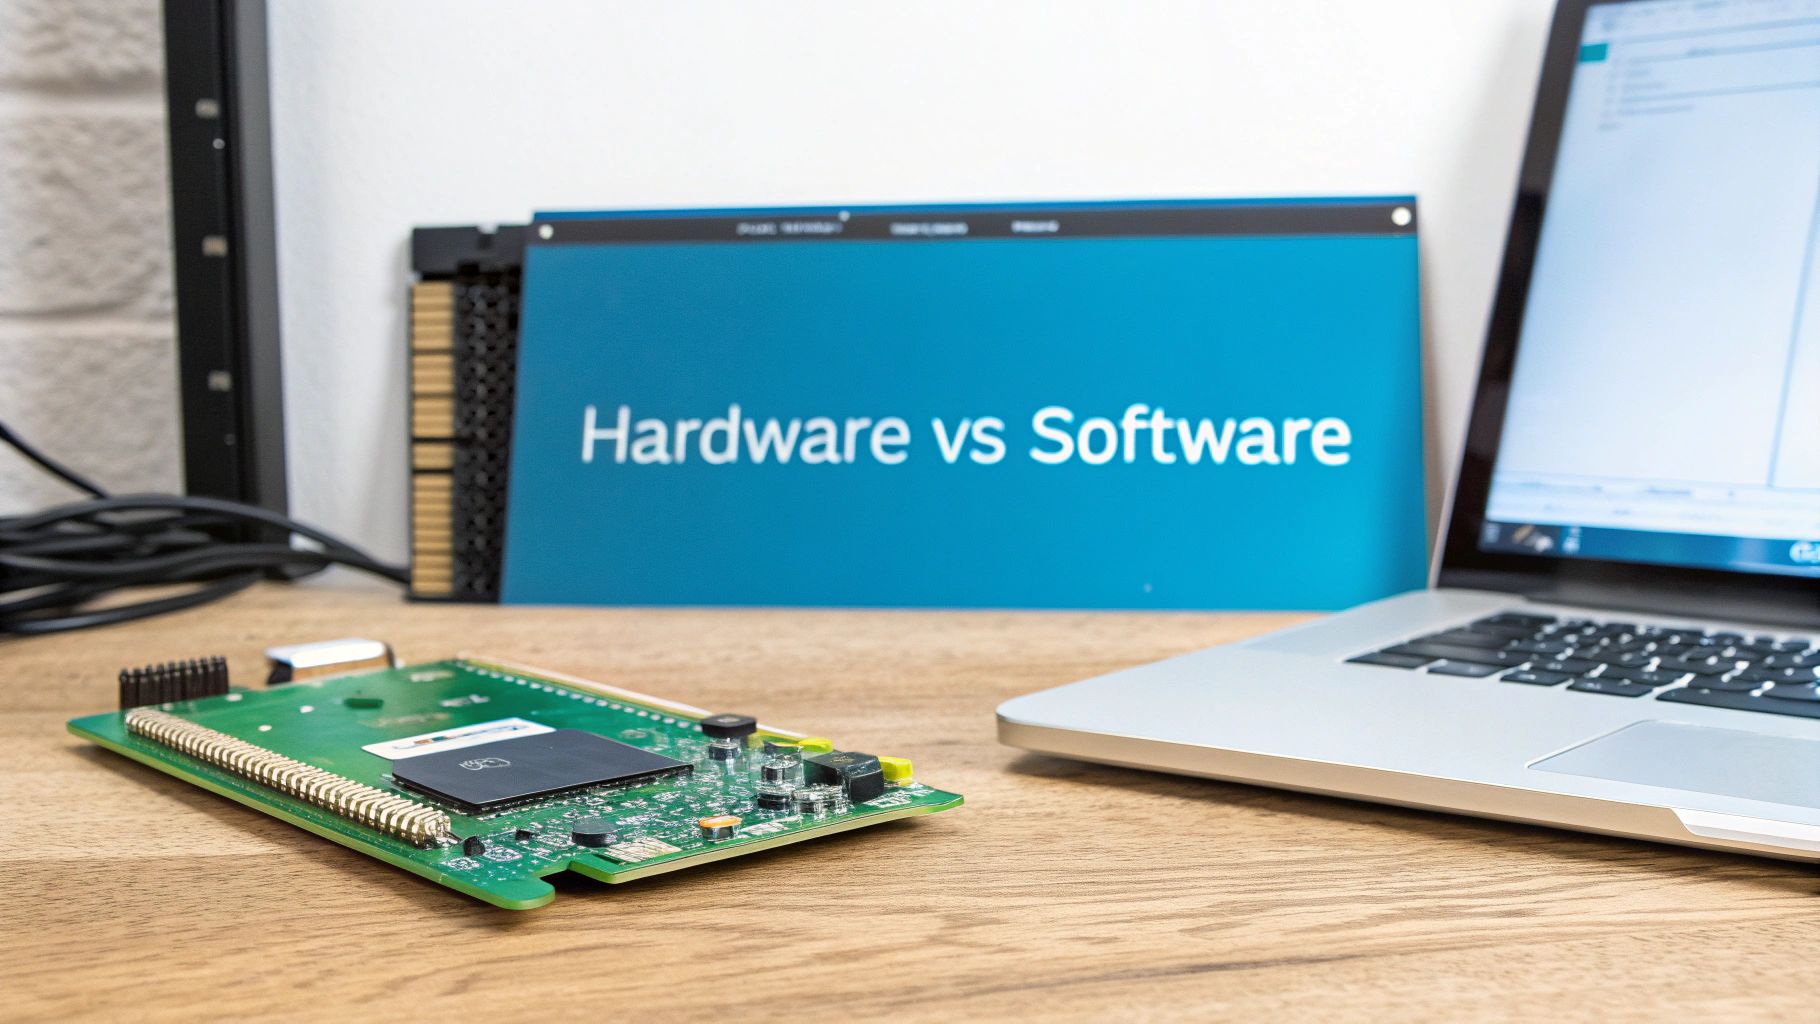
Choosing Your Path: Hardware vs. Software RAID
A critical early decision in setting up a RAID system is whether to use a hardware or software-based implementation. This choice has direct implications for performance, cost, and system architecture. The correct path depends on the specific workload, budget, and operational requirements of the server.
Hardware RAID utilizes a dedicated controller card, a specialized processing unit with its own CPU and memory dedicated solely to managing the disk array. This card offloads all RAID calculations (striping, mirroring, and parity) from the server’s main CPU, allowing it to focus exclusively on application processing.
This offloading capability is essential for I/O-intensive environments. By isolating storage operations, hardware RAID ensures consistent, high I/O performance, particularly for write-heavy RAID 5 and RAID 6 configurations where parity calculations can otherwise consume significant host CPU cycles. The demand for these controllers is substantial, with the global RAID Controller Card market projected to exceed USD 3.2 billion. This reflects their widespread adoption in enterprise data centers for mission-critical applications, a trend you can explore in this detailed market analysis.
The Case for Hardware RAID
Hardware RAID is the industry standard for high-performance and mission-critical server deployments due to several key advantages.
- Dedicated Performance: The onboard processor ensures that RAID logic does not compete for host CPU resources, resulting in predictable and superior storage performance under heavy load.
- Battery-Backed Cache: Enterprise-grade controllers typically include a Battery Backup Unit (BBU) or flash-based cache protection. In the event of a sudden power loss, this feature protects data in the controller’s write cache from being lost or corrupted, ensuring data integrity.
- OS Independence: A hardware RAID array is presented to the operating system as a single logical disk. This simplifies OS installation and booting from the array and allows for seamless migration of the entire array (controller and disks) to a new server.
A common real-world example is a Proxmox VE host running numerous virtual machines. The high-volume, random I/O generated by multiple guest operating systems would saturate a host CPU managing software RAID. A dedicated hardware controller is not just a preference but a requirement for maintaining system stability and performance in such a virtualization scenario.
The Flexibility of Software RAID
Software RAID, in contrast, forgoes a dedicated controller and uses the server’s main CPU and system memory to manage the disk array. All RAID logic is handled by the operating system kernel.
The primary advantage of software RAID is its low cost, as it requires no additional hardware beyond the disks themselves. This makes it an excellent choice for budget-constrained projects. Furthermore, modern multi-core CPUs are powerful enough that for many workloads, the performance impact of managing a software RAID array is negligible. Mature, robust implementations like Linux’s mdadm and Windows Storage Spaces provide enterprise-level reliability and extensive configuration flexibility.
Expert Insight: Software RAID should not be dismissed as merely a low-cost alternative. For read-intensive applications or on less critical systems such as development servers or secondary file storage, a properly configured software RAID solution offers excellent reliability and performance.
Software RAID is also highly adaptable. It is not tied to a specific hardware vendor, providing granular control over array configuration directly within the OS. This makes it a popular choice for custom-built systems and is a common offering from many of the best bare metal server providers, who leverage its flexibility to deliver customized storage solutions.
The final decision rests on the use case. For critical production servers where maximum I/O performance and data integrity are paramount, a high-quality hardware RAID controller is a necessary investment. For a wide range of other applications where cost and flexibility are primary drivers, software RAID is a powerful and dependable solution.
Setting Up Software RAID on Linux with mdadm
For system administrators managing Linux on bare metal or in a virtualized environment like Proxmox VE, mdadm is the definitive utility for software RAID. This powerful, kernel-integrated tool provides enterprise-grade storage management without the cost of a dedicated hardware controller.
This section provides a step-by-step technical guide to creating a resilient RAID 5 array using mdadm, from disk preparation to final filesystem mounting. This is a core competency for administrators deploying storage for Proxmox VE hosts, dedicated file servers, or private cloud infrastructure.
Getting Your Disks Ready for RAID
Proper disk preparation is the first critical step. Best practice dictates verifying disk identifiers with a command like lsblk, which provides a clear, hierarchical view of block devices, ensuring you target the correct disks. Avoid relying on device names like /dev/sdb, as they are not guaranteed to be persistent across reboots.
Once identified, the disks must be partitioned. While fdisk is a classic tool, parted is the modern standard, particularly for disks larger than 2TB that require a GPT (GUID Partition Table). The objective is to create a single partition spanning the entire disk and set its type to “Linux RAID”.
The following commands demonstrate how to prepare a disk at /dev/sdX using parted:
- Launch
partedin interactive mode:sudo parted /dev/sdX - Create a GPT partition table: This is a mandatory first step for new, unformatted disks.
(parted) mklabel gpt - Create the primary partition: This command allocates 100% of the disk’s capacity to a single primary partition.
(parted) mkpart primary 0% 100% - Set the RAID flag: This step signals to the OS that the partition is intended for a RAID array. The partition number is typically
1.(parted) set 1 raid on - Verify the configuration and exit: Use the
printcommand to review the partition table, thenquitto save changes.(parted) print (parted) quit
Repeat this precise process for every disk that will be part of the array. For large-scale deployments, this process should be scripted to ensure consistency and efficiency. Proper disk provisioning is a fundamental aspect of server administration, detailed further in our guide on how to manage dedicated servers.
Creating and Formatting the Array
With the disks partitioned and flagged, mdadm can now be used to create the array. The primary command is --create, which requires the new array device name (e.g., /dev/md0), the RAID level, and the number of component devices.
The following command creates a RAID 5 array named /dev/md0 using three prepared partitions: /dev/sdb1, /dev/sdc1, and /dev/sdd1.
# Create a RAID 5 array with three devices
sudo mdadm --create --verbose /dev/md0 --level=5 --raid-devices=3 /dev/sdb1 /dev/sdc1 /dev/sdd1
Expert Tip: Executing this command initiates a background resynchronization process. Monitor its progress in real-time by observing the
/proc/mdstatfile (watch cat /proc/mdstat). It is best practice to allow this process to complete fully before subjecting the array to production workloads.
Once created and synced, the array is presented to the OS as a single block device. The final step is to create a filesystem on it. For server workloads involving large files, XFS is an excellent choice due to its high performance and robust journaling capabilities.
# Format the new RAID device with the XFS filesystem
sudo mkfs.xfs /dev/md0
Making Sure Your Array Survives a Reboot
A common oversight is failing to configure the array for persistence. To ensure the system automatically reassembles the array on boot, its configuration must be saved to /etc/mdadm/mdadm.conf.
This can be accomplished by scanning the active array and appending the output to the configuration file.
# Save the array configuration so it persists across reboots
sudo mdadm --detail --scan | sudo tee -a /etc/mdadm/mdadm.conf
With the configuration saved, create a mount point and add a corresponding entry to /etc/fstab to automate mounting at boot time.
# 1. Create a directory to serve as the mount point
sudo mkdir -p /mnt/data

# 2. Add an entry to /etc/fstab to mount the array at boot
echo '/dev/md0 /mnt/data xfs defaults 0 0' | sudo tee -a /etc/fstab

# 3. Mount all filesystems listed in fstab to verify the new entry
sudo mount -a
This completes the setup of a robust, persistent software RAID 5 array with mdadm, ready for enterprise use.
How to Configure RAID with Windows Server Storage Spaces
For system administrators in Windows-based environments, Microsoft provides a powerful, integrated solution for creating resilient storage: Storage Spaces. This feature, managed through a graphical interface, allows for the aggregation of physical disks into flexible storage pools, replacing the legacy Dynamic Disks feature.
Storage Spaces enables the creation of virtual disks with RAID-like resiliency, including mirroring (RAID 1) and parity (RAID 5). This makes it an ideal solution for file servers, application servers, and Hyper-V hosts that require reliable storage without the complexity or cost of dedicated hardware RAID controllers.
Creating a New Storage Pool
All configuration begins within Server Manager, the central administrative console in Windows Server. The first step is to group the physical disks into a Storage Pool, which serves as a container of raw capacity from which virtual disks are provisioned.
Navigate to File and Storage Services, then select the Storage Pools pane. Any uninitialized, unallocated physical disks available to the server will be listed here.
- In the STORAGE POOLS tile, click the TASKS drop-down menu and select New Storage Pool.
- The wizard will guide you through naming the pool and selecting the physical disks to include.
- Best practice is to use disks of identical size, model, and speed to ensure consistent and predictable performance.
- You will have the option to designate one or more disks as a hot spare. For any production system, this is highly recommended. If an active disk fails, the system automatically begins rebuilding the array onto the hot spare, minimizing the time the array is in a degraded state.
After confirming your selections, Windows will create the pool, which will then appear in the Storage Pools list.
Configuring the Virtual Disk and Volume
With the storage pool established, the next step is to create a virtual disk. This is the logical volume that the operating system will interact with and is where you define the resiliency (RAID level) and provisioning policy.
This infographic provides a high-level overview of the workflow.
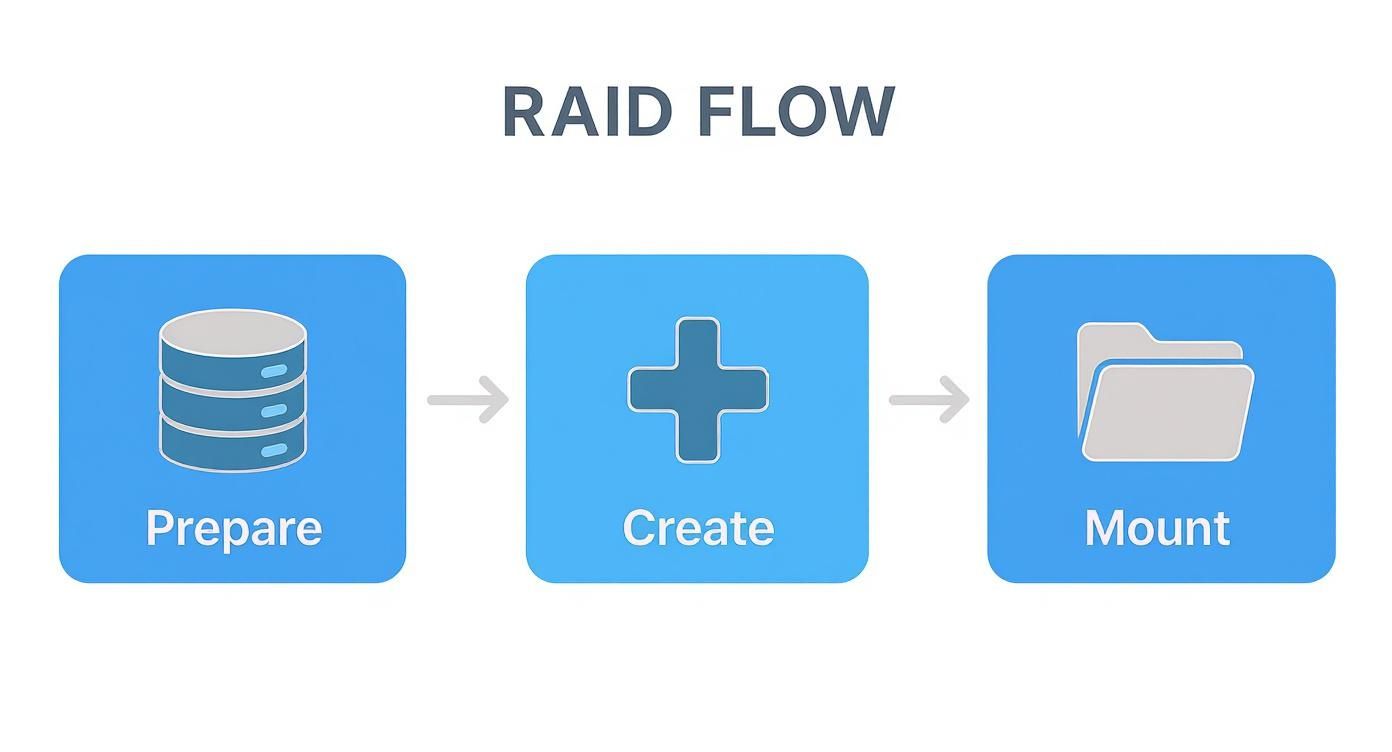
The process is logical: prepare the disks, create the virtual disk within the pool, and then create and mount the final volume for use by the server.
In Server Manager, within the VIRTUAL DISKS tile, select TASKS > New Virtual Disk. This wizard presents the most critical configuration options.
- Select the Storage Pool: Choose the pool created in the previous step.
- Specify Storage Layout: This determines the RAID level.
- Simple: This is equivalent to RAID 0 (striping), offering high performance but no fault tolerance. It should not be used for critical data.
- Mirror: This is equivalent to RAID 1, writing identical data to two or three disks for high redundancy.
- Parity: This is equivalent to RAID 5, striping data with parity information to provide a balance of capacity and fault tolerance.
- Choose Provisioning Type:
- Thin: The virtual disk reports a large size to the OS but only consumes physical disk space as data is written. This offers flexibility but requires careful monitoring to prevent the physical pool from being exhausted.
- Fixed: This allocates the full size of the virtual disk from the pool at the time of creation, similar to traditional disk provisioning.
Best Practice: For most production workloads, Fixed provisioning is recommended. It delivers more predictable performance and eliminates the risk of over-provisioning storage, which can lead to an outage if the physical pool runs out of space. Thin provisioning is useful for lab environments or workloads with unpredictable growth, but it necessitates active capacity management.
After setting the virtual disk size, the wizard prompts you to create the volume. Here you will assign a drive letter, select a filesystem (typically NTFS or the more modern ReFS for virtualization workloads), and provide a volume label. Upon completion, the new resilient volume will appear in the system, fully formatted and ready for use.
Keeping Your RAID Array Healthy: Verification, Monitoring, and Maintenance

Configuring a RAID system is only the beginning; ongoing monitoring and maintenance are critical for ensuring its long-term reliability. An unmonitored array is a significant liability, as a silent disk failure can go unnoticed until a second failure occurs, leading to catastrophic data loss.
Immediately after setup, the first action should be to verify the array’s health. In a Linux environment using mdadm, this is a straightforward command-line check.
Execute mdadm --detail /dev/md0 to get a detailed status report.
This command provides critical information, including the RAID level, the total number of configured vs. active devices, and the health state of each individual disk. For a healthy three-drive RAID 5 array, the state should be reported as active with a component device status of [UUU], indicating all disks are online and synchronized.
Get Proactive With Your Monitoring
Manual, periodic checks are insufficient for production systems. A proactive, automated monitoring strategy is essential to detect failures as they happen. This is where tools like smartmontools and the mdadm monitoring daemon become indispensable components of your management stack.
- The
smartddaemon (part ofsmartmontools) continuously monitors the S.M.A.R.T. (Self-Monitoring, Analysis, and Reporting Technology) attributes of your physical drives. It can detect pre-failure indicators like increasing bad sector counts or temperature thresholds and send email alerts, allowing for preemptive drive replacement. mdadm‘s monitoring mode can be configured to watch the array’s state. It can be set up to execute a script or send an email notification immediately if a disk is marked as faulty or if the array enters a degraded state, minimizing the window of vulnerability.
Don’t Forget About Data Scrubbing
A frequently overlooked aspect of RAID maintenance is data scrubbing. This is a background process where the RAID controller or software methodically reads all data blocks on every disk in the array to detect and correct silent data corruption, often referred to as “bit rot.”
Key Takeaway: Data scrubbing acts as a periodic integrity check for your data. By comparing data blocks against their corresponding parity information, the system can identify and repair subtle inconsistencies before they become unrecoverable file corruption errors.
For Linux mdadm arrays, a data scrub can be initiated manually. Best practice is to schedule this as a recurring cron job to run weekly or monthly during off-peak hours.
echo 'check' > /sys/block/md0/md/sync_action
This proactive maintenance is vital for ensuring the long-term integrity of the data stored on the array.
RAID Is Not a Backup
It cannot be overstated: RAID provides redundancy, not backup. It is engineered to maintain system uptime during a hardware failure. It offers no protection against human error, malware, logical file corruption, or physical disaster. A RAID array must be one component of a comprehensive disaster recovery strategy.
This necessitates off-site or cloud backups. For maximum data protection, implementing immutable backups, such as those offered by https://arphost.com, is a critical defense against ransomware and other malicious attacks that could otherwise compromise both production data and traditional backups.
The enterprise storage market reflects this need for robust data protection. The Standard RAID Mode Hard Disk Array market is projected to reach USD 19.17 billion, driven by the demands of cloud computing and big data. This growth highlights the importance of well-architected failure recovery plans, including the use of hot spares for automated array rebuilds.
Finally, when replacing failed drives and decommissioning old hardware, it is imperative to follow proper data sanitization procedures. Always know how to securely wipe hard drives to protect sensitive corporate or customer data.
Common Questions (and Crucial Answers) About RAID Setups
When implementing RAID, several common technical questions arise. Addressing these correctly from the outset is crucial for building a stable and efficient storage architecture.
Can I Mix and Match Drive Sizes in My Array?
While some RAID controllers may technically permit this, it is a significant anti-pattern. In any standard RAID configuration, the array’s usable capacity is constrained by the size of the smallest disk in the set. Any additional capacity on larger drives is rendered unusable.
For example, in a RAID 5 array built with two 4TB drives and one 2TB drive, the controller will treat all three disks as 2TB drives. This results in 4TB of wasted storage capacity. For predictable capacity, stable performance, and ease of management, always use identical drives. This includes matching the model, capacity, and ideally, the firmware version.
So, RAID Is a Backup, Right?
This is the most critical misconception to address, and the answer is an unequivocal no. RAID is a high-availability technology focused on hardware fault tolerance. Its sole purpose is to keep a system operational in the event of a physical disk failure.
RAID provides zero protection against common causes of data loss, including:
- Accidental file deletion (
rm -rf) or user error. - Logical data corruption caused by software bugs or OS crashes.
- Ransomware attacks that encrypt all files on the redundant array.
- Physical disasters such as fire, flood, or theft that destroy the entire server.
A proper backup strategy involves creating independent, versioned copies of your data on separate systems and media, with at least one copy stored off-site.
The 3-2-1 rule is the industry best practice: maintain at least three copies of your data, on two different types of media, with one copy stored off-site. Your RAID array represents only the first, primary copy.
What’s a Hot Spare? Do I Really Need One?
A hot spare is a standby drive, physically installed in the server and pre-assigned to a RAID array, that remains idle during normal operation. If an active drive in the array fails, the RAID controller automatically activates the hot spare and initiates the rebuild process without manual intervention.
This is a critical feature for production systems. It significantly reduces the Mean Time to Recovery (MTTR) because the rebuild starts immediately. The period when an array is running in a degraded state (with one failed drive) is its most vulnerable. If a second drive fails before the first is replaced and rebuilt, it results in total data loss.
For any business-critical system, a hot spare is not a luxury; it is an essential component of a robust data protection strategy.
How Will I Know When a Drive Fails?
A properly configured system will provide multiple forms of notification. Hardware RAID controllers typically feature an audible alarm and physical status LEDs on the drive carriers—a blinking amber or solid red light universally indicates a fault.
Beyond physical indicators, both hardware and software RAID systems generate detailed log entries. These can be found in the Windows Event Viewer or system logs (dmesg, /var/log/syslog) on Linux. However, a reactive approach is insufficient. Proactive monitoring is key. Configure tools like mdadm‘s email alerts or smartmontools to send notifications directly to your monitoring dashboard or ticketing system. This enables you to be aware of pre-failure conditions before a drive fails catastrophically.
Building a resilient storage foundation is crucial for any business-critical application. At ARPHost, LLC, we provide high-performance bare metal servers and flexible KVM virtual servers perfect for deploying robust RAID configurations. Let our experts help you design and manage an infrastructure built for reliability and speed by visiting https://arphost.com.