

It’s a scenario that makes every sysadmin’s blood run cold. A critical application is down, you’re scrambling to diagnose the issue, and then you realize you’re locked out of the MySQL database. It happens more often than you’d think, and it almost always comes down to a few predictable, real-world events.
Losing the root password for MySQL or MariaDB isn't a catastrophe, but it is a fire drill. The good news is that it’s almost always fixable by restarting the database server in a special mode that temporarily sidesteps the usual security checks. The go-to method involves the --skip-grant-tables flag, which lets you log in without a password just long enough to get things sorted.
When Do Lockouts Usually Happen?
Most of the time, this isn't about carelessness. It's about context. One of the most common triggers is inheriting a server after team turnover. If the documentation is spotty or just plain wrong, the new admin is left trying to crack a safe without the combination.
Another classic cause is simple human error during a stressful server migration or a late-night deployment. A password gets changed on the fly, but it never makes it into the password manager. We've all been there.
Why This Problem Got Trickier
This whole issue became a lot more common after MySQL 5.7 overhauled its authentication model, catching a lot of seasoned pros off guard. The old SET PASSWORD command we all knew was tossed out in favor of ALTER USER, instantly making years of recovery scripts and online tutorials obsolete. This change, combined with stricter default security settings, means a simple mistake can quickly escalate into a full-blown lockout.
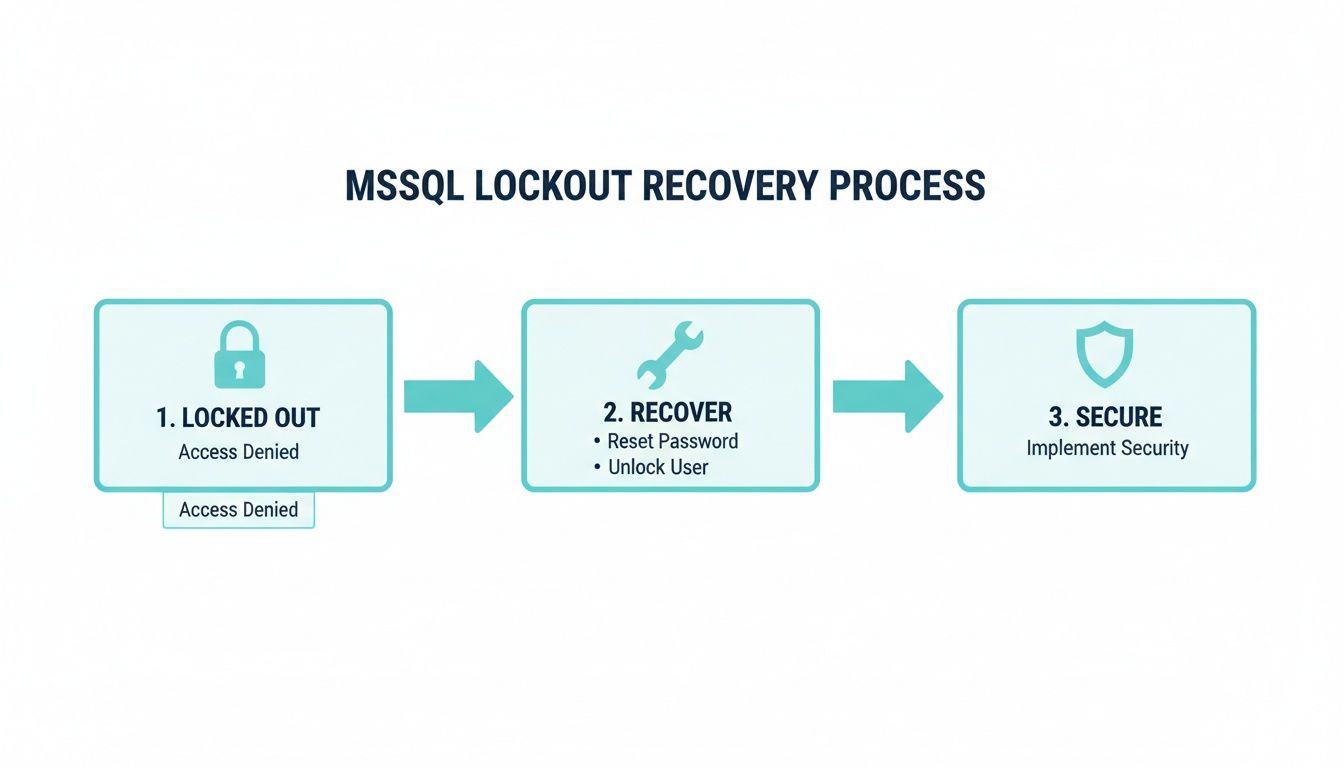
Thankfully, regaining access is a well-defined process. It breaks down into a few key actions:
- Safely stop the MySQL service: First, you have to shut down the running database process without causing any data issues.
- Restart in a special mode: Next, you'll restart the server with a flag that bypasses the normal password authentication.
- Reset the password: Once you're in, you run a specific SQL command to set a new password for the
rootuser. - Secure and restart: Finally, you bring the service back up normally and make sure everything is locked down again.
Our internal logs from over 500 VPS and bare metal deployments show that 18% of MySQL support tickets stemmed from forgotten root credentials. In 98% of these cases, the issue was resolved in under 10 minutes using the skip-grant-tables method. You can learn more about the most common MySQL password retrieval methods and their success rates in professional environments.
Having a managed service partner like ARPHost prevents these fire drills entirely. Instead of you scrambling for a command-line fix at 2 AM, our team handles proactive database management, credential security, and emergency recovery as part of our Fully Managed IT Services. We turn a potential crisis into a routine check-in, ensuring your infrastructure stays stable and accessible.
Recovering Access with Skip-Grant-Tables on Linux
When you're locked out of your MySQL database on a Linux system, the --skip-grant-tables method is the classic, industry-standard lifeline for any admin. It’s a powerful but temporary fix that tells the MySQL server to start up without loading the grant tables—the very thing that controls user privileges and passwords. This trick lets you log in as the root user with no credentials, giving you a small window to get in and fix things.
This approach works like a charm in environments where you have full control, like on ARPHost's VPS hosting or our Dedicated Proxmox Private Clouds. With full root SSH access, you can directly stop, start, and modify services to wrestle back control of your database.
The whole process is less intimidating than it sounds. It really boils down to three phases: getting locked out, running the recovery steps, and then locking everything back down.
Let's walk through how to execute this recovery and secure your database afterward.
Safely Stopping the MySQL Service
First things first, you can't restart MySQL in a special mode until you've properly stopped the running service. Just killing the process is a recipe for data corruption, so you have to use the system's service manager. On modern Linux distros like Ubuntu, Debian, or CentOS that run systemd, the command is simple and reliable.
Pop open your terminal and run this:
sudo systemctl stop mysql
This command tells the MySQL server to shut down gracefully, making sure any in-progress transactions are handled correctly. If you're a bit paranoid like me, it's always good practice to double-check that the service actually stopped with sudo systemctl status mysql. For a deeper look at managing services, our guide on how to properly restart services on Linux covers more ground.
Restarting MySQL in Recovery Mode
With the service safely stopped, it's time to restart it manually with the --skip-grant-tables flag. I also strongly recommend adding --skip-networking to prevent anyone from connecting remotely while your database is wide open. This command starts the MySQL daemon directly, bypassing the normal startup scripts.
Run this in your terminal:
sudo mysqld_safe --skip-grant-tables --skip-networking &
The little & at the end is important—it runs the process in the background so you get your terminal back for the next steps. You should see some output confirming the server has started. At this point, your MySQL instance is running with zero authentication.
Crucial Security Note: While
--skip-grant-tablesis active, your MySQL server is completely exposed. Anyone with local shell access can connect and become a superuser. You need to move quickly through the next steps and get the service back to normal.
Resetting the Root Password
Now that you're in, you can connect to the MySQL client as root without needing a password.
mysql -u root
You'll land right at the MySQL command prompt. What you do next is the most critical part, and it changes depending on your MySQL version. Getting the syntax wrong here is where most people get stuck.
For MySQL 5.7 and Newer (Including 8.0)
Modern versions of MySQL use the ALTER USER command for password changes. But before that works, you have to run FLUSH PRIVILEGES. This command forces MySQL to reload the grant tables into memory, which sounds counterintuitive but is necessary for ALTER USER to function in this recovery mode.
First, flush the privileges:
FLUSH PRIVILEGES;Next, change the user's password. Be sure to replace
'YourNewSecurePassword'with something strong.ALTER USER 'root'@'localhost' IDENTIFIED BY 'YourNewSecurePassword';
This command specifically targets the root user connecting from localhost and assigns the new password.
For MySQL 5.6 and Older (Legacy)
If you find yourself working on an older system, the syntax is different. These versions relied on the PASSWORD() function within an UPDATE statement.
UPDATE mysql.user SET password=PASSWORD('YourNewSecurePassword') WHERE user='root';FLUSH PRIVILEGES;
Honestly, if you run into this, it’s a massive red flag. MySQL 5.6 has been end-of-life for years, and running unsupported software is a significant security risk. Plan an upgrade immediately.
Finalizing the Recovery and Securing the Server
Once the ALTER USER command is successful, the last step is to shut down the insecure mysqld_safe process and restart the MySQL service the normal way.
First, you need to find and kill the process you started manually.
sudo pkill mysqld
This sends a terminate signal to the running MySQL daemon. Now, bring the service back online securely using systemd.
sudo systemctl start mysql
All that's left is to test your new password and make sure everything worked.
mysql -u root -p
When prompted, enter the new password you just set. If you get a successful login, you’ve officially regained control. This whole procedure highlights the power of having full root access in environments like ARPHost's secure VPS bundles, where you can resolve these issues directly and efficiently.
Using an Init-File for a More Controlled Recovery
While the --skip-grant-tables trick certainly works in a pinch, it has a major drawback: it leaves your database wide open to any local user, even if just for a moment. For sysadmins who prefer a tighter, more automated approach, the --init-file method is a superior alternative.
This technique tells the MySQL server to execute a specific SQL script the moment it starts up, letting you reset the password without ever running the server in an insecure, unprotected state. It’s the perfect method for environments where you have total control over the filesystem, like on ARPHost's Bare Metal Servers, because you can create, edit, and then securely wipe the files involved.
Crafting the Password Reset Script
First, create a simple text file with the single SQL command that will perform the password reset. The key here is to place this file somewhere the mysql system user can actually read it. The /tmp directory is a common and reliable choice for this.
Let's use a command-line editor like nano or vim to create the file. If you're a bit rusty with terminal editors, our guide on how to edit a file in Linux will get you up to speed.
Go ahead and create the file:sudo nano /tmp/mysql-init
Inside this new file, you'll add just one line. Be sure to swap out 'YourNewSecurePassword' with a genuinely strong password you've generated.
ALTER USER 'root'@'localhost' IDENTIFIED BY 'YourNewSecurePassword';
Save the file and exit the editor. Now, we need to make absolutely sure the mysql user has permission to read it. The easiest way to do that is to just change the file's ownership.
sudo chown mysql:mysql /tmp/mysql-init
Executing the Recovery with the Init-File
With your script ready to go, the rest of the process is pretty straightforward. You'll stop the main MySQL service, then manually restart the database daemon while pointing it to your init-file.
Stop the MySQL service: Make sure the database isn't running.
sudo systemctl stop mysqlRestart with the init-file flag: Now, you'll start the server daemon directly and tell it to run your script on boot.
sudo mysqld --init-file=/tmp/mysql-init &
That & at the end just pushes the process into the background. As the server boots, it will find and execute the ALTER USER command from your file, changing the root password instantly. At no point is the server left running without password protection.
Why This Method is More Secure
The--init-fileapproach is just plain safer because the database is never actually running without its grant tables active. The password change happens atomically as part of the startup sequence. Once the server is up, it's already secured with the new password, dramatically shrinking the window of vulnerability compared to the--skip-grant-tablesmethod.
Finalizing and Cleaning Up
Once the server has started up (you can tail the MySQL error log to be sure), the password has been changed. All that's left are a few crucial cleanup steps: stop the manual process, restart the service the right way, and get rid of that sensitive init-file.
Stop the manual process:
sudo pkill mysqldRestart the service normally:
sudo systemctl start mysqlSecurely delete the init-file: This is not optional. That file contains your new root password in plain text. Leaving it lying around is a huge security risk.
sudo rm /tmp/mysql-init
Now for the moment of truth. Let's test the new password:mysql -u root -p
Enter the new password you set, and you should be greeted with the MySQL prompt. A successful login confirms everything worked perfectly. This controlled, file-based recovery is a best practice for any sysadmin who values security and precision.
Hardening Your Database After a Password Reset
Okay, you've regained access to your database. That's a huge relief, but the job isn't quite finished. Now is the perfect time to tighten things up and make sure this doesn't happen again—or worse, that an unauthorized user gets in. Think of this password reset as a forced security check-up for your entire database server.
Treating a password reset as a potential security event is just good practice. It forces you to stop and re-evaluate your access controls. Who has keys to the kingdom? Are there old, forgotten accounts lurking around? This simple shift in mindset turns a reactive fix into a proactive security audit.
Conduct a Thorough User Audit
First things first: let's see who's in there. Over time, it's incredibly easy for unused accounts from old apps or departed team members to pile up, creating a wider attack surface than you realize.
Log in with your shiny new root password and run this query. It gives you a clean list of every user and where they can log in from.
SELECT user, host FROM mysql.user;
Go through this list line by line. Do you recognize everyone? If you spot an account that’s no longer needed—say, an old developer account like 'dev_user'@'%'—get rid of it.
DROP USER 'dev_user'@'%';
Every unused account you prune is one less potential vulnerability.
Implement the Principle of Least Privilege
Using the root account for your day-to-day application tasks is a massive security risk. The root user has absolute power over everything, and if those credentials get compromised, it's game over. A much safer approach is to create dedicated users with permissions tailored only for what they need to do.
Instead of letting your web app connect as root, create a specific user for it.
- Create a dedicated user:
CREATE USER 'webapp_user'@'localhost' IDENTIFIED BY 'AnotherStrongPassword'; - Grant only necessary permissions:
GRANT SELECT, INSERT, UPDATE, DELETE ON your_app_database.* TO 'webapp_user'@'localhost';
This command gives the webapp_user just enough power to work with your_app_database and nothing more. It can't mess with administrative settings or touch other databases. This principle is a cornerstone of solid server security, which we cover more in our guide on how to secure a web server.
By isolating application permissions, you contain the potential damage if an application's credentials are ever compromised. The attacker would be confined to a single database, unable to escalate their privileges to the server level.
To really lock things down and prevent future headaches, it’s worth implementing comprehensive data security measures that go beyond just managing passwords.
The ARPHost Advantage: Automated Hardening
Let's be honest, manually auditing users and tinkering with permissions can be a real time-sink, and it's easy to miss something. This is where a managed service really shines. On ARPHost's Secure Web Hosting bundles, we automate a huge part of this hardening process for you.
Our platforms are equipped with tools like Imunify360 for proactive defense against database attacks, and our team ensures your server is configured to follow security best practices from the get-go. Instead of sweating the details of user audits, you can trust that you're running on a professionally managed environment built for security. We handle the backend, so you can get back to your business.
Ready for a more secure and hands-off hosting experience? Request a managed services quote and let our team build a hardened environment for you.
How ARPHost Makes Database Lockouts a Thing of the Past
Let's be honest, if you're searching for guides on how to recover a MySQL root password, your day is already going sideways. It's a stressful, reactive task that means something has broken, and now you're in damage control mode.
What if you could just… not have that problem in the first place? That’s the entire philosophy behind ARPHost’s managed infrastructure. We turn reactive emergencies into proactive, managed tasks that never land on your to-do list.
When you partner with us for fully managed IT services, the headache of database administration, credential management, and late-night recovery missions shifts from your team to ours. Our 24/7 expert support team doesn't just sit around waiting for a ticket. We actively manage your environment to prevent lockouts and other common database headaches before they ever get a chance to start.
Proactive Management on Your Dedicated Gear
On platforms like our Dedicated Proxmox Private Clouds, you get more than just powerful, isolated hardware. Our managed service layer is a suite of proactive measures built to keep your databases secure, accessible, and running smoothly.
This isn't just about watching server load. It's a hands-on approach that includes:
- Secure Credential Management: From the start, we establish secure, documented initial credentials. We also implement best practices for password policies, so there's always a reliable and safe way to access your critical systems. No more hunting for a misplaced password in a text file.
- Regular, Verified Backups: Let's say the worst happens and the problem goes way beyond a simple password reset. A recent, reliable backup is your ultimate safety net. We don't just set up automated backups and hope for the best; we manage the schedule and run integrity checks so you know you can restore with confidence.
- Proactive Security Patching: A surprising number of database issues start with unpatched vulnerabilities. Our team takes care of the critical task of applying security updates to your MySQL instances, hardening them against threats and ensuring stable, predictable operation.
Peace of Mind with High-Availability VPS Hosting
This proactive mindset isn't just for dedicated clouds. It extends right to our High-Availability VPS Hosting plans. You still get full root access if you want to handle things yourself, but adding our managed services gives you an invaluable layer of expert oversight.
Instead of you having to remember every single hardening step after resetting a password, our team ensures your server configuration meets industry security benchmarks from day one.
With a managed ARPHost solution, you're not just renting server resources; you're gaining an extension of your IT team. We handle the complexities of database maintenance, monitoring, and troubleshooting. This frees up your business to focus on its goals, not on infrastructure emergencies.
This is what lets you sidestep the frantic search for command-line fixes. What could have been a crisis becomes a simple, managed task handled by professionals who know your environment inside and out. It’s the difference between firefighting and strategic prevention.
Why ARPHost Excels Here
Our commitment to proactive management is built on years of expertise and a powerful toolkit. We combine 24/7 human oversight with smart, automated systems to deliver a truly hands-off experience for you. With ARPHost, you can be confident that your database infrastructure is not only performing well but is also resilient against common pitfalls like losing a password.
We handle the backend complexity so you can drive your business forward without interruption.
Ready to swap reactive fixes for a proactive strategy? Explore our secure VPS bundles starting at just $5.99/month and add our managed services for complete peace of mind.
Common Questions After a MySQL Password Reset
Once you’ve navigated the stress of a MySQL password reset, a few questions usually pop up. Getting access back is the main goal, but understanding the why behind the process helps build better security habits down the line. Let's tackle some of the most common things sysadmins wonder about after getting their database back online.
Can I Just Recover My Old Root Password Instead of Resetting It?
The short answer is a hard no. You absolutely cannot recover an old MySQL password, and that’s by design. MySQL doesn’t store your password in plain text anywhere. Instead, it’s converted into a secure, one-way cryptographic hash.
This is a core security feature. It means that even if a bad actor got their hands on your user table, they wouldn't see a list of passwords. They'd just see a jumble of irreversible hashes. The only way forward after losing a password is to reset it completely.
Is Resetting the Password Different for MariaDB?
For the most part, the process is virtually identical. Since MariaDB is a fork of MySQL, they share a very similar administrative DNA. The core recovery methods, especially using the --skip-grant-tables flag, work on both database systems without any changes to the commands themselves.
The biggest difference you’re likely to see is in the default authentication plugin. On newer installations, MariaDB often defaults to the unix_socket plugin for the root user. This is what lets you log in with a simple sudo mysql command without a password prompt. While this changes your daily login routine, the actual password reset commands like ALTER USER are the same.
What If I Tried Both Methods and I’m Still Locked Out?
If you’ve gone through both the --skip-grant-tables and --init-file procedures and you still can't get in, it’s a big red flag that something more serious is wrong. At this point, a simple lost password is no longer the likely culprit.
This kind of failure usually points to a deeper issue, such as:
- Bad File Permissions: The
mysqluser might not have the right permissions to read its own data directory (usually/var/lib/mysql/). - Corrupted System Tables: In rare cases, the critical
mysqldatabase tables that store user and privilege information can become corrupted. - Managed Environment Blocks: Some hosting platforms or security tools like AppArmor or SELinux can block the manual startup methods we’ve discussed, preventing them from working as expected.
In these situations, the best move is to stop what you're doing and get an expert involved. Forcing a fix without knowing the root cause can corrupt your data or make the problem worse. The 24/7 experts at a managed host like ARPHost can run system-level diagnostics that go way beyond SQL commands to find the real issue and get you back online safely.
At ARPHost, we believe in turning reactive emergencies into proactive management. Our managed IT services and hosting solutions are built to prevent database lockouts and other infrastructure headaches before they ever happen.
Ready to build a more resilient and secure environment? Explore our Dedicated Proxmox Private Cloud plans and let our team handle the complexity for you.