


If you’re managing a Linux server, mounting a drive isn’t just a task—it’s a fundamental skill. This guide cuts through the theory and gets straight to the practical, real-world steps for managing storage on production servers.
You’ll learn the essential commands to find, format, and temporarily mount a new disk. Then, we’ll make it permanent so it survives a reboot—the same reliable method we use to provision storage on ARPHost’s ARPHost’s Bare Metal Servers.
Mastering Drive Mounting for Linux Servers
So, what exactly does “mounting” a drive mean? Think of it like plugging in a USB stick and having it show up as a drive letter on your computer. In Linux, a mounted drive is simply a storage device—like a hard disk, SSD, or even a network share—that you’ve made accessible at a specific location in the server’s directory tree.
That location is called a mount point. Without this crucial step, the drive is just a piece of hardware the system knows is there, but its storage capacity is completely offline and unusable for your apps and users. It’s the bridge between the physical device and the filesystem.
In a business environment, getting this right underpins the reliability of countless services. You’ll find yourself needing to mount drives in a few common scenarios:
- Expanding Storage: The classic case of adding a new disk to a server to host large databases, application data, or critical backups.
- Isolating Data: A smart move for performance and management. You can separate user data (
/home), application logs (/var/log), or web content (/var/www) onto their own dedicated partitions. - System Recovery: When a system fails, you often need to attach its drive to a rescue environment to pull off critical files.
- Network File Sharing: Mounting network filesystems like NFS or CIFS is essential for accessing centralized storage across multiple servers.
Ever since the Linux kernel 2.4.20 introduced detailed disk statistics, system administrators have relied on precise mounting techniques to keep systems running smoothly. This is especially true in hosting, where 96% of the world’s top 1 million websites run on Linux. Proper drive mounting ensures seamless storage access for everything from high-performance Bare Metal Servers to flexible KVM VPS.
If you want to dive deeper into the official documentation, Red Hat offers an excellent guide on managing file systems effectively.
Why ARPHost Excels Here
At ARPHost, we take the guesswork out of storage management. Our fully managed IT services and Secure Web Hosting Bundles are configured by experts who live and breathe these best practices. We ensure your drives are partitioned, formatted, and mounted for peak performance and stability from day one, so you can focus on your business, not the infrastructure.
Now, let’s walk through the entire process, from identifying a brand new disk to making it a permanent, reliable part of your system.
Key Commands for Initial Drive Setup
Before you can even think about mounting, you have to prepare the drive. This involves identifying it, creating a partition table, and formatting it with a filesystem. This table is a quick cheat sheet for the commands you’ll use in the initial setup stages.
| Command | Purpose | Common Use Case Example |
|---|---|---|
lsblk | List block devices to identify new drives and their names (e.g., /dev/sdb). | lsblk |
fdisk | A classic, powerful tool for creating and managing partition tables. | fdisk /dev/sdb |
parted | A more modern partition editor, useful for drives larger than 2TB and scripting. | parted /dev/sdb |
mkfs.ext4 | Creates an ext4 filesystem, the most common default for Linux systems. | mkfs.ext4 /dev/sdb1 |
mkfs.xfs | Creates an XFS filesystem, often preferred for large files and high performance. | mkfs.xfs /dev/sdb1 |
Getting comfortable with these commands is the first step. Once the drive is partitioned and formatted, you’re ready to actually mount it and put it to work.
Preparing New Drives for Production Use
Before you can actually start using a new drive to store data, there’s some groundwork to do. That raw disk needs to be turned into a usable, formatted partition that your operating system can understand and work with. Getting this initial setup right is non-negotiable, especially in high-performance environments like ARPHost’s High-Availability VPS plans, where data integrity starts with a solid foundation.
Think of it as a three-step process: identify the disk, format it, and then mount it.
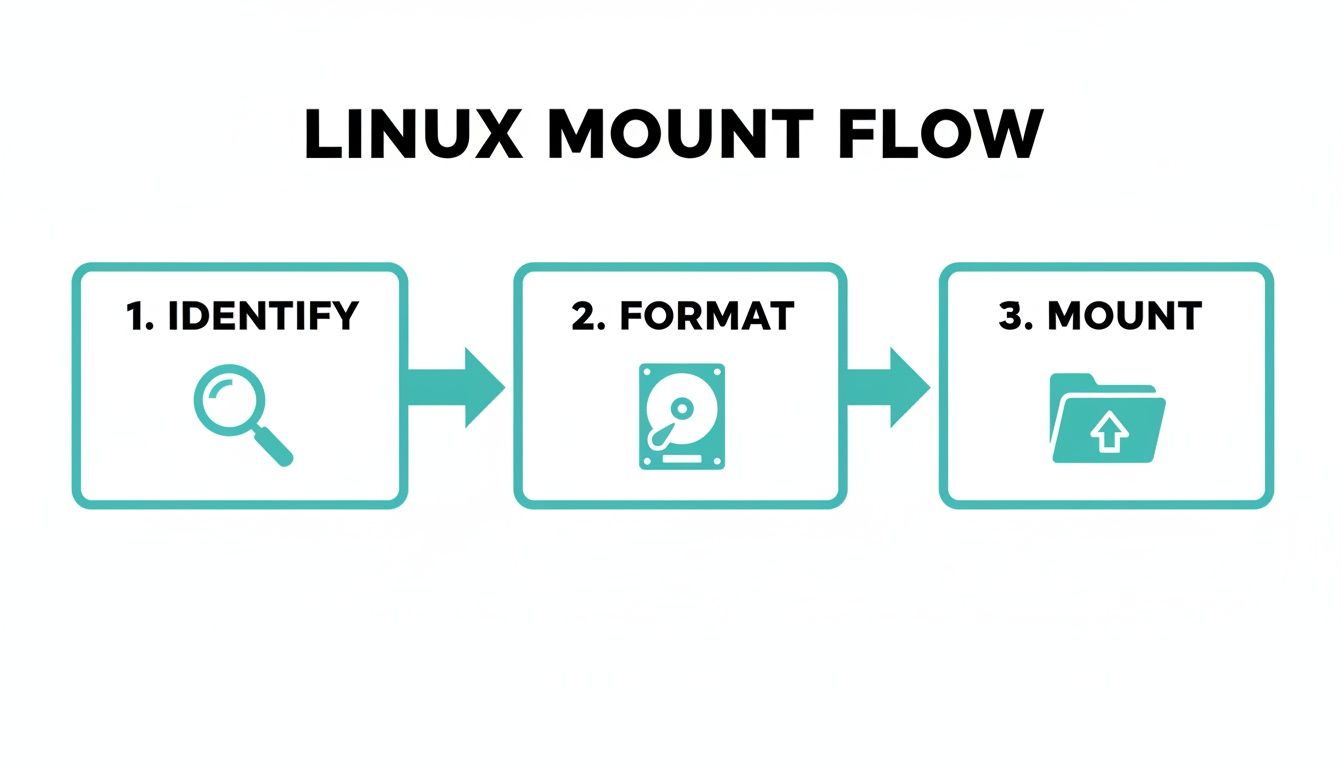
Each of these steps builds on the last, ensuring your new storage is correctly recognized, accessible, and ready for reliable use.
First, Identify Your New Drive
The very first job is to pinpoint which device is the new one. This is a step where you want to be absolutely sure—getting it wrong can lead to wiping out the wrong drive, and that’s a nightmare scenario.
My go-to command for this is lsblk (list block devices). It gives you a clean, tree-like view of every storage device connected to your system.
Just run lsblk on its own:
lsblk
You’ll see a list of disks (like sda, sdb) and the partitions under them (sda1, sda2). The new, unpartitioned drive will stick out because it won’t have any partitions nested underneath it. So if sda has children but sdb is just sitting there by itself, sdb is almost certainly your new disk. You can also use fdisk -l for a more detailed look at the partition tables.
Next, Create a Partition with fdisk
Once you’ve confidently identified the new disk (we’ll use /dev/sdb for this example), it’s time to partition it. Partitioning carves up the physical disk into logical sections that the OS can manage. The classic tool for this job is fdisk.
A Quick Security Note: If you’re repurposing an old drive, it’s a smart move to wipe it clean first. You never know what residual data might be lingering. It’s a critical best practice to securely wipe a hard drive on Linux to guarantee a fresh start before putting it into production.
To start the partitioning process, fire up fdisk with the disk name:
sudo fdisk /dev/sdb
This drops you into the fdisk interactive prompt, where you’ll use a series of single-letter commands to get the job done. Here’s the typical sequence:
g: This creates a modern GPT partition table, which is what you want for most setups today.n: This creates a new partition. Just press Enter through the prompts to accept the defaults, which will create a single partition spanning the entire disk.w: This writes your changes to the disk and exitsfdisk.
After you’re done, run lsblk again. You should now see your new partition listed, something like /dev/sdb1. This same logic applies whether you’re working with a single physical disk or a logical volume built from a RAID array. For more on that, check out our guide on how to set up a RAID system for better performance and redundancy.
Finally, Format the Partition with a Filesystem
The last piece of the puzzle is to create a filesystem on your new partition. The filesystem is the underlying structure that lets your OS actually store, read, and organize files.
For general use on any modern Linux system, ext4 is a rock-solid, reliable choice. It’s been the default for years for good reason.
To format our new partition (/dev/sdb1) with the ext4 filesystem, run this command:
sudo mkfs.ext4 /dev/sdb1
The command will quickly build the filesystem structure. Once it finishes, your drive is officially prepped and ready to be mounted. Now you can finally make that storage available to the rest of your system.
Configuring Permanent Mounts with /etc/fstab
Manually mounting a drive is fine for temporary access, but it’s a non-starter in any real server environment. Storage must be available automatically after a reboot. If you forget this step, your applications, databases, or user directories will simply fail to load, leading straight to downtime.
This is where the Filesystem Table, or /etc/fstab, comes in. Think of it as the definitive guide that tells your Linux system which drives to mount at boot time and exactly how to do it.
Getting this file right is a core skill for any sysadmin. It’s what separates a resilient, self-recovering server from one that needs a manual fix after every restart—a standard we live by across all of ARPHost’s fully managed IT services.
Finding Your Drive’s Unique Identifier
Before you even think about editing fstab, you need a reliable way to identify your drive. Sure, you could use device names like /dev/sdb1, but that’s a risky habit on production servers. Device names aren’t guaranteed to be consistent; they can change if you add or remove hardware, which could easily cause your system to fail on boot because it can’t find the correct drive.
The industry best practice is to use the Universally Unique Identifier (UUID). A UUID is a permanent address assigned to the filesystem the moment it’s created, and it never changes.
To find the UUID for your new partition, just use the blkid command:
sudo blkid /dev/sdb1
The output will look something like this. The part you need is the long string inside the quotes next to UUID.
/dev/sdb1: UUID="a1b2c3d4-e5f6-7890-1234-567890abcdef" TYPE="ext4" PARTUUID="..."
This unique string is what we’ll use in our fstab file to ensure the system always mounts the correct drive, every single time. No guesswork involved.
Understanding the fstab File Structure
The /etc/fstab file is a simple text file, and each line in it represents one filesystem to be mounted. Every line is broken down into six distinct fields, separated by spaces or tabs. Knowing what each field does is absolutely critical for a successful setup.
Let’s break down what each of those six fields represents.
Anatomy of an /etc/fstab Entry
| Field | Description | Example Value |
|---|---|---|
Field 1 [device] | Specifies the device to mount, using its UUID for reliability. | UUID=a1b2c3d4-e5f6-7890-1234-567890abcdef |
Field 2 [mount_point] | The absolute path to the directory where the filesystem will be mounted. | /mnt/data |
Field 3 [filesystem] | The type of filesystem on the partition (e.g., ext4, xfs, ntfs). | ext4 |
Field 4 [options] | A comma-separated list of mount options, such as defaults, rw, noexec. | defaults |
Field 5 [dump] | Used by the dump utility to determine if the filesystem needs to be backed up. 0 means disabled. | 0 |
Field 6 [pass] | Determines the order for filesystem checks at boot time. The root filesystem (/) should be 1, while all others should be 2 (or 0 to disable checking). | 2 |
Getting fstab right is about more than just a technical task; it has real business implications. One DevOps report found that 62% of SMBs in the US achieve an average of 25% savings on storage costs through optimized configurations, like auto-mounting drives at boot to maintain 99.99% uptime. This kind of reliability is paramount, especially in environments like colocation, where hardware degradation can affect up to 12% of drives annually.
Putting It All Together: An fstab Example
Okay, let’s add our new drive to /etc/fstab. You’ll need to edit the file as the root user. If you need a quick refresher, check out our guide on how to edit a file in Linux using common text editors like nano or vim.
First, open the file:
sudo nano /etc/fstab
Now, scroll to the bottom of the file and add a new line using the UUID we found and the structure we just covered. For a standard data drive, the entry would look something like this:
# Mount for /dev/sdb1 - Application Data
UUID=a1b2c3d4-e5f6-7890-1234-567890abcdef /mnt/data ext4 defaults 0 2
Expert Tip: Always add a comment (
#) above yourfstabentry. This simple act of documentation can save you a massive headache months from now when you’re trying to remember what a specific drive is for. Trust me on this one.
After you’ve saved the file, you can test your new fstab entry without rebooting. Just run sudo mount -a. This command tells the system to mount all filesystems listed in /etc/fstab that aren’t already mounted. If it runs without any errors, your permanent mount is configured correctly and will stick around through reboots.
Tuning Mount Options for Performance and Security
Sticking with the defaults option in /etc/fstab is fine for a basic setup, but production servers demand more finesse. If you want to truly optimize your storage, you have to dig deeper into the mount options to fine-tune them for specific workloads. This is where you can squeeze out that extra bit of performance and seriously harden your system’s security.
Applying the right options can turn a good server into a great one. For instance, on a busy database server hosted on one of ARPHost’s Bare Metal Servers, cutting down on unnecessary disk writes can be the difference between a snappy application and a sluggish one. It’s these small, expert tweaks that make sure you get the most out of your hardware.
Boost Performance by Reducing Disk I/O
Every single time a file is accessed on a Linux system, the kernel dutifully updates its access timestamp, or atime. This might sound harmless, but it creates a constant stream of tiny write operations. On high-traffic systems—or worse, on SSDs with a finite number of write cycles—this can create a very real performance drag.
Thankfully, you can shut this behavior down with a simple change to your mount options:
noatime: This is the big one. It completely disablesatimeupdates for both files and directories, eliminating a huge number of writes and giving you the biggest performance boost.nodiratime: A slightly less aggressive choice that only turns offatimeupdates for directories, leaving them on for files.relatime: This is the modern default in many distributions for a reason. It’s a smart compromise that only updatesatimeif the previous access time was older than the file’s modification time (mtime).
For the vast majority of workloads, especially on SSDs, just go with noatime. It’s a safe and incredibly effective optimization.
Why ARPHost Excels Here
When you choose an ARPHost VPS Hosting plan, we provision your storage with performance-oriented defaults from the get-go. Our managed services team can take it a step further, tuning these settings based on your specific application to ensure your databases or web servers run at their absolute best.
Harden Your System with Security Options
Certain directories on a Linux server are classic targets for attackers. The /tmp directory, which is world-writable by design, is a prime example. An attacker who gains even limited access might try to upload and run a malicious script from there. You can shut down this entire class of attack by using security-focused mount options.
noexec: Prevents any binary files from being executed on the filesystem. This is absolutely essential for directories like/tmpor/var/tmp.nosuid: Disables thesetuidbit. This stops a user from executing a file with the permissions of the file’s owner (which is oftenroot).nodev: Stops character or block special devices from being interpreted on the filesystem, which means a user can’t create sneaky device files.
Putting these options in place is a cornerstone of proper server hardening. A common best practice is to create a separate partition just for /tmp and mount it with noexec,nosuid,nodev. It makes your system far more resilient.
Applying Tuned Options in fstab
Let’s put this into practice. Say you have a data drive where you want to maximize performance, and a separate /tmp partition that you need to lock down tight.
Your /etc/fstab entries would look something like this:
# Data Drive with Performance Tuning
UUID=a1b2c3d4-e5f6-7890-1234-567890abcdef /data ext4 defaults,noatime 0 2
# Secure /tmp Partition
UUID=b2c3d4e5-f6a7-8901-2345-67890abcdef1 /tmp ext4 defaults,noexec,nosuid,nodev 0 2
These simple additions make a dramatic difference in both the speed and security of your server. For ARPHost customers scaling their infrastructure, verifying these mounts with a quick findmnt /mnt ensures there are no conflicts, contributing to high uptime. This process, combined with our 24/7 monitoring, helps spot potential issues like disk utilization spikes long before they become problems. For more insights, Red Hat’s documentation on mounting file systems is a great resource.
Ready to build on a secure, high-performance foundation? Explore our Secure VPS Bundles starting at just $5.99/month and let our experts handle the optimization for you.
Troubleshooting Common Drive Mounting Issues
Sooner or later, every sysadmin runs into a mount that just won’t cooperate. Even with a perfect setup, things can go wrong. When you’re learning how to mount a drive in Linux, knowing how to chase down and fix these common errors is a skill that pays for itself.
These problems usually rear their heads during boot or when you run mount -a, and they can be anything from a simple typo in your fstab to a full-blown corrupted filesystem.
The good news? Most mounting problems give you pretty clear error messages that point you right to the culprit. The trick is knowing where to look and how to interpret what you see. It’s the same diagnostic process our ARPHost support engineers follow to keep downtime at a minimum for clients on our secure managed VPS hosting plans.
Diagnosing with dmesg
Your first stop when a mount fails should always be the dmesg command. This is your direct line to the kernel’s logs, giving you the unfiltered story about what went wrong with the hardware or drivers during the mount attempt.
If a mount fails, pop open a terminal and run dmesg | tail. This shows you the last few messages from the kernel, and it’s usually all you need to spot the issue. Look out for errors like:
wrong fs type, bad option, bad superblock: This is the classic “something’s wrong” error. It often means you typed the filesystem incorrectly in/etc/fstab(likeext3instead ofext4) or the filesystem itself has some corruption.VFS: Can't find ext4 filesystem: This one is less ambiguous. The kernel is telling you flat-out that the partition isn’t formatted with an ext4 filesystem, or it’s so damaged it’s unrecognizable.mount: /data: device is busy: You’ll see this when another process has a lock on the device or the folder you’re trying to mount to. A quicklsof /datawill usually show you which process is holding on.
Expert Tip: The kernel log is your source of truth. The error from the
mountcommand is a good starting point, butdmesggives you the low-level details you need to really understand what broke.
Recovering from a Bad fstab Entry
A typo in /etc/fstab is probably the most common reason a server fails to boot. It’s frustrating, but the system will usually drop you into an emergency shell so you can fix it. Don’t panic; this is a straightforward repair.
When you’re in that emergency mode, the root filesystem is almost always mounted read-only. First, you need to make it writable.
mount -o remount,rw /
Now, open /etc/fstab with your favorite text editor (nano, vim, whatever you’re comfortable with). Scrutinize the line that’s causing the trouble. Check for typos in the UUID, the mount point path, or the filesystem type.
Once you’ve corrected the mistake, you can try rebooting. If you want to be extra safe—or just get the system back online quickly—you can comment out the faulty line with a #. The server will boot, and you can troubleshoot the mount properly once you’re logged in. And if other services act up after the fix, you may need to learn how to properly restart services in Linux to get everything running smoothly again.
Fixing Ownership and Permission Problems
What about when a drive mounts just fine, but nobody can write to it? This is almost always a permissions issue. By default, when you mount a fresh filesystem, its root directory belongs to root:root, locking everyone else out.
The fix is simple: change the ownership of the mount point after the drive is mounted. Just use the chown command to hand over control to the right user and group.
sudo chown username:groupname /mnt/data
This one command resolves those maddening “access denied” errors and lets your apps and users get back to work. It’s a standard step we perform on all dedicated server and private cloud deployments managed by ARPHost to ensure everything works out of the box.
Ready for a hosting environment where experts handle these details for you? Request a managed services quote and let our team build a reliable foundation for your business.
Scaling Your Storage with ARPHost Managed Solutions
Knowing how to mount a drive in Linux is a fantastic technical skill, but let’s be honest—managing an entire storage infrastructure for a growing business is a whole different beast. The commands and config files are just the starting line. Real-world reliability comes from proactive management, constant performance tuning, and making sure best practices are hammered into every server, every time.
This is where turning to an expert makes all the difference. Our managed services at ARPHost take storage from a manual, time-consuming chore and transform it into a fully supported foundation for your applications. Instead of losing your nights troubleshooting fstab entries or diagnosing I/O bottlenecks, you get to focus on actually growing your business.
From Single Drives to Private Clouds
For businesses just getting their footing, our High-Availability VPS plans are the perfect entry point. Our team handles everything from the initial disk setup to secure, optimized mounting. We apply performance-enhancing options right out of the gate, so your server is primed for real production workloads from day one.
Of course, as your needs grow, a single VPS might not cut it anymore. That’s where our Dedicated Proxmox Private Clouds come in, offering the next level of raw power and isolation. These are high-performance, single-tenant environments with fully managed storage, giving you all the benefits of dedicated hardware and full root access without any of the management headaches. We build, secure, and maintain the storage layer so you can scale up without a second thought.
In the fast-paced world of managed hosting, mounting a drive isn’t just a task—it’s a critical component of server stability. In fact, one sysadmin survey revealed that disk I/O issues are responsible for a staggering 35% of all server performance complaints. Proactive management is the only way to get ahead of those problems. You can read more about disk monitoring insights to see the full impact.
Why ARPHost Excels Here
When you partner with ARPHost, you’re getting more than just a server; you’re getting an optimized storage foundation engineered for growth. We bridge the gap between knowing the commands and having a professionally managed infrastructure that just plain works.
- Proactive Monitoring: We don’t sit around waiting for a drive to fail. Our team actively monitors disk health, performance, and capacity to squash issues long before they can impact your services.
- Expert Configuration: From picking the right filesystem to tweaking advanced mount options, we tailor storage setups for your specific workload, whether it’s a high-traffic database or a massive file archive.
- Seamless Scalability: Need to upgrade a VPS or expand your private cloud? We manage the entire storage expansion process to ensure zero disruption to your operations.
Stop wrestling with storage and start building your business. Explore our fully managed IT services and let our experts handle the heavy lifting of your infrastructure.
Common Questions About Mounting Drives
We’ve walked through the fundamentals of mounting drives in Linux, but in my experience, a few questions always come up. Let’s tackle the most common ones with some quick, practical answers.
What’s the Real Difference Between a Device Name and a UUID?
It’s tempting to use a simple device name like /dev/sdb1 because it’s short and easy to type. But trust me, that convenience will bite you in a production environment. Those names are not guaranteed to stick. After a reboot, especially if you add or remove drives, /dev/sdb1 could suddenly become /dev/sdc1, and your server will fail to boot because it can’t find its files.
A UUID (Universally Unique Identifier), on the other hand, is burned into the filesystem itself. It’s a permanent address that never changes, ensuring you always mount the exact partition you intend to. For any serious setup, from a single VPS to a multi-node Proxmox private cloud, using UUIDs in /etc/fstab isn’t just a best practice—it’s the only reliable way to do things.
How Can I Check All My Mounted Filesystems?
If you just need a quick, easy-to-read summary of what’s mounted and how much space is left, df -h is your best friend. The -h makes the output “human-readable,” showing sizes in Gigabytes instead of cryptic blocks. It’s perfect for a daily health check.
For a deeper dive, you’ll want more detail. The plain mount command or the cleaner findmnt command will show you everything—the device, the mount point, and all the specific options it was mounted with. These are indispensable when you’re troubleshooting a problem and need to see the exact configuration.
Can I Actually Mount a Windows Share on My Linux Server?
You absolutely can, and it’s a common requirement. To connect to a Windows (SMB/CIFS) share, you first need to get the right tool for the job. On most distributions, this means installing the cifs-utils package.
Once that’s installed, you can use the mount -t cifs command, pointing it to the network path of the share and providing your credentials. Even better, you can add the network share directly into your /etc/fstab file. This makes the connection persistent, so it automatically reconnects after a reboot—a must-have for any application that depends on that shared storage.
Properly managing storage is the bedrock of a reliable server. At ARPHost, our managed services and hosting solutions are built on these exact industry best practices, guaranteeing your infrastructure is stable and performant from the get-go. Let our experts handle the backend complexities so you can stay focused on your business. Explore our Secure VPS Bundles at arphost.com/vps-web-hosting-security-bundles/.