

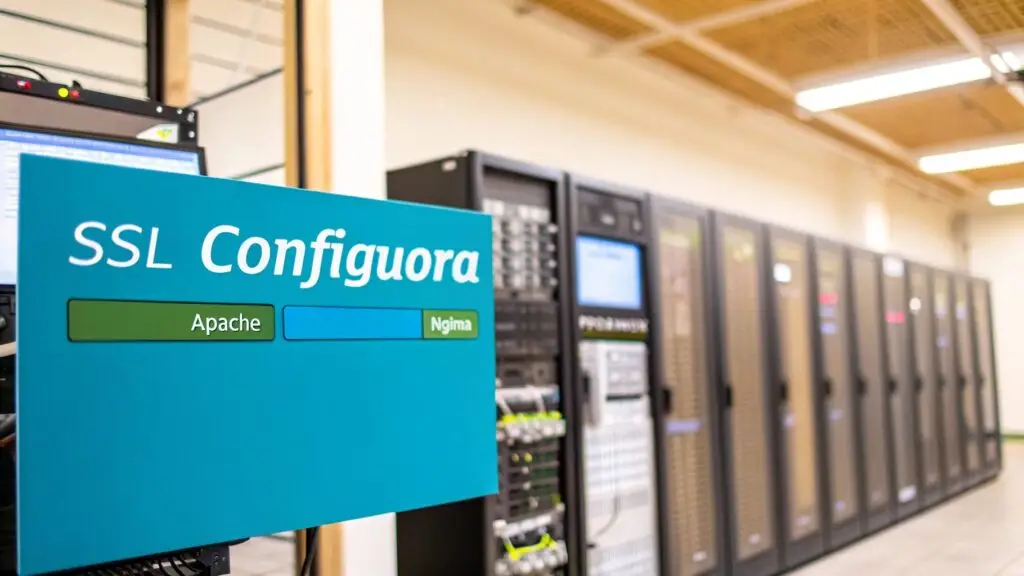
Configuring an SSL certificate involves three core technical steps: generating a Certificate Signing Request (CSR), obtaining the certificate files from a trusted Certificate Authority (CA), and installing those files on your web server. This process is fundamental to establishing an encrypted channel between your server, whether it’s a bare metal instance, a VM in a Proxmox cluster, or a cloud server, and a user’s browser.
Why Proper SSL/TLS Configuration is a Foundational Security Requirement

Before executing any commands, it is critical for system administrators to understand the why behind SSL/TLS. Whether managing a single virtual server or a complex Proxmox VE private cloud, a proper setup is about more than displaying a padlock icon in the browser. It’s about establishing a cryptographic chain of trust that validates your server’s identity and protects the integrity of user data in transit.
Misconfiguration can lead to browser security warnings, a severe loss of user trust, and exploitable security vulnerabilities. The process relies on several key components you will manage directly:
- Private Key: A secret cryptographic key that must never leave your server. It is used to decrypt all information encrypted with its public counterpart.
- Certificate Signing Request (CSR): An encoded block of text containing your organization’s details and public key. You submit this to a Certificate Authority (CA) to request your official certificate.
- Certificate File (.crt, .pem): The official SSL certificate issued by the CA. It contains your public key and is presented to browsers to initiate a secure TLS session.
The Business Case for Secure Configuration
A correctly implemented SSL certificate directly impacts business operations and security posture. It serves as the primary defense against man-in-the-middle (MitM) attacks, where a third party attempts to intercept and alter communications. Beyond this foundational security, it builds user confidence, leading to higher engagement and conversion rates. Search engines also provide a tangible SEO boost to HTTPS-enabled sites.
The data underscores this importance. As of June 2025, 88.08% of websites have adopted HTTPS, yet a significant number still exhibit vulnerabilities due to improper setup. The demand for secure connections is driving the certificate authority market, which is projected to grow from USD 208 million in 2025 to USD 354 million by 2030.
Choosing the Right Certificate Validation Level
Not all certificates provide the same level of assurance. The key difference lies in the rigor of the CA’s vetting process.
- Domain Validated (DV): The most basic and common type. The CA only verifies control over the domain name. It’s ideal for blogs, personal sites, or internal services—such as a Proxmox VE management interface—where simple encryption is the primary objective.
- Organization Validated (OV): This level requires the CA to verify the legal identity of the organization. It provides a higher level of trust, making it a solid choice for business and e-commerce websites where demonstrating corporate identity is crucial.
- Extended Validation (EV): The highest level of validation, involving a strict vetting process of the organization. While modern browsers have deprecated the “green bar” indicator, an EV certificate still offers the highest possible assurance and is a standard for financial institutions and large enterprises.
While SSL is a critical component, it is just one part of a comprehensive security strategy. Mastering software development security best practices provides a broader context, showing how SSL fits into a defense-in-depth approach to securing your entire infrastructure stack.
Generating a CSR and Selecting a Certificate Authority
With the fundamentals established, the first practical step is generating a Certificate Signing Request (CSR). This is the formal application for your server’s digital identity, containing your public key and organizational details, which you submit to a Certificate Authority (CA).
On nearly every Linux-based virtual server or bare metal machine, the industry-standard tool for this task is OpenSSL. A single command generates both your private key and the corresponding CSR.
Creating the CSR with OpenSSL
SSH into your server to execute the following command. This command creates a new 2048-bit RSA private key (yourdomain.key) and its associated CSR (yourdomain.csr).
The -nodes flag is critical; it instructs OpenSSL not to encrypt the private key with a passphrase. This is best practice for web servers like Apache and Nginx, as it allows them to restart automatically without requiring manual password entry, preventing service interruptions after a reboot.
Execute this command in your terminal:
openssl req -new -newkey rsa:2048 -nodes -keyout yourdomain.key -out yourdomain.csr
Upon execution, OpenSSL will prompt for information to be embedded into the certificate’s “Distinguished Name” (DN).
- Country Name (2 letter code): The two-letter ISO code for your country (e.g., US, CA, GB).
- State or Province Name: The full name, e.g., “California”.
- Locality Name (eg, city): The city where your organization is legally registered.
- Organization Name (eg, company): Your full, legal company name.
- Organizational Unit Name (eg, section): A relevant department, such as “IT” or “Web Security”.
- Common Name (e.g. server FQDN or YOUR name): This is the most critical field. It must be the exact Fully Qualified Domain Name (FQDN) you intend to secure, such as
www.yourdomain.comorpve.yourdomain.com. An incorrect entry will cause browser trust errors. - Email Address: An administrative contact email address.
Leave the optional “challenge password” blank by pressing Enter.
Selecting a Certificate Authority
With your CSR file ready, the next step is to choose a Certificate Authority to sign it. This decision depends on your technical requirements, budget, and the level of trust you need to convey. The degree of control your hosting environment provides, such as a KVM-based virtual server, enables more automation options. Understanding the differences between shared hosting vs. VPS can provide valuable context for selecting a suitable CA.
Here is a comparison of popular choices:
| Certificate Authority | Key Feature | Best For |
|---|---|---|
| Let’s Encrypt | Free, trusted, and fully automated with ACME clients like Certbot. | Development servers, internal tools (e.g., Proxmox VE), APIs, and any project where automation and cost-effectiveness are priorities. |
| DigiCert | Premium CA offering high-assurance OV/EV certificates, enterprise-grade support, and advanced management platforms. | E-commerce sites, financial institutions, and enterprise applications where verified organizational trust is a non-negotiable requirement. |
| Sectigo | Offers a broad spectrum of certificates, from DV to EV, often at competitive price points. | Small and medium-sized businesses that require a trusted brand and a balance between features and cost. |
Best Practice: For most managed deployments on virtual servers and private clouds, Let’s Encrypt is an excellent and highly recommended solution due to its robust automation capabilities. However, for client-facing applications or services where organizational trust is paramount, investing in a commercial OV or EV certificate from a provider like DigiCert is the correct enterprise approach.
Configuring SSL on Apache and Nginx Web Servers
Once the CA has issued your certificate files, the next step is to install them on your web server. This is the critical configuration step where you instruct your web server—typically Apache or Nginx on our managed virtual and bare metal servers—to use the certificate to enable HTTPS and encrypt traffic.
HTTPS is the modern web standard. As of mid-2025, 88.08% of all websites use it. This adoption is largely driven by server administrators configuring SSL certificates from CAs like Let’s Encrypt, which holds a dominant 63.7% market share. The process always begins with a CSR and concludes with the installation of the issued certificate. To explore SSL adoption trends provides a deeper look into the importance of this configuration.
The initial steps to obtain a certificate are universal, regardless of the web server software.

The workflow is straightforward: generate a private key, create a CSR, submit it to a CA, and upon verification, receive the certificate files for installation.
Setting Up SSL on Apache
For Apache, SSL configuration centers on its virtual host files and enabling the mod_ssl module. The process involves pointing Apache to your certificate, private key, and intermediate chain files.
First, enable the SSL module. On Debian-based systems like Ubuntu, this is done with a single command:
sudo a2enmod ssl
With the module enabled, you will edit an existing virtual host file or create a new one to handle traffic on port 443, the standard for HTTPS. These files, typically located in /etc/apache2/sites-available/, define how Apache handles secure requests for your domain.
Below is a minimal SSL virtual host configuration. This block would be placed in a file such as your-domain-ssl.conf:
<VirtualHost *:443>
    ServerName www.yourdomain.com
    DocumentRoot /var/www/yourdomain

    SSLEngine on
    SSLCertificateFile /etc/ssl/certs/yourdomain.crt
    SSLCertificateKeyFile /etc/ssl/private/yourdomain.key
    SSLCertificateChainFile /etc/ssl/certs/yourdomain_chain.pem
</VirtualHost>
Directive Explanation:
SSLEngine on: Enables the SSL/TLS engine for this virtual host.SSLCertificateFile: Points to your main domain certificate file (.crt).SSLCertificateKeyFile: Specifies the location of the private key (.key) generated with the CSR.SSLCertificateChainFile: Points to the intermediate certificate bundle provided by your CA, which is essential for browser trust.
Pro Tip: Never restart Apache blindly after modifying configurations. Always validate the syntax first using
sudo apachectl configtest. If the output is “Syntax OK,” it is safe to restart the service. This simple check prevents configuration-related outages.
Implementing SSL on Nginx
Nginx is equally straightforward, though its configuration syntax differs from Apache’s. SSL directives are placed within a server block in your Nginx configuration files, typically found in /etc/nginx/sites-available/.
You will add a new server block or modify an existing one to listen on port 443 with the ssl parameter, then specify the paths to the certificate and its private key.
This example shows a basic server block configured for HTTPS:
server {
    listen 443 ssl;
    server_name www.yourdomain.com;

    root /var/www/yourdomain;
    index index.html;

    ssl_certificate /etc/ssl/certs/yourdomain.crt;
    ssl_certificate_key /etc/ssl/private/yourdomain.key;
}
Directive Explanation:
listen 443 ssl;: Instructs Nginx to listen for secure connections on port 443.ssl_certificate: This should point to your full certificate chain file. Nginx best practice is to combine your domain certificate and the intermediate certificates into a single.crtfile.ssl_certificate_key: Points to the private key that corresponds to your certificate.
As with Apache, always validate your configuration before reloading the service. Run sudo nginx -t to check for syntax errors. If the test passes, a graceful reload is all that’s needed to apply the changes.
Apache vs Nginx SSL Configuration Directives
While both web servers achieve the same outcome, their directives differ. This reference table translates the essential SSL directives between Apache and Nginx.
| Directive Purpose | Apache Directive | Nginx Directive |
|---|---|---|
| Enable SSL/TLS | SSLEngine on | listen 443 ssl; |
| Primary Certificate | SSLCertificateFile | ssl_certificate |
| Private Key | SSLCertificateKeyFile | ssl_certificate_key |
| Intermediate Chain | SSLCertificateChainFile | (Bundled with primary certificate) |
This table highlights a key difference: Nginx expects a single, bundled certificate file containing the full chain, whereas Apache often uses a separate directive for the intermediate chain. Understanding these distinctions simplifies administration across different environments.
Automating Certificate Renewals with Certbot
With SSL certificate validity periods now at just over one year, manual renewal is no longer a viable strategy; it is an operational risk. An expired certificate is a common cause of service downtime and erodes user trust.
Automation is the non-negotiable solution in modern server management. The industry standard is Certbot, the official client for the ACME protocol, engineered to automate the entire certificate lifecycle.
Certbot communicates directly with CAs like Let’s Encrypt to handle certificate issuance and renewal. For any administrator managing virtual servers, bare metal servers, or private cloud infrastructure, it is an essential tool for maintaining continuous, automated security.
Installing Certbot on Your Server
Certbot installation is straightforward on most Linux distributions. While commands may vary slightly, the objective is to install the core Certbot package and the appropriate plugin for your web server (e.g., Apache or Nginx).
For modern Debian-based systems like Ubuntu 22.04, the recommended installation method is snap. This ensures you are always running the latest, most secure version of Certbot.
sudo snap install --classic certbot
sudo ln -s /snap/bin/certbot /usr/bin/certbot
On RHEL-based systems such as AlmaLinux or Rocky Linux 9, snap is also a reliable choice. Alternatively, Certbot can be installed from the EPEL repository.
After installing the core package, install the plugin for your web server. The plugin allows Certbot to not only fetch a certificate but also automatically modify your Apache or Nginx configuration files to use it. For Nginx, you would install python3-certbot-nginx.
Fetching and Installing Your First Certificate
Once installed, using Certbot is remarkably simple. The client intelligently scans your web server’s configuration to identify hosted domains, and you simply specify which one to secure.
For an Nginx server, the command is as follows:
sudo certbot --nginx -d www.yourdomain.com
Certbot will guide you through a brief setup, asking for an email for renewal alerts and agreement to the terms of service. It then initiates an ACME challenge to verify domain ownership. Upon successful verification, it fetches the certificate, installs it into the appropriate Nginx server block, and optionally configures an HTTP-to-HTTPS redirect.
The ACME challenge is the mechanism by which the CA verifies your control over a domain, often relying on DNS records. A foundational understanding of how DNS propagation works is beneficial, as delays in propagation can occasionally affect the verification process.
Verifying and Testing Automated Renewals
Certbot’s primary advantage is its automated renewal capability. Upon the first successful run, Certbot adds a cron job or systemd timer to your system. This scheduled task executes certbot renew periodically, checking all managed certificates and automatically renewing any that are approaching expiration.
This feature is enabled by default. However, it is a best practice to verify its functionality. A “dry run” simulates the renewal process without modifying your live certificates, providing confidence that automation is working correctly.
To test your renewal setup, execute this command:
sudo certbot renew --dry-run
A successful dry run confirms that renewals will be handled automatically, preventing service interruptions due to certificate expiration. This “trust but verify” approach is a cornerstone of reliable system administration.
Hardening Your SSL and TLS Configuration

Installing an SSL certificate is only the first step. A default server configuration often supports outdated protocols and weak ciphers, leaving it vulnerable to known exploits. To build a truly resilient infrastructure on your virtual or bare metal server, you must actively harden your SSL/TLS settings. This is where a system administrator’s expertise moves beyond basic setup to fine-tuning the server’s security posture.
Disable Obsolete Protocols
The single most effective hardening measure is to disable old, insecure protocols. This includes SSLv2, SSLv3, TLS 1.0, and TLS 1.1. These protocols are compromised by well-documented vulnerabilities such as POODLE and BEAST. Modern browsers have already deprecated support for them, and your server must do the same.
The objective is to explicitly allow only TLS 1.2 and the current standard, TLS 1.3. This action significantly reduces your server’s attack surface.
Here is how to enforce this in Nginx:
ssl_protocols TLSv1.2 TLSv1.3;
And for Apache:
SSLProtocol all -SSLv3 -TLSv1 -TLSv1.1
This directive instructs Apache to support all modern protocols except for the specified legacy versions, effectively restricting it to current standards.
Define Strong Cipher Suites
A “cipher suite” is the set of algorithms used to secure a network connection. It is critical to prioritize modern, robust ciphers that utilize algorithms like AES-GCM or ChaCha20-Poly1305 and support Perfect Forward Secrecy (PFS).
PFS ensures that if a server’s private key is compromised in the future, an attacker cannot decrypt previously recorded traffic. This is achieved using ephemeral key exchange mechanisms like ECDHE.
A strong cipher suite configuration for Nginx is:
ssl_ciphers 'ECDHE-ECDSA-AES128-GCM-SHA256:ECDHE-RSA-AES128-GCM-SHA256:ECDHE-ECDSA-AES256-GCM-SHA384:ECDHE-RSA-AES256-GCM-SHA384';
ssl_prefer_server_ciphers on;
The ssl_prefer_server_ciphers on; directive is crucial—it forces the server to use its own preferred (stronger) cipher list rather than accepting the client’s potentially weaker preference.
Implement HTTP Strict Transport Security (HSTS)
HTTP Strict Transport Security (HSTS) is a security policy mechanism delivered via a response header. It instructs browsers to communicate with your server only over HTTPS, mitigating protocol downgrade attacks and man-in-the-middle attempts to strip encryption.
Once a browser receives the HSTS header, it will enforce HTTPS for all future requests to that domain for a specified duration, even if a user manually types https://.
Best Practice: Implementing HSTS is a non-negotiable hardening step. It enforces HTTPS at the browser level, creating a more secure user experience and eliminating the risk of accidental insecure connections.
Adding the header is straightforward. In Nginx, add this line to your server block:
add_header Strict-Transport-Security "max-age=31536000; includeSubDomains" always;
This configuration enforces HTTPS for one year (max-age in seconds) and applies the policy to all subdomains.
Implement Additional Security Headers
While HSTS is a powerful start, a fully hardened configuration includes several other security headers to defend against common web vulnerabilities like Cross-Site Scripting (XSS) and clickjacking.
Essential Security Headers for SSL/TLS Environments
This table summarizes key headers to implement alongside your SSL certificate.
| Header | Purpose | Example Value |
|---|---|---|
| Content-Security-Policy | Controls which resources (scripts, images) the browser can load, mitigating XSS attacks. | script-src 'self'; |
| X-Content-Type-Options | Prevents browsers from MIME-sniffing a response away from the declared content-type. | nosniff |
| X-Frame-Options | Protects against clickjacking by controlling whether your site can be embedded in an <iframe>. | SAMEORIGIN |
| Referrer-Policy | Controls how much referrer information is included with requests. | strict-origin-when-cross-origin |
These headers are integral to a modern, defense-in-depth security strategy, working in concert with your SSL certificate to secure your application.
The rise of sophisticated attacks makes these configurations more important than ever. With phishing sites now at 90% HTTPS-masked, a precise configuration of TLS 1.3 ciphers is vital for distinguishing legitimate services from malicious ones. The web’s evolution from 18.5% TLS 1.3 adoption in 2018 to 87.6% in 2024 demonstrates that proper configuration mastery is essential. For more details on these trends, you can review comprehensive SSL statistics and market growth.
Enable OCSP Stapling
When a browser connects to your site, it must verify that your SSL certificate has not been revoked. This online check to the Certificate Authority (CA) can add latency to the initial connection.
OCSP Stapling resolves this. Your server periodically fetches a signed, time-stamped proof of validity from the CA and “staples” it to the TLS handshake. This allows the browser to get the revocation status directly from your server, improving both speed and privacy.
To enable OCSP Stapling in Nginx:
ssl_stapling on;
ssl_stapling_verify on;
ssl_trusted_certificate /path/to/your/fullchain.pem;
Ensure that ssl_trusted_certificate points to your full certificate chain file (your domain certificate plus intermediates).
These are just a few of the necessary steps for a high-performance, secure server. For a more comprehensive checklist, consult our guide on how to secure a web server for additional best practices.
Troubleshooting Common SSL Certificate Errors
Even with a meticulous setup, SSL/TLS configurations can encounter issues. Browser security warnings erode user trust and can disrupt service availability. Fortunately, most SSL errors fall into common, diagnosable categories. Proficiency in troubleshooting is a core skill for any system administrator managing virtual or bare metal server environments.
The first principle of troubleshooting is to gather accurate data before making changes. Use appropriate diagnostic tools to inspect what your server is presenting to the outside world, rather than relying on potentially cached browser information.
Your Essential Diagnostic Toolkit
The primary command-line tool for SSL/TLS diagnostics is openssl. It allows you to connect directly to your server and inspect the certificate it presents.
To perform a quick diagnostic check from your terminal, use this command:
openssl s_client -connect yourdomain.com:443 -servername yourdomain.com
This command initiates a TLS connection and outputs the entire certificate chain and other connection details, providing a definitive view of your server’s configuration. For a more comprehensive, user-friendly analysis, online SSL checkers can provide a detailed report on everything from chain completeness to protocol and cipher support.
Decoding the Certificate Name Mismatch Error
A frequent issue is the “Certificate Name Mismatch” error (e.g., ERR_CERT_COMMON_NAME_INVALID). This error indicates that the domain name in the browser’s address bar does not match any of the hostnames listed in the certificate’s Common Name (CN) or Subject Alternative Name (SAN) fields.
Common causes include:
- The certificate was issued for
yourdomain.combut is being used forwww.yourdomain.com. - The certificate was issued for an entirely different subdomain.
- A single-domain certificate is being used on a server hosting multiple sites (e.g., with Apache Virtual Hosts or Nginx Server Blocks).
The solution is to ensure your certificate covers all required hostnames. Modern best practice is to use a SAN certificate that explicitly lists every valid domain and subdomain.
Solving the Certificate Not Trusted Error
The “Certificate Not Trusted” warning almost always indicates an incomplete certificate chain. Browsers rely on a chain of trust; they must be able to trace a certificate’s lineage back to a trusted root CA through one or more “intermediate” certificates.
If your server fails to provide these intermediates, the browser cannot complete the chain and will flag the connection as insecure. This common configuration error occurs when an administrator installs only the main domain certificate (yourdomain.crt) and omits the intermediate bundle provided by the CA.
Solution: Combine your primary certificate with the intermediate CA bundle into a single file (often named
fullchain.pem). Configure your web server to use this combined file. This ensures the entire chain is presented to the client, allowing for correct validation.
Addressing Mixed Content Warnings
Mixed content warnings occur when a page loaded over HTTPS attempts to load resources (such as images, scripts, or stylesheets) over unencrypted HTTP. While the main page is secure, these insecure elements create a vulnerability that modern browsers will flag or block entirely, often breaking site functionality.
The fix for this issue lies not in your server’s SSL configuration but in your application’s source code and content. Conduct a thorough audit to ensure that every asset—images, stylesheets, JavaScript files, API endpoints—is loaded using https://. This issue is common immediately after you configure an SSL certificate and migrate a site to HTTPS. Your browser’s developer console is the best tool for identifying which resources are being loaded insecurely.
Common SSL Configuration Questions Answered
The following are answers to common questions system administrators encounter when they configure an SSL certificate.
How Do I Secure Multiple Subdomains with a Single SSL Certificate?
The most effective methods are using a Wildcard Certificate (e.g., *.yourdomain.com) or a Subject Alternative Name (SAN) certificate. While a wildcard secures all subdomains at a single level (e.g., api.yourdomain.com, blog.yourdomain.com), a SAN certificate offers greater flexibility.
A single SAN certificate can protect a combination of different domains and subdomains, such as:
www.yourdomain.comapi.yourdomain.compve.yourdomain.comanothersite.net
This versatility makes SAN certificates ideal for complex environments. Let’s Encrypt provides full support for SAN certificates at no cost, making it the default choice for most multi-domain setups on virtual or bare metal servers.
What Is the Difference Between a PEM and a CRT File?
The .pem (Privacy Enhanced Mail) and .crt (Certificate) extensions can be confusing. Both are used for Base64 ASCII encoded certificate files, but their contents can differ.
A .crt file typically contains only the end-entity (your server’s) certificate. A .pem file, however, is a container format that can hold the entire certificate chain—the server certificate, any intermediate certificates, and even the private key—all concatenated into one file.
Web servers like Nginx and Apache are often configured to use the
.pemformat. Bundling the server certificate and the intermediate chain into a single file simplifies configuration directives and reduces the likelihood of chain-related trust errors.
Can I Use a Self-Signed Certificate for a Production Server?
No. Using a self-signed certificate in a live production environment is a critical misstep. Although it provides encryption, it is not issued by a trusted Certificate Authority (CA).
Consequently, every browser and client connecting to the server will display a prominent security warning, which immediately destroys user trust. Self-signed certificates should be used strictly for closed, internal development or testing environments where the certificate can be manually added to the local trust store of each client machine.
For any public-facing service or critical internal system—from a customer portal to a Proxmox VE management interface—always use a certificate issued by a trusted public CA.
At ARPHost, LLC, we provide the high-performance infrastructure and expert support you need to manage secure, reliable services. Whether you’re deploying a single VPS or a complex private cloud, our solutions are built to scale with you. Explore our managed and unmanaged hosting options at https://arphost.com.