

Your project usually doesn’t start with “I need a home data center.” It starts with friction. A developer has too many local VMs on a workstation. A small business has outgrown shared hosting and a NAS in the closet. A team wants a safe place to test Proxmox, Docker, CI runners, internal apps, or a database replica without pushing everything straight into production.
That’s when a home data center becomes more than a hobby. It becomes a controlled environment for learning, staging, self-hosting, backup services, private cloud experiments, and sometimes production-adjacent workloads that need more stability than a laptop can offer.
The appeal is obvious. You get root access, hardware you chose, and a platform you can shape around your actual workloads. You can run KVM virtual machines, LXC containers, a firewall appliance, a backup target, and a small storage cluster under one roof. You also get immediate feedback on what good infrastructure requires.
That last part matters. Once you move from a single machine to dedicated server hardware, consumer assumptions stop working. Power quality matters. Noise matters. Airflow matters. Security matters. So does the question most guides skip: whether your house is the right place for a system that behaves more like a small server room than a desktop.
Beyond the Laptop Why Build a Home Data Center?
A serious home data center usually appears when one of three things happens.
First, development outgrows a single machine. You need one VM for a database, another for an app stack, a container host for CI jobs, and a sandbox for updates. Rebuilding all of that on a laptop after each failure gets old fast.
Second, an SMB needs private infrastructure. Maybe you host internal dashboards, file sync, a VoIP component, or a line-of-business application that shouldn’t live on a consumer PC under someone’s desk. You want something cleaner, segmented, and easier to back up.
Third, you’re building skills that transfer to production. Running Proxmox, storage, VLANs, firewall policy, and backup tooling at home is one of the best ways to learn what breaks in real environments.
What counts as a home data center
In this context, it’s not just one gaming PC with extra RAM. It’s a small but intentional stack of infrastructure:
- Dedicated compute such as a tower server, refurbished rack server, or purpose-built host
- Centralized storage using local disks, a NAS, or storage attached to a hypervisor
- Reliable networking with managed switching, wired uplinks, and segmentation
- Protected power through UPS capacity and sane shutdown behavior
- Operational discipline around backups, patching, and monitoring
A home data center is useful when it reduces operational chaos. If it adds chaos, it’s just expensive clutter.
Good reasons to build one
Some workloads fit well at home. Lab environments, test platforms, backup targets, build runners, low-risk internal services, and learning clusters all make sense when you control expectations.
A home setup also helps you understand trade-offs you won’t see in cloud-only work. You learn why idle draw matters, why cable layout affects heat, and why one failed fan can turn into a stability issue if the room itself has no cooling plan.
Still, the best home data center projects start with restraint. Build for the workload you have, not the rack photo you saw online. That usually leads to a quieter, safer, and more maintainable environment.
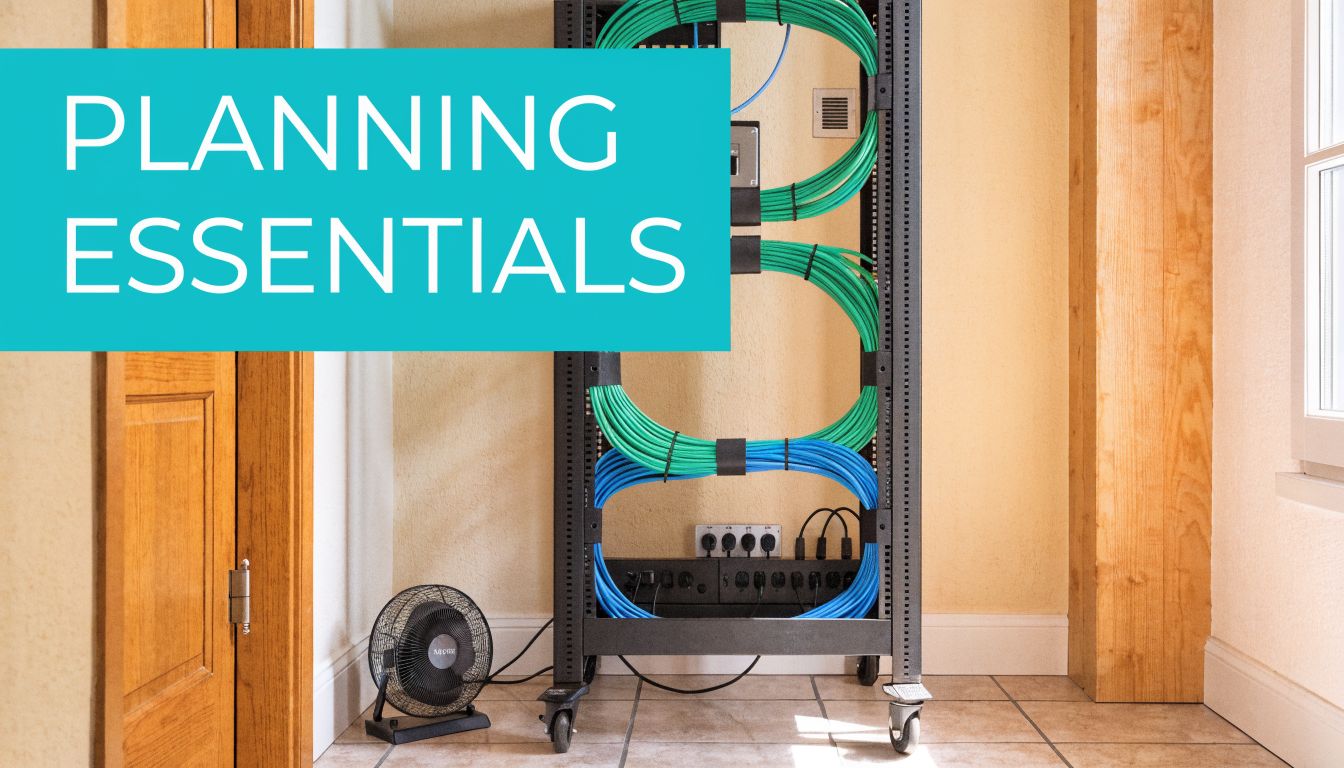
Architecting for Success Planning Power, Cooling, and Networking
Most failed home data center builds fail before the first server boots. The problem isn’t the CPU choice. It’s a weak foundation. People buy hardware first, then try to fit power, cooling, and networking around it.
That order creates bad systems. In designing a home data center, a step-by-step power system methodology matters because it starts with architecture, removes single points of failure, uses modular UPS systems for scalability, and integrates redundant power for higher uptime. Designs that integrate power and cooling from the start report 40% lower Total Cost of Ownership over 10 years according to this data center design guidance.
Start with power topology
A home lab becomes unreliable when every device depends on one wall outlet and one consumer power strip. Treat power like infrastructure.
Use this sequence:
Define critical workloads first
Decide what must stay online during a brief outage. A firewall, core switch, storage box, and one hypervisor node may be essential. A GPU test bench probably isn’t.Map loads to circuits
Separate steady server load from bursty devices like workstations or lab gear. Keep enough headroom so normal operation doesn’t sit near the limit of the circuit.Add UPS protection where shutdown order matters
A good UPS isn’t just battery runtime. It gives you clean shutdown behavior for hypervisors, storage, and network gear. Modular UPS choices make expansion easier than replacing a too-small unit later.Remove obvious single points of failure
If one switch, one PDU, or one UPS failure drops the entire stack, the design isn’t ready.
Practical rule: Buy your electrical protection after you’ve mapped the architecture, not before.
Whole-home electrical resilience matters too. If you’re running sensitive gear in a residential setting, this guide to surge protection for home is a useful companion to server-side UPS planning.
A related concept is network redundancy. If you want a clean primer on where redundancy helps and where it adds pointless complexity, this overview of network redundancy is worth reviewing before you add more switches and links than your environment needs.
Cooling has to be intentional
Cooling is where many home builds become uncomfortable to live with. Servers don’t care that they’re in a spare bedroom. They still dump heat into the room, and that room has to shed it somewhere.
Treat the room like part of the design:
- Choose the room carefully. Basements and utility rooms are usually better than bedrooms or shared offices.
- Keep front-to-back airflow clear. Don’t rotate one chassis sideways because it fits the shelf better.
- Avoid recirculation. Hot exhaust should not feed right back into server intakes.
- Leave service space. You need room for cable access, drive replacement, and cleaning.
If the room already runs warm in summer, your future rack won’t improve it. You may need dedicated ventilation, better room AC control, or a smaller deployment than you first planned.
Plan the network like a production environment
A home data center should be wired first. Wireless is fine for client devices. It’s not where you want your hypervisors, storage traffic, or backup flows.
A basic design usually includes:
| Layer | What to plan |
|---|---|
| Core switching | Managed switch with VLAN support and enough ports for growth |
| Firewall | Policy control between WAN, user LAN, lab VLANs, and management networks |
| Management access | Separate admin path for hypervisors, IPMI, and switches |
| Backup path | Predictable route for backup traffic that doesn’t fight user traffic |
Keep the topology simple enough that you can explain it from memory. If you can’t describe which systems depend on which switch or UPS, you’ve already built too much too soon.
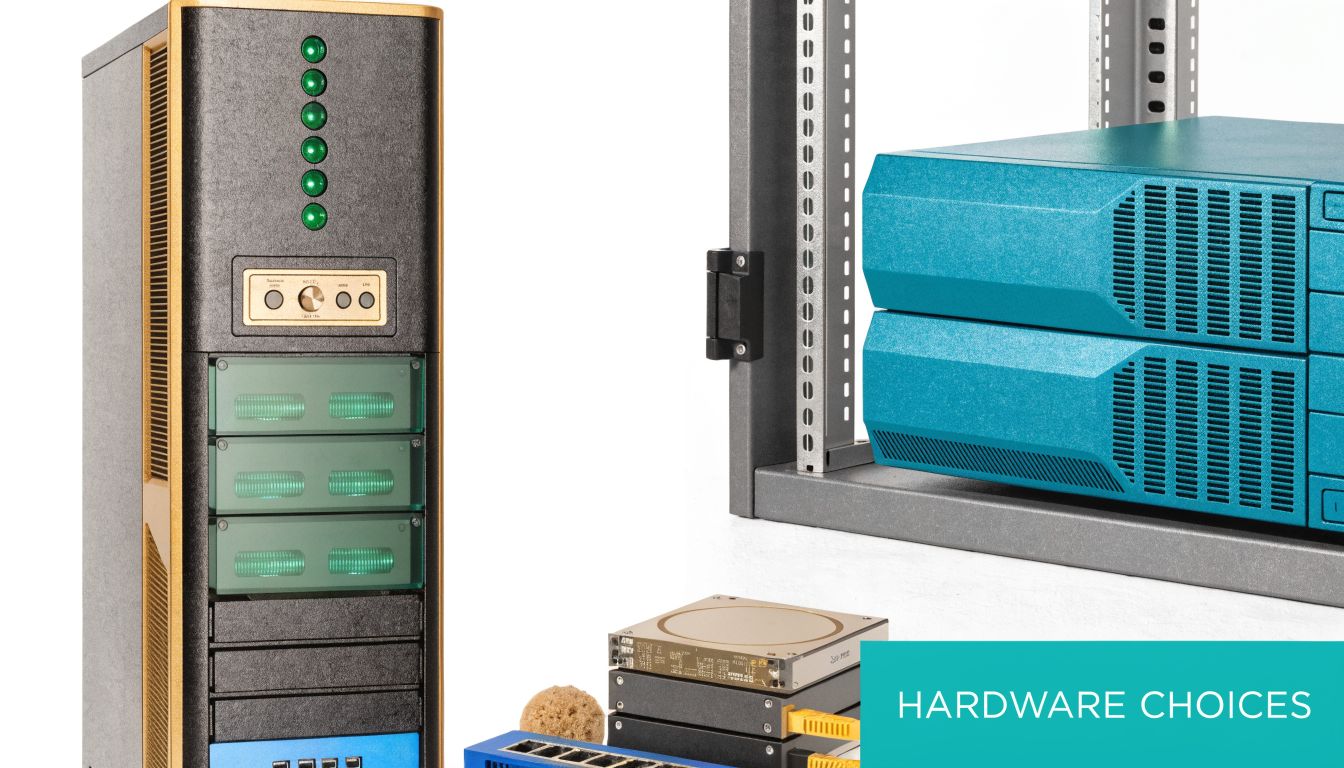
Choosing Your Hardware Servers, Storage, and Network Gear
Hardware selection is where people either save the build or sabotage it. The right gear fits the workload, the room, and the maintenance burden you’re willing to accept. The wrong gear looks impressive on day one and becomes an annoying heater with screaming fans by week two.
Server form factor choices
A tower server is often the best starting point for a serious home data center. It’s easier to place, usually quieter, and less demanding in rooms without rack-grade airflow. If your main jobs are virtualization, backup, file services, and a few internal apps, a tower can be the most practical choice.
Rack servers make sense when density, remote rails, shared rack accessories, or standardized parts matter more than acoustics. Refurbished enterprise rack gear can be attractive, but be honest about the trade-off. You may get strong compute value and enterprise boards, but you also inherit older power supplies, older fans, and noise levels that many homes can’t tolerate.
Custom whitebox builds give you flexibility. They also shift support, firmware sanity, and parts compatibility onto you.
Used enterprise gear is cheap for a reason. It was designed for server rooms, not spare bedrooms.
Match hardware to workloads
Pick hardware by workload profile, not by brand loyalty.
- Virtualization hosts need CPU cores, RAM capacity, and storage paths that won’t bottleneck multiple guests at once.
- Database and cache nodes benefit from fast storage and predictable latency.
- Backup servers want capacity, sensible redundancy, and quiet reliability more than flashy CPU specs.
- GPU or AI test rigs create a very different power and thermal problem than standard VM hosts.
A common mistake is buying compute-heavy gear with too little memory. In small private clouds, RAM usually becomes the constraint before CPU does.
Storage decisions that age well
Storage design shapes your experience more than is commonly thought. The usual options are NAS, DAS, or a hyperconverged layout.
NAS versus DAS versus hyperconverged
A NAS keeps storage separate from compute. That’s useful when you want one central target for backups, media, shared files, or VM images. It also makes maintenance easier because storage can evolve independently.
DAS keeps disks attached directly to the host. That’s simple and often fast. It’s a good fit for a single Proxmox node or a compact lab where you don’t need networked storage behavior.
A hyperconverged approach folds compute and storage into the same cluster. In Proxmox environments, people often pair this thinking with shared or clustered storage designs. It’s powerful, but it raises the operational bar. Clustered storage at home can be excellent for learning, but it’s not automatically the best answer for a small environment.
If you’re evaluating drive types for a mixed lab or backup node, this quick reference on rack hard drive considerations is a useful starting point for matching bays, density, and serviceability.
Cooling and cable layout should influence the buy list
Cooling isn’t separate from hardware choice. It starts there. For effective cooling, especially at rack densities of 5-15kW, hot and cold aisle containment with blanking plates can cut hotspots by 50%, and raising the supply air setpoint to 77-79°F can yield 30-66% fan energy savings, according to STULZ guidance on data center best practices. The same source notes that poor under-floor cable management obstructed up to 40% of airflow in some audited sites.
You probably don’t have raised floor cooling at home, but the lesson still applies. Airflow loses to clutter. Empty rack spaces need blanking plates. Cable bundles shouldn’t block intake paths. Dense chassis in a shallow closet usually perform worse than fewer systems in open, clean airflow.
What works in real home environments
Here’s a practical way to choose:
| Scenario | Usually the better fit |
|---|---|
| One host, light production, low noise tolerance | Tower server with direct-attached SSD storage |
| Learning enterprise hardware and remote management | Single refurbished rack server in a ventilated rack |
| Heavy backup or file storage focus | NAS plus one compute host |
| Multi-node virtualization lab | Small cluster only if you can power, cool, and monitor it properly |
Network gear deserves more respect
Unmanaged switches are fine for a few desktops. They’re weak tools for a home data center. You want a managed switch that supports VLANs, monitoring, and clean separation between management, storage, and user traffic.
On the edge, a real firewall matters. That could be a dedicated appliance or a VM if you understand the failure domains. If the host that runs your firewall also runs everything else, maintenance windows become awkward quickly. Teams that need stronger policy control often look at business-grade firewalls and switching, including Juniper, because visibility and segmentation matter more than raw port count.
Don’t build around maximum hardware. Build around the amount of hardware you can troubleshoot calmly on a tired Friday night. That’s the gear you’ll keep running.
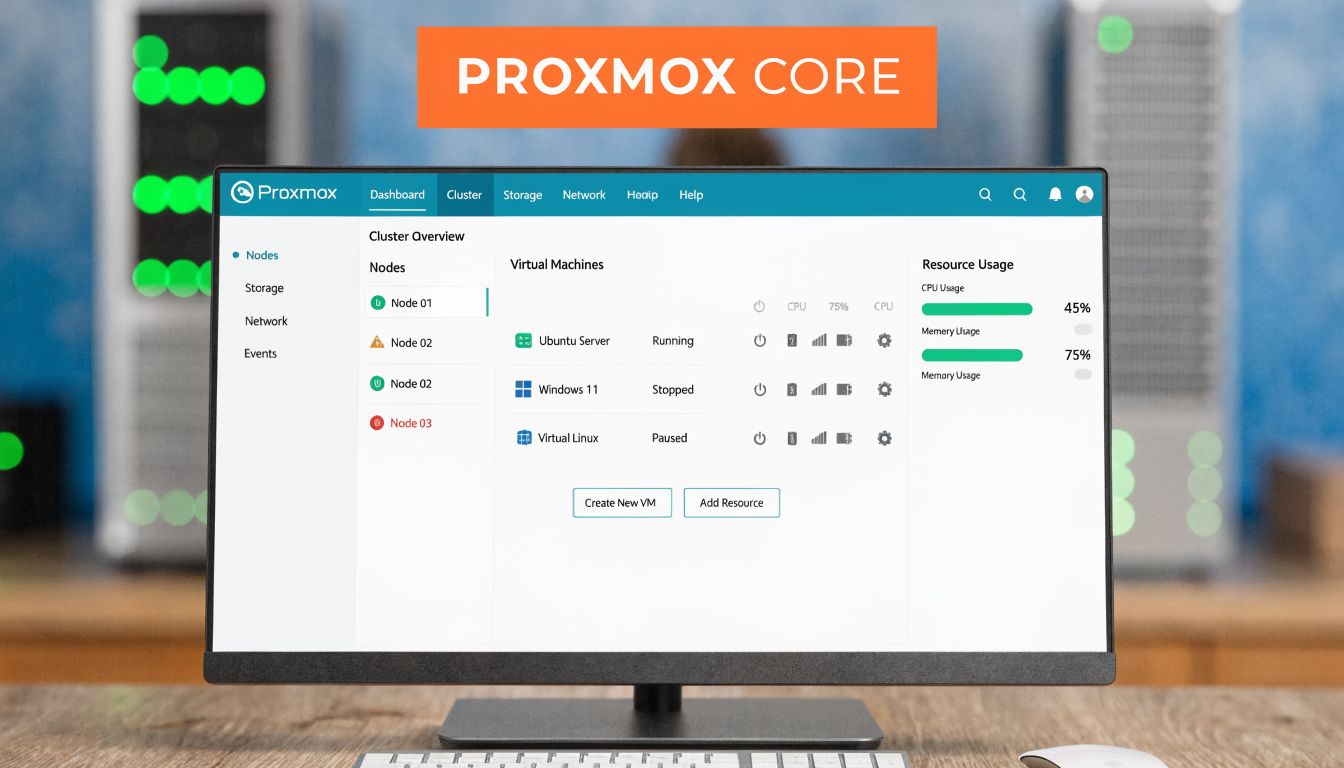
The Software Layer Installing and Configuring Proxmox VE 9
Once the hardware is stable, Proxmox VE 9 is one of the most practical ways to turn a home data center into a real virtualization platform. It gives you KVM virtual machines, LXC containers, storage integration, snapshots, clustering options, backup support, and a web interface that’s good enough for daily use without hiding the Linux underneath.
Install Proxmox cleanly
The smoothest installs happen when you keep the first node boring. One server. Local storage. A straightforward bridge. No cluster until the base platform is healthy.
A typical sequence looks like this:
Prepare installation media
Write the Proxmox VE 9 installer image to USB using a tool you trust.Configure firmware first
Enable virtualization support in BIOS or UEFI, confirm boot order, and update firmware if the platform is behind.Install to the right storage target
Choose storage based on your workload. Fast local SSDs are usually the best first target for VM and container disks in a small build.Set a management address and hostname
Keep naming consistent. Your future self will thank you when you add backup jobs, replication, and monitoring.Log into the web UI and verify health
Before creating guests, check storage visibility, CPU flags, memory reporting, and network bridge status.
Keep the first node simple enough that you can reinstall it without panic.
Build a sane network bridge
Most home data center Proxmox nodes start with a Linux bridge attached to the primary NIC. That lets VMs and containers join the network cleanly.
A common bridge config pattern looks like this:
auto lo
iface lo inet loopback

auto eno1
iface eno1 inet manual

auto vmbr0
iface vmbr0 inet static
    address  YOUR-MANAGEMENT-ADDRESS
    gateway  YOUR-GATEWAY
    bridge-ports eno1
    bridge-stp off
    bridge-fd 0
If you’re trunking VLANs from a managed switch, keep the physical switch config and Proxmox bridge plan documented together. Most networking mistakes in small labs come from losing track of where tagging happens.
For environments that need failover and clustered behavior later, it helps to understand how Proxmox high availability changes storage, fencing, and node design decisions before you start adding more hosts.
Create your first VM and container
Use KVM virtual machines for workloads that need a full kernel, custom drivers, or stronger isolation. Use LXC containers for lightweight Linux services where density and speed matter.
Example KVM VM creation
qm create 101 --name app-vm --memory 4096 --cores 2 --net0 virtio,bridge=vmbr0
qm importdisk 101 /var/lib/vz/template/iso/app-image.img local-lvm
qm set 101 --scsihw virtio-scsi-pci --scsi0 local-lvm:vm-101-disk-0
qm set 101 --boot order=scsi0
qm start 101
That pattern creates a VM shell, imports a disk image, attaches it, and boots it. Adjust memory, cores, and storage target to match the job.
Example LXC container creation
pveam update
pveam available
pct create 201 local:vztmpl/debian-12-standard_12.0-1_amd64.tar.zst
  --hostname web-ct
  --memory 2048
  --cores 2
  --net0 name=eth0,bridge=vmbr0,ip=dhcp
  --rootfs local-lvm:8
pct start 201
That gives you a lightweight Debian container that’s great for internal tools, reverse proxies, or utility services.
After the base install, add storage deliberately. Don’t attach every disk and protocol on day one. Start with local storage, then add NFS, SMB, ZFS, or backup targets only when you know why each layer exists.
A practical walkthrough can help if you want to compare your setup against another engineer’s process.
Configuration habits that prevent pain
A few habits make Proxmox much easier to live with:
- Separate templates from production guests so you can clone clean builds quickly.
- Name storage consistently across nodes if you plan to expand later.
- Use snapshots carefully and don’t treat them as backups.
- Back up the host config and guest data before major upgrades.
- Document VM IDs, VLANs, and storage placement in one place.
A compact starting layout
| Component | Recommended first step |
|---|---|
| Node storage | Fast local storage for active guests |
| Backups | Separate target, not the same volume as production VMs |
| Management | One bridge, clear naming, minimal complexity |
| Guest types | KVM for full OS needs, LXC for lightweight Linux services |
Proxmox scales well, but the best home installs don’t chase complexity for its own sake. They stay understandable.
Securing and Maintaining Your Home Data Center
A home data center becomes risky when the owner focuses on build quality and ignores operating discipline. Security and maintenance aren’t cleanup tasks. They’re the difference between a useful private platform and a noisy liability.
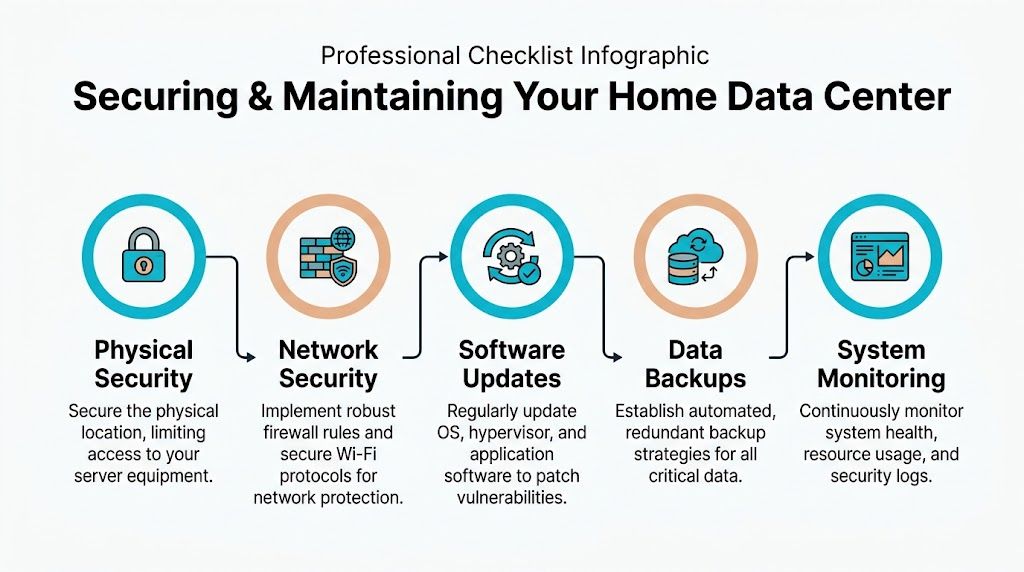
Physical and network security
Physical access is the first control. If the server lives in a shared room, utility closet, or garage with easy walk-in access, assume someone can unplug it, reset it, or remove media. A locking rack or a locked room solves more problems than another software agent ever will.
On the network side, segment aggressively. Put management interfaces on their own VLAN. Keep user devices away from hypervisor management. Keep IoT devices away from everything important. If you run a dedicated firewall, create explicit rules for admin access instead of relying on broad trust between subnets.
A Juniper-style policy mindset works well even if you don’t use Juniper gear: define zones, allow only required flows, and log what matters.
If your phone, smart TV, and hypervisor management interface can all talk freely, the network isn’t segmented. It’s just busy.
Host hardening and patching
Every layer needs updates. That includes firmware, the hypervisor, guest operating systems, containers, storage appliances, and any control panel or web app you expose.
Use a repeatable patch rhythm:
- Schedule maintenance windows so updates don’t happen ad hoc
- Snapshot where appropriate before risky guest changes
- Patch internet-facing services first
- Review release notes for storage and hypervisor updates
- Test one thing at a time in smaller environments
If you host websites or mail-related workloads in adjacent infrastructure, malware protection and account isolation matter too. Tools like Imunify360 are popular for that reason in managed hosting stacks because they reduce the blast radius when one site or user account gets messy.
Backups and monitoring
A snapshot isn’t a backup. A replica isn’t a backup either if it lives in the same failure domain. Use dedicated backup software and separate storage targets. In Proxmox environments, Proxmox Backup Server is the obvious fit because it’s designed for the platform and encourages cleaner recovery workflows.
Monitoring should cover:
- Hardware health such as disk status, fan alarms, and thermal warnings
- Hypervisor capacity including CPU, memory pressure, and storage growth
- Network availability for switch, firewall, and uplink visibility
- Backup success because silent backup failures are common
- Log review for repeated auth failures or unstable services
If you maintain room cooling or ventilation for the setup, basic facilities discipline helps too. This commercial HVAC maintenance checklist is written for a different scale, but the operational thinking applies surprisingly well to dedicated equipment rooms and conditioned server spaces.
Operations note: The quieter the environment, the easier it is to miss a failed fan, rising room temperature, or a backup job that stopped weeks ago. Monitoring has to say it out loud.
Why ARPHost excels here
Teams that don’t want to spend evenings on patch cycles, backup validation, malware cleanup, endpoint protection, and server monitoring usually do better with managed infrastructure. ARPHost’s fully managed IT services fit that model well because the operational burden doesn’t disappear just because the rack sits in your house.
The True Cost When to Choose Colocation or a Private Cloud
DIY infrastructure fans often assume a home data center is automatically the cheaper option. It isn’t. Sometimes it is. Often it’s only cheaper if you ignore your time, your living environment, and the liabilities that come with running business-grade equipment in a residential space.
The hidden costs show up slowly. Power draw creeps into your bill. The room gets hotter than expected. Fan noise becomes the background sound of your office. Then one weekend disappears into replacing a failed SSD, tracing a network issue, or figuring out why a UPS battery test failed.
Residential risk is also real. The rise of home data centers for AI and ML work brings overlooked problems. Home setups can see power bills spike by 20-50% in states like CA, server fans can produce 80-100dB and violate local ordinances, and high-power setups can trigger HOA disputes or voided insurance policies, according to this report on residential impacts around data center demand.
What DIY really asks from you
A home deployment means you own all of this:
| Responsibility | DIY at home |
|---|---|
| Power protection | You size, buy, test, and replace UPS hardware |
| Cooling | You manage room heat, airflow, and seasonal variation |
| Noise control | You live with it, dampen it, or move it |
| Physical security | You secure the room and equipment yourself |
| Maintenance | You patch, monitor, back up, and troubleshoot |
| Liability | You carry the residential consequences |
That’s fine for a lab. It’s less fine when the workloads become important.
When colocation makes sense
Choose colocation when you already own hardware or need specific hardware control, but your house is the wrong place to run it. Colocation is the right move when you want proper power, cooling, rack space, connectivity, and physical security without giving up ownership of the server.
It’s usually the best fit for:
- Specialized hardware you’ve already bought
- Storage-heavy nodes you don’t want heating your office
- Projects that need better uptime discipline
- Teams that want remote hands instead of home visits to the rack
When bare metal or private cloud is the better move
Choose bare metal when you need dedicated performance and root access, but don’t want to source parts, rack hardware, or worry about fan failures in your spare room. It removes CapEx planning, hardware replacement logistics, and a lot of physical risk.
Choose a private cloud when the primary requirement is virtualization, isolated workloads, and growth without rebuilding the physical platform every few months. For many SMBs and dev teams, this is the cleanest upgrade path from a home lab. You keep the flexibility that made the home build attractive, but move into infrastructure designed for production behavior.
A home data center is a great teacher. It’s a poor landlord for critical workloads.
A practical decision test
Ask four questions:
- Would an outage at home interrupt revenue, delivery, or support?
- Can the room safely handle the heat, sound, and power profile?
- Do you want to spend your own time on hardware and facilities issues?
- Is the goal learning, or is the goal reliable service?
If the answer leans toward reliable service, off-premises infrastructure usually wins. Not because DIY is bad, but because homes aren’t data centers.
Conclusion Your Path from Home Lab to Hybrid Infrastructure
A home data center is one of the best ways to learn infrastructure properly. You get hands-on experience with power planning, hardware selection, Proxmox, segmentation, backups, and the operational habits that separate stable systems from fragile ones.
It’s also where many people discover the limit of DIY. Once workloads become important, residential power, cooling, noise, security, and maintenance stop being side issues. They become business risk.
The smart path isn’t “never build at home.” It’s build at home for the right reasons, then scale out of it before the liabilities catch up. A lab can stay a lab. Production can move to colocation, dedicated servers, or a managed private cloud. That hybrid model usually gives you the best of both worlds: practical control and professional reliability.
If you’re deciding whether to keep building at home or move into infrastructure that’s easier to trust, talk with ARPHost, LLC. Their team can help you choose the right next step, whether that’s a small VPS, dedicated bare metal, colocation for hardware you already own, or a Proxmox-based private cloud with expert support behind it.