

A Linux firewall is the primary security control for a server, meticulously inspecting every packet of data traversing the network stack. The best firewalls for Linux are almost always built on powerful kernel-level tools like the classic iptables or its modern successor, nftables. While these provide incredibly fine-grained control, user-friendly frontends like UFW and Firewalld make management far simpler.
Ultimately, the right tool for the job depends entirely on the architecture you’re protecting, from a single bare metal server to a sprawling private cloud infrastructure. This guide provides the actionable steps and best practices needed to implement robust firewall policies in enterprise environments.
Understanding Linux Firewall Fundamentals
At the core of every Linux firewall is a kernel subsystem called Netfilter. This is not a separate application; it is the central traffic controller built directly into the Linux kernel. Netfilter provides hooks into the networking stack, allowing it to inspect every data packet entering, leaving, or passing through the server, deciding its fate based on a defined ruleset.
The tools IT professionals interact with, such as iptables, nftables, or ufw, are command-line interfaces for configuring this kernel-level engine.
This is a critical distinction for any system administrator. You are not just tweaking a standalone program; you are defining the security policy for the kernel itself. This direct integration is what makes firewalls for Linux incredibly performant and robust, whether you’re running a lightweight virtual server or managing a fleet of bare metal machines. For a deeper analysis of server OS choices, our guide comparing Debian Server vs Ubuntu Server offers valuable technical perspective.
Core Concepts Explained
To effectively implement any Linux firewall, understanding a few foundational concepts is essential. These building blocks work in concert to create a complete security policy:
- Tables: These are containers that group rules based on their general purpose. For example, the
filtertable is dedicated to packet filtering (allow/deny decisions), while thenattable handles Network Address Translation, crucial for routing in private cloud setups. - Chains: Within each table are chains, which are sequences of rules that packets traverse. The most common chains are
INPUT(for packets destined for the server itself),OUTPUT(for packets originating from the server), andFORWARD(for packets being routed through the server, as with a gateway or hypervisor). - Rules: A rule is a single instruction that tells Netfilter what action to take (
ACCEPT,DROP,REJECT) on a packet that matches specific criteria, such as its source IP, destination port, or protocol.
Beyond simple traffic filtering, a well-configured firewall is a cornerstone of effective anti-malware protection on Linux systems. The need for this layered security is undeniable. According to this detailed market research, the global firewall market continues a steep growth trajectory, a direct response to the increasing sophistication of cyber threats against enterprise IT infrastructure.
Choosing the Right Linux Firewall Tool
Selecting the right firewall tool is as critical as defining the rules themselves. The Linux ecosystem offers several powerful options, each providing a different interface to the kernel’s Netfilter subsystem. Your choice should be driven by a balance of technical requirements, ease of management, and the specific needs of your bare metal server, virtual server, or private cloud environment.
The four main tools you will encounter are iptables, the legacy standard; nftables, its modern and more efficient successor; Uncomplicated Firewall (UFW), known for its streamlined syntax; and Firewalld, which excels in dynamic network environments.
Comparing the Core Contenders
Understanding the key differences is the first step toward making an informed decision. While iptables is still prevalent, it is considered a legacy tool for new deployments. Its syntax can become cumbersome, and managing separate rulesets for IPv4 and IPv6 is inefficient. In contrast, nftables unifies both protocols into a single framework with a cleaner syntax and, crucially, atomic rule updates. This “atomic” feature ensures that an entire ruleset is applied at once or not at all, preventing broken, partially-loaded configurations from taking down a production server.
UFW and Firewalld are higher-level abstractions that simplify management. UFW prioritizes simplicity, making it ideal for securing a single web server or virtual machine without requiring deep networking expertise. Firewalld, the default on Red Hat-based distributions, uses a zone-based model that allows for dynamic rule changes without dropping active connections—a critical feature for virtualized environments where services and containers are ephemeral.
Best Practice Recommendation: Do not overemphasize raw performance differences. While pure nftables is technically the most performant, the overhead from UFW or Firewalld is negligible for most enterprise workloads. The deciding factors should be your team’s familiarity with the tool and the operational requirements of the environment.
This flowchart illustrates the fundamental logic every firewall follows.
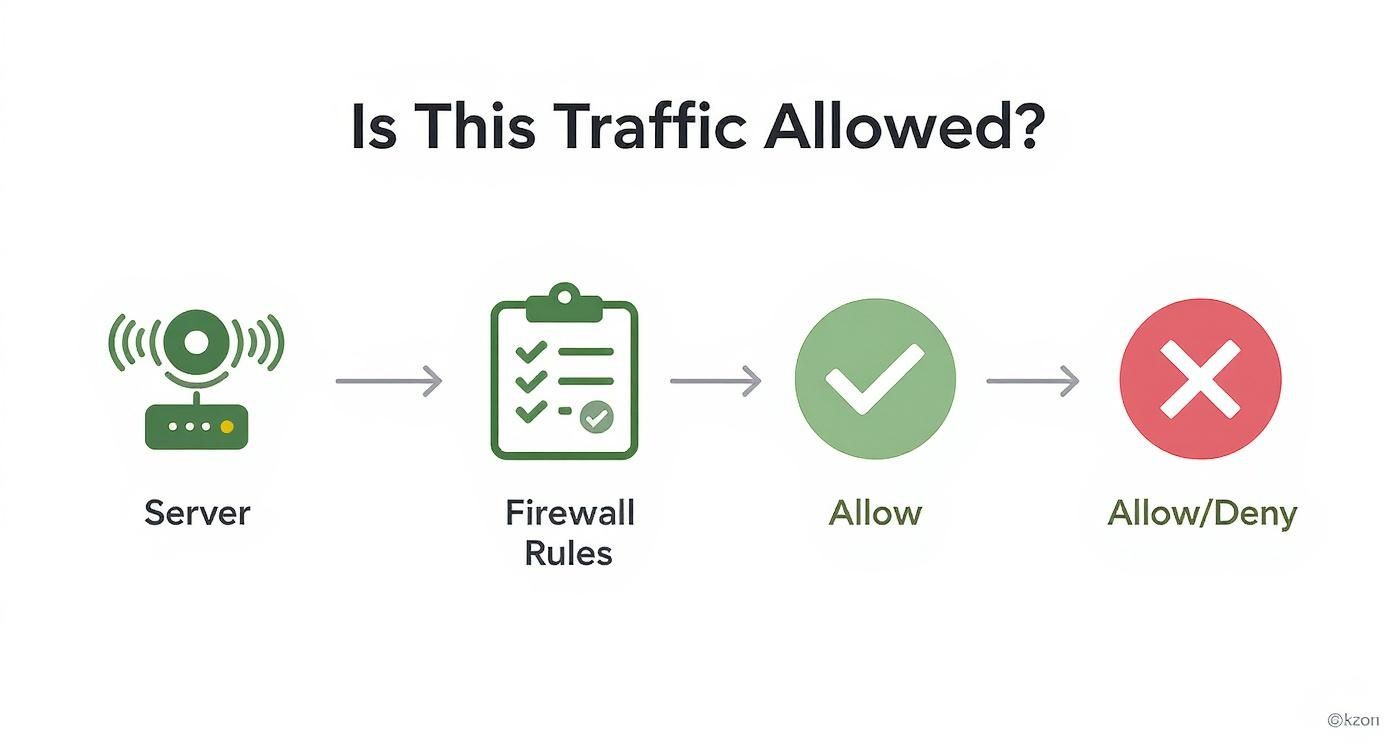
As shown, every packet is evaluated against the ruleset, resulting in an “allow” or “deny” action.
The right tool can make managing this process efficient or error-prone. This comparison table is designed to help IT professionals choose wisely.
Linux Firewall Tool Comparison for IT Professionals
This table provides a high-level comparison of the leading firewall management tools, helping you align the right technology with your specific Linux deployment.
| Tool | Primary Use Case | Syntax Complexity | Dynamic Rules | Best For |
|---|---|---|---|---|
| iptables | Legacy systems, embedded devices | High | No (requires service reload) | Maintaining older servers or environments where it’s already the standard. |
| nftables | Modern, high-performance firewalling | Medium | Yes (atomic updates) | Complex bare-metal servers, hypervisors like Proxmox VE, and custom network appliances. |
| UFW | Simplified host-based security | Low | No (requires service reload) | Single web servers, VPS instances, and developer workstations (Debian/Ubuntu). |
| Firewalld | Dynamic, service-oriented environments | Low to Medium | Yes (live reloads) | RHEL-based servers, private cloud infrastructure, and systems running dynamic container workloads. |
Ultimately, the choice is not about which tool is “best” in absolute terms, but which is optimal for the specific deployment scenario.
Matching the Tool to the Task
The most effective firewall tool is the one that aligns with your specific use case. Here’s a practical breakdown for enterprise environments:
- For a Production Web Server (Ubuntu/Debian): UFW is the recommended choice. Its straightforward commands allow you to secure ports 80 and 443 and implement rate limiting for SSH with minimal complexity, providing robust security without a steep learning curve.
- For a Proxmox VE Host or Complex Bare-Metal Server: nftables offers the granular control necessary for securing a hypervisor. You can craft detailed rules to manage inter-VM traffic, segment networks with VLANs, and handle complex NAT scenarios with maximum performance.
- For a RHEL/AlmaLinux Server in a Private Cloud: Firewalld is the clear choice. Its ability to manage services and apply rules to network zones on the fly is ideal for environments where virtual machines or containers are frequently provisioned and de-provisioned.
- For Legacy Systems or Maintaining Existing Setups: A working knowledge of iptables remains essential. While it should not be used for new deployments, you will inevitably encounter it on older systems. Familiarity with its syntax is required for maintenance and troubleshooting.
Securing Web Servers with UFW: A Step-by-Step Tutorial

For web servers running on Debian or Ubuntu, Uncomplicated Firewall (UFW) provides an optimal balance of power and simplicity. It offers a clean command-line interface that abstracts the complexity of the underlying nftables backend. For rapidly securing a new virtual server or bare metal machine, UFW is the industry-standard tool. Its primary design goal is to provide robust security without requiring extensive manual configuration.
The demand for accessible yet powerful security tools is growing. As Linux continues to gain market share, detailed in reports like this one on Linux security tools over at itsfoss.com, the need for reliable firewalls for Linux that sysadmins can deploy confidently becomes ever more critical.
Initial UFW Setup and Default Policies
The first step in any firewall configuration is to establish a secure baseline. Best practice dictates a default-deny policy for all incoming traffic while permitting all outgoing traffic. This security posture ensures no unexpected ports are left exposed.
- Install UFW: If not already present, install the package using
apt.sudo apt update && sudo apt install ufw - Set Default Policies: Configure the default-deny incoming and default-allow outgoing rules.
sudo ufw default deny incoming
sudo ufw default allow outgoing
These two commands form the foundation of your firewall configuration. All subsequent steps will involve selectively opening only the necessary ports.
Building a Practical Ruleset
With the secure baseline established, you can now add rules to permit legitimate traffic. For a standard web server, this includes SSH for administrative access and HTTP/HTTPS for user traffic.
Allowing SSH Access
CRITICAL: You must allow SSH before enabling the firewall to avoid locking yourself out of the server. For enhanced security, restrict SSH access to a specific, trusted IP address or subnet.
# BEST PRACTICE: Allow SSH from a single trusted IP address
sudo ufw allow from YOUR_TRUSTED_IP to any port 22

# Alternative: Allow SSH from any source (less secure)
# sudo ufw allow ssh
Best Practice Recommendation: Always limit SSH access to known IP addresses. This single action dramatically reduces the attack surface by mitigating automated brute-force attempts from botnets.
Opening Web Server Ports
Next, open the standard ports for web traffic: port 80 (HTTP) and 443 (HTTPS). UFW simplifies this with predefined application profiles.
sudo ufw allow 'Nginx Full'
This single command opens both ports 80 and 443. For more granular control, you could use ufw allow 'Nginx HTTP' or ufw allow 'Nginx HTTPS' individually.
Enabling and Verifying the Firewall
Once the rules are configured, enable UFW and verify the configuration.
- Enable the Firewall: UFW will prompt for confirmation, providing a safety check before altering network connectivity.
sudo ufw enable - Check the Status: Verify that the rules are active and the firewall is enabled.
sudo ufw status verbose
The command output will display the active policies and rules, confirming that your server is now protected. This provides a solid baseline for security, but a firewall is just one component. For a comprehensive approach, review our guide on how to secure a web server.
Mastering Nftables for Advanced Security
When simple port blocking is insufficient, it’s time to leverage the power of nftables. This is the modern, high-performance engine for securing complex environments, such as multi-service bare metal servers or private cloud hypervisors like Proxmox VE. As the successor to iptables, it provides a cleaner syntax, superior performance, and solutions to many of its predecessor’s limitations.
A significant advantage of nftables is its support for atomic rule updates. This is a game-changer for production environments. Instead of applying rules sequentially, nftables applies the entire ruleset in a single transaction. If any part of the new configuration contains a syntax or logic error, the transaction fails, and the existing, functional ruleset remains active. This feature prevents misconfigurations from locking administrators out of their own systems.
Building a Foundational Nftables Ruleset
Getting started with nftables requires understanding its logical structure: tables contain chains, and chains contain rules. A table is a namespace, and a chain is an ordered list of rules that packets must traverse. We will begin by creating a basic structure with a default-deny policy—a core principle of enterprise security.
First, create the configuration file at /etc/nftables.conf. This file will define the entire firewall policy.
#!/usr/sbin/nft -f

# Flush the existing ruleset completely to ensure a clean state
flush ruleset

# Create a table to handle both IPv4 and IPv6 traffic
table inet filter {
    # Define a chain for incoming traffic with a default policy of drop
    chain input {
        type filter hook input priority 0; policy drop;
    }
    # Define a chain for forwarded traffic with a default policy of drop
    chain forward {
        type filter hook forward priority 0; policy drop;
    }
    # Define a chain for outgoing traffic with a default policy of accept
    chain output {
        type filter hook output priority 0; policy accept;
    }
}
This script creates a single table named filter for the inet family (IPv4 and IPv6). It establishes three base chains: input, forward, and output. The default policy is set to drop for incoming and forwarded traffic, while outgoing traffic is trusted and set to accept.
Adding Rules for Essential Services
With a default-deny policy in place, the next step is to add explicit rules to permit legitimate traffic. This typically includes rules to allow established connections and access for essential services like SSH.
We will now enhance the input chain to make the firewall stateful and allow remote administrative access.
- Allow Established Connections: This is the most critical rule for a stateful firewall. It instructs Netfilter to automatically permit return traffic for connections initiated by the server.
- Permit Loopback Traffic: The server requires internal communication via the
localhostinterface for many services. This rule enables it. - Allow ICMP: This permits network diagnostic tools like
pingto function, which is essential for troubleshooting connectivity issues. - Open SSH Port: Port 22 must be opened to allow remote management.
Technical Note: The
ct state established,relatedrule leverages the connection tracking system (conntrack). This is far more efficient and secure than writing discrete rules for return traffic, as it relies on the kernel’s state machine to validate packets.
Here is the updated input chain to be added to your /etc/nftables.conf file:
    chain input {
        type filter hook input priority 0; policy drop;

        # Allow traffic that is part of an established or related connection
        ct state established,related accept

        # Allow all traffic from the loopback interface
        iifname "lo" accept

        # Allow essential ICMP (ping) and ICMPv6 traffic
        ip protocol icmp accept
        ip6 nexthdr icmpv6 accept

        # Allow new TCP connections on port 22 (SSH)
        tcp dport 22 accept
    }
After saving the configuration, apply it with the command sudo nft -f /etc/nftables.conf. This direct, script-based approach provides the granular control required to build highly secure and efficient firewalls for Linux, tailored perfectly for demanding enterprise workloads.
Using Firewalld in Dynamic Environments

In dynamic network environments, such as managed private clouds with frequent VM provisioning or containerized microservice architectures, Firewalld is the superior choice. Its design prioritizes agility, making it the default firewall for RHEL-based systems like AlmaLinux and Rocky Linux.
Firewalld’s core strength lies in its zone-based model. Zones are predefined security profiles (e.g., public, internal, dmz) that can be assigned to a server’s network interfaces. This architecture allows an administrator to change firewall rules or even move an entire interface between zones without reloading the firewall and dropping active connections. For production systems, this capability for zero-disruption changes is critical.
Managing Zones and Services
The primary command-line tool for Firewalld is firewall-cmd. It is used to dynamically manage interfaces and services. For example, an internet-facing network interface would be assigned to the highly restrictive public zone, while an interface connected to a trusted backend network would be assigned to the internal zone.
# Display the default zone assigned to new interfaces
firewall-cmd --get-default-zone

# Move a specific network interface (eth1) to the 'internal' zone
firewall-cmd --zone=internal --change-interface=eth1
This flexibility is invaluable in virtualized platforms like Proxmox VE or VMware. When a new virtual machine is provisioned, its virtual network interface can be programmatically assigned to the appropriate zone, instantly inheriting a complete security policy without manual intervention.
Practical Rule Management with firewall-cmd
Firewalld simplifies rule creation by abstracting port numbers into predefined “services.” Instead of specifying port 443, an administrator can simply allow the https service, which improves readability and reduces the risk of configuration errors.
Here are practical examples of firewall-cmd usage:
- Add a service temporarily: To open HTTPS access in the
publiczone for the current session (rule will be lost on reboot):sudo firewall-cmd --zone=public --add-service=https - Make a rule permanent: To ensure the rule persists across reboots, add the
--permanentflag. This writes the change to the configuration file but does not apply it to the running firewall.sudo firewall-cmd --permanent --zone=public --add-service=https - Reload the firewall: After making a permanent change, reload the firewall to apply it to the live configuration.
sudo firewall-cmd --reload
Best Practice Recommendation: The two-step process for permanent rules is a critical safety feature. It allows you to test new rules in the live configuration. If a rule causes a lockout or disrupts a service, a simple reboot will revert the firewall to its last known-good permanent configuration, restoring access.
The rise of dynamic infrastructure has driven the adoption of new security models. As more organizations build agile private clouds and containerized deployments on Linux, tools like Firewalld become essential. This shift also requires a deep understanding of potential cloud computing security risks and the implementation of appropriate controls.
Common Questions About Linux Firewalls
When implementing firewalls for Linux across diverse environments like private clouds, bare metal servers, or container platforms, several common questions arise. Addressing these is key to developing a security policy that is both robust and manageable. Here are clear, technically-grounded answers for sysadmins and IT professionals.
Should I Use Iptables or Nftables?
For any new server deployment, nftables is the recommended standard. It is the modern successor to iptables, offering a unified syntax for managing both IPv4 and IPv6 rules, superior performance, and atomic rule updates. This atomicity is a critical feature for production systems, as it prevents partial rule application during a reload, which can lead to server lockouts.
While a working knowledge of iptables is still necessary for managing legacy systems, all current development and optimization efforts in the Linux kernel are focused on nftables. Investing time in mastering nftables aligns with the future of Linux network security.
Can a Firewall Run Inside a Proxmox VE Container?
Yes, it is technically possible to run a firewall inside a Proxmox VE LXC container, but it requires manual configuration and is generally not a recommended best practice. By default, unprivileged containers are isolated from the host’s Netfilter stack for security purposes. Enabling firewall functionality within a container requires modifying its security profile and permissions on the Proxmox host.
Industry Best Practice: The recommended approach is to manage all container network policies from the Proxmox host’s firewall. This provides a single, centralized point of control for all virtual machines and containers. This architecture is simpler to manage, easier to audit, and reduces the overall attack surface compared to managing individual firewalls inside each container.
What Is the Performance Impact of UFW or Firewalld?
For the vast majority of enterprise server workloads, the performance impact of using a front-end manager like UFW or Firewalld is negligible and not a factor in decision-making. These tools are merely convenient wrappers that generate rules for the highly optimized Netfilter backend within the kernel. The significant benefits they offer in terms of ease-of-use, reduced complexity, and prevention of human error far outweigh any theoretical microsecond performance gains from using raw rules directly.
The choice should be based on operational requirements:
- UFW is ideal for its simple syntax on single-purpose servers.
- Firewalld excels in dynamic environments like private clouds where services and zones change frequently.
- Raw nftables provides maximum control and is best suited for custom network appliances or complex hypervisor security.
How Do I Make My Firewall Rules Permanent?
Ensuring that firewall rules persist across reboots is a critical final step, and the method varies between tools.
- UFW and Firewalld: These tools manage persistence automatically. Once the service is enabled via
systemctl, any added rules are saved and reloaded on reboot. - iptables: On Debian-based systems, this requires the
iptables-persistentpackage. After installation, the commandnetfilter-persistent savemust be run to write the current rules to a configuration file. - nftables: This is a manual process. The complete ruleset must be saved to
/etc/nftables.conf. Thenftables.servicemust then be enabled withsystemctlto ensure this configuration is loaded at boot time.
Regardless of the tool used, a best practice is to perform a controlled reboot after finalizing the configuration to verify that all rules persist as expected.
At ARPHost, LLC, we provide the high-performance infrastructure and expert support you need to build secure, scalable solutions. Whether you’re deploying bare-metal servers, managing a private cloud, or need reliable VPS hosting, our managed services ensure your systems are protected and optimized. Explore our robust hosting options at https://arphost.com.