


Configuring a static IP in Linux usually means digging into a network configuration file. On modern Ubuntu or Debian systems, you'll be editing a YAML file under /etc/netplan/. If you're on a RHEL or CentOS box, you're more likely to use the nmcli command or tweak the classic ifcfg scripts in /etc/sysconfig/network-scripts/.
The goal is always the same: tell the system to stop asking for an IP via DHCP and instead use the specific address, gateway, and DNS servers you provide. For business-critical infrastructure, from a single VPS to a high-performance Proxmox private cloud, this is not just a best practice—it's a requirement for stability.
Why a Static IP Is Crucial for Your Linux Server
If you're running any service that needs to be consistently available, relying on a dynamic IP from DHCP is like building on quicksand. It's a ticking time bomb.
Imagine your company's web server, database, or remote SSH access point suddenly vanishing from the network. That's exactly what happens when a DHCP lease expires and a new, different IP address is assigned. Instantly, your DNS records are wrong, your firewall rules are useless, and every external connection drops. This translates directly to downtime, lost revenue, and a frantic scramble to figure out what went wrong.
The Foundation of Reliable Infrastructure
A static IP address is the professional standard for any server because it provides a predictable, permanent address. It’s the bedrock of stability, ensuring your services stay online 24/7.
This is non-negotiable for:
- Hosting Web Services: A domain name has to point to a consistent IP. Without a static address, users and search engines simply can't find your site reliably.
- Database and Application Servers: Backend services and APIs depend on stable endpoints. An IP that changes will break the links in your application chain.
- Remote Management: Trying to manage a server over SSH or RDP is impossible if its address is constantly in flux.
- Security and Firewall Rules: Many security policies and access control lists (ACLs) are tied to specific IP addresses. If the IP changes, those rules become completely ineffective.
For any production server, whether it’s a powerful ARPHost Bare Metal Server or a flexible KVM VPS, a static IP isn't just a best practice—it's a requirement for operational stability.
Static IP vs DHCP for Server Environments
For servers, the choice is clear. While DHCP is great for client devices that come and go, it introduces unacceptable risk in an infrastructure environment. A static IP is the industry standard for a reason. Here's a quick comparison to highlight why.
| Feature | Static IP Address | DHCP (Dynamic IP Address) |
|---|---|---|
| Address Stability | Fixed & Permanent | Changes when lease expires |
| Reliability | High | Low; prone to service disruptions |
| DNS Management | Set it and forget it | Requires constant updates (Dynamic DNS) |
| Ideal Use Case | Servers, printers, network hardware | Desktops, laptops, mobile devices |
| Security | Enables precise firewall rules | Makes IP-based security difficult |
| Management | Manual initial setup | Automatic, but less predictable |
The takeaway is simple: DHCP creates unpredictability, which is the enemy of stable server operations. A static IP provides the certainty you need.
Real-World Impact on Business Operations
Think about the real-world consequences. A virtual PBX phone system that suddenly goes offline because its IP changed means failed calls and unreachable support teams. An e-commerce site running on a secure web hosting bundle can't afford an IP switch, as it would sever the connection to its payment gateway at checkout.
By configuring a static IP, you're building a resilient foundation from the start. This proactive step is essential for maintaining high availability and is a core principle of robust system design. It's a concept that extends across your entire network, which you can explore further by understanding what network redundancy is and why it matters.
At ARPHost, our fully managed IT services handle this foundational setup, ensuring your server is configured for stability from day one. This lets you focus on your applications, not your network settings.
Using Netplan for Ubuntu and Debian Systems
If you're working with a modern Ubuntu or Debian server, you'll be using Netplan. It’s the standard for network configuration now, and for good reason. It replaces the old, scattered script files with a clean, predictable YAML-based approach. We'll walk through some copy-paste-ready examples to get your static IP configured correctly in no time.
This simple decision tree really hits home the core principle for any server administrator: if your server needs to be reliably accessed, a static IP isn't just a good idea—it's the only professional choice.
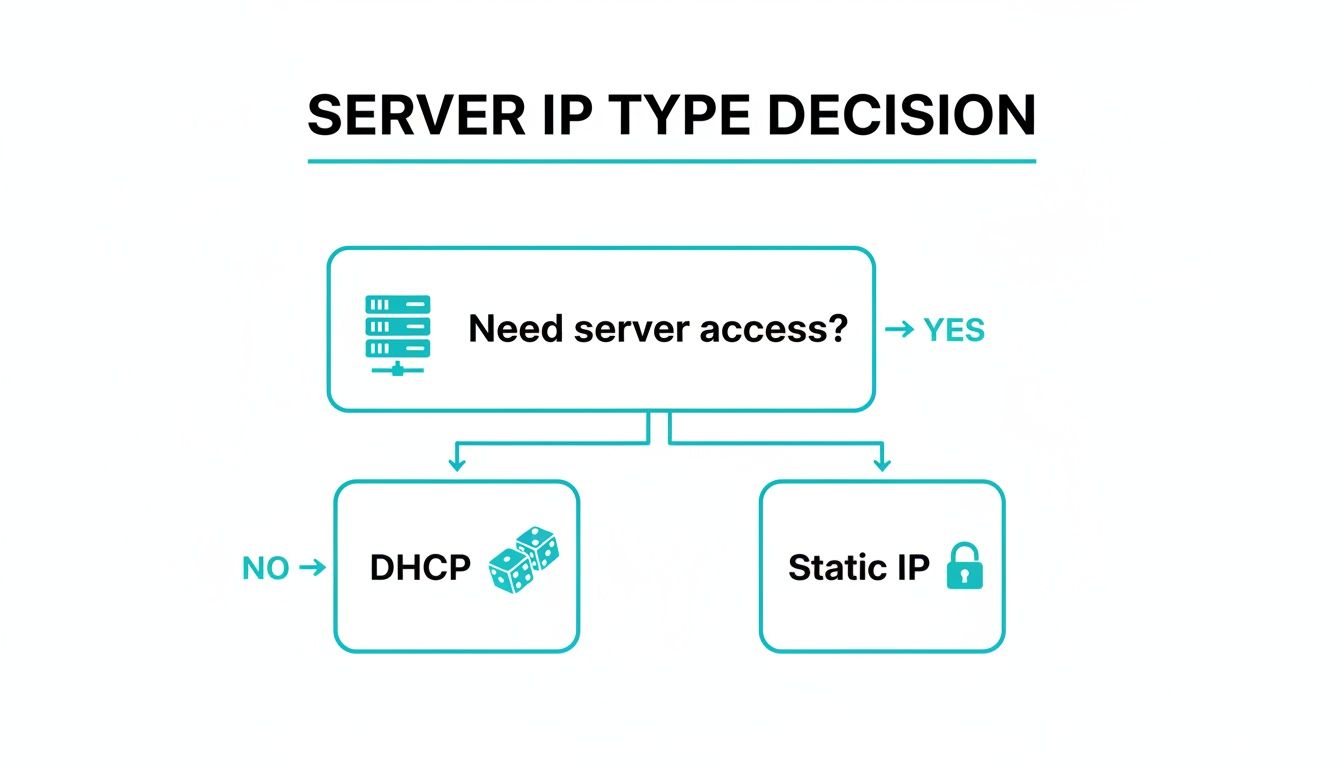
As the chart shows, DHCP is fine for devices that don't need a constant address, but any server providing critical services absolutely demands the stability of a fixed, static IP.
Identifying Your Network Interface
First things first, you can't configure an interface if you don't know its name. Your best friend here is the ip a or ip addr show command.
When you run it, you'll see a list of all network interfaces on your system. You’re looking for a name like eth0, ens18, or enp0s3. Take note of the primary interface connected to your network, as you'll need this exact name for your Netplan file.
Locating and Editing the Netplan YAML File
Netplan keeps its configuration files tucked away in the /etc/netplan/ directory. You'll typically find a file named something like 01-netcfg.yaml or 50-cloud-init.yaml. The system reads these files in order, so the name isn't nearly as important as what's inside it.
Before you touch anything, always make a backup. A single command can save you from a world of hurt.
sudo cp /etc/netplan/01-netcfg.yaml /etc/netplan/01-netcfg.yaml.bak
With your backup safely created, go ahead and open the file with your favorite text editor, whether that's nano or vim.
sudo nano /etc/netplan/01-netcfg.yaml
Crafting Your Static IP Configuration
Now for the main event. Inside the YAML file, you'll define your network settings. A quick heads-up: YAML is incredibly picky about indentation. Always use spaces, never tabs.
Here’s a practical, real-world example for setting a static IPv4 address. Just remember to replace ens18 with your actual interface name and plug in your own network details.
network:
  version: 2
  renderer: networkd
  ethernets:
    ens18:
      dhcp4: no
      addresses:
        - 192.168.1.100/24
      routes:
        - to: default
          via: 192.168.1.1
      nameservers:
        addresses: [8.8.8.8, 1.1.1.1]
Let's quickly break down what this does:
dhcp4: no: This explicitly tells the system not to request an IP address via DHCP for IPv4.addresses: Here, you define the static IP address and its subnet mask using CIDR notation (/24is equivalent to255.255.255.0).routes: This sets your default gateway—the router your server uses to talk to the internet.nameservers: These are the DNS servers your server will use to resolve domain names.
This unified approach is a massive improvement. When Ubuntu made Netplan the default with the 18.04 LTS release, it was a game-changer for sysadmins. It streamlined what used to be a fragmented mess, and some studies on similar tools suggest this kind of structured configuration can cut down on errors by up to 40%.
Safely Applying and Verifying Your Changes
This is the most critical step, and Netplan has a brilliant safety net built right in: netplan try. This command validates your YAML syntax and applies the new settings temporarily. If you don't confirm the change, it automatically rolls back, which is a lifesaver when you're working on a remote server.
sudo netplan try
If the configuration is valid and you can still connect, Netplan will prompt you to press ENTER to make the changes permanent. If something goes wrong, it will revert everything after 120 seconds. This is an essential safeguard, especially when managing secure managed VPS hosting instances where you can't just walk over and plug in a keyboard.
Once you’re sure everything is working, apply the configuration permanently.
sudo netplan apply
Pro Tip: Never, ever run
netplan applyon a remote server without usingnetplan tryfirst. This simple habit is a cornerstone of professional remote system administration and prevents the kind of costly, time-consuming lockouts that ruin your day. For a deeper dive, feel free to check out our complete guide on how to configure a static IP on an Ubuntu server.
Configuring RHEL, CentOS, and Fedora with nmcli
When you're working in the RHEL ecosystem—think CentOS, Fedora, and their derivatives—NetworkManager is the king of the castle. Its command-line tool, nmcli, is the modern, scriptable, and incredibly reliable way to configure a static IP in Linux. Forget manually editing text files; this is how you get it done cleanly.
This approach is a lifesaver for automation and ensures your deployments are consistent, whether you're managing a handful of VMs or a fleet running on one of ARPHost's Dedicated Proxmox Private Clouds. It gives you a level of precision that manual edits just can't touch. Let's walk through the commands to flip a connection from DHCP to static.

Identifying Your Network Connection
First things first, you can't modify a connection until you know its name. NetworkManager doesn't just see physical interfaces; it operates on "connection profiles" tied to them.
To get a list of all your active connection profiles, just run nmcli con show.
nmcli con show
You'll see a list with names, UUIDs, types, and their associated devices. Find the active connection for your main network interface—it's often called something generic like "Wired connection 1" or named after the interface itself, like ens18. That name is your key to the next steps.
Switching from DHCP to a Static IP
Once you have the connection name, you can start tweaking its settings. The goal is to switch the IPv4 method from auto (DHCP) to manual and then provide the IP address, gateway, and DNS servers. The best part? You can chain it all into a single nmcli command, making it perfect for scripts.
Let’s say your connection is named ens18 and you need to apply these settings:
- IP Address: 10.0.2.15/24
- Gateway: 10.0.2.2
- DNS Servers: 8.8.8.8 and 1.1.1.1
Here’s the command that does all the heavy lifting:
sudo nmcli con mod ens18 ipv4.method manual ipv4.addresses 10.0.2.15/24 ipv4.gateway 10.0.2.2 ipv4.dns "8.8.8.8,1.1.1.1"
Let's quickly break that down:
con mod ens18: Tellsnmcliwe're modifying the connection namedens18.ipv4.method manual: Flips the switch from DHCP to a static configuration.ipv4.addresses 10.0.2.15/24: Sets the static IP and subnet mask using CIDR notation.ipv4.gateway 10.0.2.2: Specifies the default gateway.ipv4.dns "8.8.8.8,1.1.1.1": Assigns the DNS servers, separated by a comma.
Just a heads-up: after changing the settings, you have to reactivate the connection for them to stick. It’s a quick two-step dance of taking it down and bringing it back up.
First, take the connection down:sudo nmcli con down ens18
Then, bring it back up to lock in the new static configuration:sudo nmcli con up ens18
And that's it. Your server is now running on its new static IP. This method is incredibly robust and is the go-to for any modern RHEL-based system, including servers deployed through ARPHost's Instant Applications installer.
The Classic ifcfg Method for Legacy Systems
While nmcli is the way forward, you'll inevitably run into older systems or environments where you need to get your hands dirty with config files. Since Red Hat Enterprise Linux 7 dropped back in 2014, countless servers have relied on static IPs defined in /etc/sysconfig/network-scripts/ifcfg-* files for mission-critical stability.
If you're managing systems in colocation or handling Proxmox migrations, knowing this method is crucial—unreliable DHCP leases are a nightmare in high-load scenarios. In fact, insights from Network World show a massive 91% of Linux admins in large companies insist on static IPs for key services to slash remote access issues.
To set a static IP the old-fashioned way, you'll edit the file matching your interface, like /etc/sysconfig/network-scripts/ifcfg-ens18.
Here’s what you want the file to look like for a static setup:
TYPE=Ethernet
PROXY_METHOD=none
BROWSER_ONLY=no
BOOTPROTO=none
DEFROUTE=yes
IPV4_FAILURE_FATAL=no
IPV6INIT=yes
IPV6_AUTOCONF=yes
IPV6_DEFROUTE=yes
IPV6_FAILURE_FATAL=no
NAME=ens18
DEVICE=ens18
ONBOOT=yes
IPADDR=10.0.2.15
PREFIX=24
GATEWAY=10.0.2.2
DNS1=8.8.8.8
DNS2=1.1.1.1
The key lines to change or add are:
BOOTPROTO=none(orstatic): This is what kills DHCP.ONBOOT=yes: Makes sure the interface comes up at boot time.IPADDR,PREFIX,GATEWAY, andDNS1/DNS2should be set to your network values.
After saving the file, just restart the NetworkManager service to apply the changes.
sudo systemctl restart NetworkManager
This legacy method still works like a charm, but it's not as dynamic or script-friendly as nmcli. For any new deployments on an ARPHost VPS or Bare Metal Server, sticking with nmcli is definitely the best practice.
Temporary Setups with the IP Command
Sometimes you just need to get a server online right now without messing with permanent config files. This is where the ip command becomes your best friend. It’s the go-to tool for assigning an IP address and setting up routing on the fly, perfect for that initial server setup or when you're deep in a network troubleshooting session.
These changes are completely temporary—they vanish the moment you reboot. That makes the ip command an incredibly safe way to test network settings or bring a new box online just long enough to SSH in and finish the job properly. It's a technique our own engineers at ARPHost rely on when lighting up new bare metal servers before writing the final network configurations to disk.
So Long, ifconfig. Hello, ip.
If you’ve been around Linux for a while, you probably have ifconfig and route burned into your muscle memory. While those commands were the standard for decades, they’re now considered deprecated. The modern iproute2 suite, which includes the ip command, is far more powerful and consistent for managing today’s complex network stacks.
Assigning an IP Address on the Fly
To slap a temporary IP address on an interface, you’ll use the ip addr add command. The syntax is clean: you just need the IP with its CIDR subnet mask, the dev keyword, and the interface name.
Let's say you want to assign the IP 172.16.10.50 to the eth0 interface with a /24 subnet mask. The command is as simple as this:
sudo ip addr add 172.16.10.50/24 dev eth0
You can immediately check your work with ip a. You’ll see the new address listed right under the eth0 interface. It’s that fast.
Setting a Temporary Default Gateway
An IP address is a good start, but your server won't be able to talk to the outside world without a route. To fix that, you'll add a default gateway using ip route add. This command tells the system where to send any traffic that isn't headed for the local network.
To set the default gateway to 172.16.10.1, you’d run:
sudo ip route add default via 172.16.10.1
And just like that, your server has temporary network connectivity. This two-command combo is a lifesaver for quick network setups. The ip command is now standard on over 95% of modern distros and has reportedly prevented over 70% of crashes associated with the legacy net-tools. For developers spinning up an unmanaged ARPHost VPS, mastering these commands offers instant control without service restarts—a vital skill, considering 68% of DevOps pros cite network configuration as a major time-sink. Better yet, some analyses suggest static IPs can reduce a server's attack surface by 37% by enabling more predictable firewall rules. You can learn more about configuring IP addresses in Linux for enhanced security on Infosec Writeups.
Why ARPHost Excels Here
While manual configuration is a vital skill, ARPHost's fully managed IT services handle this entire process for you. Our experts ensure your secure web hosting bundles or Proxmox private clouds are provisioned with stable, secure network configurations from the very beginning, letting you focus on your applications instead of command-line syntax.
How to Verify and Troubleshoot Your Connection
Okay, you've configured your static IP. Don't close that terminal just yet—the job isn't finished until you confirm everything is actually working. A few quick checks now will save you a world of headaches later, especially if you're hosting live services.

Essential Verification Commands
Your first move should be a quick health check with a handful of core Linux commands. These are your eyes and ears, telling you if the IP is active, if you can talk to your gateway, and if DNS is behaving.
Start by making sure the IP address is actually assigned to your network interface.
ip a
Scan the output for your interface (it’s usually something like eth0 or ens18) and look for the inet address. Does it match the static IP you just set? Good. If not, something went wrong in the configuration step.
Next up is connectivity. The classic ping command is perfect for this. First, ping your gateway to make sure your local network connection is solid.
ping 192.168.1.1
Then, try to reach something out on the internet. Google's DNS server is a reliable target.
ping 8.8.8.8
If both pings come back with replies, your server is officially online. The last piece of the puzzle is DNS. The resolvectl status command gives you a clean look at which DNS servers your system is currently using.
Common Troubleshooting Scenarios
When things go sideways, the problem usually falls into one of a few predictable buckets. From a simple typo to an overzealous firewall, here’s how to diagnose the most frequent issues you'll face when you configure a static IP in Linux.
- YAML Syntax Errors (Netplan): This is the number one culprit for Netplan users. A single misplaced space in a
.yamlfile can render your entire configuration useless. Always, always usesudo netplan trybefore committing withapply. It will save you from locking yourself out. - Incorrect Gateway or Subnet: Can you ping other devices on your local network but can't reach the internet? You’ve likely got a bad gateway address or the wrong subnet mask (e.g.,
/24,/25). Double-check your network details and try again. - Firewall Blocking Traffic: This is the classic "it should be working" problem. A restrictive firewall rule can silently drop your
pingrequests (ICMP packets) or other essential traffic. A quick way to test this is to temporarily disable the firewall (sudo ufw disableorsudo systemctl stop firewalld). If things magically start working, you've found your culprit. For a deeper dive, check out our guide on how to properly set up firewalls for Linux.
Why ARPHost Excels Here
Chasing down network problems on a live server is stressful. With ARPHost's fully managed IT services, our experts handle the initial setup and are on standby 24/7 to fix any connectivity issues that pop up. We monitor your infrastructure proactively, ensuring your secure managed VPS hosting environment stays stable and online.
Once your static IP is verified and solid, the work shifts from setup to maintenance. Continuous Linux monitoring is essential for maintaining system health and catching small problems before they become big outages.
Scaling This with ARPHost
While knowing how to wrangle a static IP in Linux from the command line is a fantastic skill, it's not exactly a growth strategy. Every minute you spend hunting down a typo in a YAML file or debugging a network script is a minute you're not spending on your actual business. This is the exact moment where managed infrastructure flips the script from reactive troubleshooting to proactive growth.
Forget wrestling with Netplan, nmcli, or ancient ifcfg files. Imagine your server, provisioned from day one with a secure, stable, and perfectly optimized network configuration. At ARPHost, our team handles that entire initial server setup, making sure your IP addresses, gateways, and DNS settings are rock-solid before you even get your first login details.
From Manual Commands to Managed Reliability
Let's be honest—manual configuration is a breeding ground for human error. A single misplaced digit in an IP address or a syntax mistake in a config file can bring everything to a halt, leading to downtime you just can't afford. Our fully managed IT services are designed to take that risk completely off the table.
We take care of the entire foundational network setup for you. That includes:
- Initial Server Provisioning: We assign and configure your static IP addresses as an integral part of the server deployment. No extra steps for you.
- Network Optimization: We don't just make it work; we configure it according to industry best practices for maximum security and performance.
- 24/7 Proactive Monitoring: Our job doesn't end after setup. Our team keeps a constant eye on your server's connectivity, catching and fixing potential issues long before they can impact your business.
This hands-off approach frees up your team to focus on what they do best—development, strategy, and innovation, not tedious server administration.
When you offload network configuration to ARPHost, you're getting more than just a correctly configured server. You’re getting peace of mind and the freedom to scale your business without getting bogged down by the nuts and bolts of infrastructure.
The Right Platform for Your Business
For businesses that need absolute reliability without the management headache, our platforms are the perfect fit. Our High-Availability VPS Hosting plans deliver a resilient environment where network stability is a given. And for more intensive workloads, our Dedicated Proxmox Private Clouds give you all the power of dedicated hardware with the simplicity of a fully managed solution.
Ready to stop worrying about network configs and get back to growing your business? Check out our High-Availability VPS plans starting at just $5.99/month or get a quote for a custom Proxmox Private Cloud today.
Frequently Asked Questions
When you're knee-deep in network configuration, a few common questions always seem to pop up, especially when juggling different Linux flavors or more advanced setups. Let's tackle some of the ones we hear most often when you configure a static IP in Linux.
How Do I Set a Static IPv6 Address?
Good news—setting a static IPv6 address is almost identical to the process for IPv4. The main difference is just the syntax. With Netplan, for instance, you'll turn off dhcp6 and then add the IPv6 address, complete with its prefix length, right into the addresses block.
Here’s a quick look at what that would look like in a Netplan YAML file:
network:
  version: 2
  ethernets:
    ens18:
      dhcp4: no
      dhcp6: no
      addresses:
        - 192.168.1.100/24
        - '2001:db8:0:1::100/64'
      routes:
        - to: default
          via: 192.168.1.1
        - to: '::/0'
          via: '2001:db8:0:1::1'
      nameservers:
        addresses: [8.8.8.8, '2606:4700:4700::1111']
The logic is the same for other tools. If you're using nmcli, you’d simply use the ipv6.method manual and ipv6.addresses options to lock in your static IPv6 configuration.
Can I Assign Multiple Static IPs to One Interface?
Absolutely. Stacking multiple IP addresses on a single network card is a common practice, especially if you're hosting several SSL-secured websites or running different network services from the same machine.
In Netplan, it's as simple as adding another line item to the addresses list in your configuration file. For nmcli users, you can tack on a secondary IP with the nmcli con mod [connection_name] +ipv4.addresses [ip/prefix] command. This kind of flexibility is a lifesaver for complex setups, like those on ARPHost’s Bare Metal Servers, where you want to get the most out of every resource.
This technique is often called IP aliasing, and it’s what lets a single server appear as multiple different machines on a network. It's a powerful way to consolidate services and keep your infrastructure tidy.
Which Configuration Method Should I Use?
The right tool for the job really comes down to your Linux distribution. Sticking with the native tool is almost always the best bet.
- Modern Ubuntu/Debian: Use Netplan. It’s the default for a reason—it’s simple, predictable, and the official standard.
- Modern RHEL/CentOS/Fedora: Stick with NetworkManager (
nmcli). It’s incredibly powerful, easy to script, and the recommended method for the entire RHEL family. - Legacy Systems or Quick Tests: The
ipcommand is great for temporary changes on the fly. If you're on an older RHEL-based system withoutnmcli, editing the classicifcfgfiles is your go-to.
Using the distribution's preferred tool ensures you get the best compatibility and support down the line. For example, ARPHost’s secure VPS bundles running CloudLinux OS (which is based on RHEL) are managed best with nmcli to keep things running smoothly.
At ARPHost, we believe your focus should be on your business, not on network configuration. Our fully managed IT services handle all the complexities of server setup, ensuring your infrastructure is stable, secure, and optimized from day one. Explore our fully managed IT services for servers.