


Choosing the best unmanaged VPS hosting is like being handed the keys to a high-performance race car. You get the engine, the chassis, and a full tank of gas, but you’re the driver, mechanic, and the entire pit crew. For developers, sysadmins, and anyone with the technical chops to get under the hood, that level of control is a massive advantage.
What Unmanaged VPS Hosting Really Means
Think of hosting as a spectrum of control. On one end, you have managed hosting—it’s like an all-inclusive resort where the staff handles everything from security to maintenance, leaving you to just enjoy the service. Unmanaged VPS hosting sits at the complete opposite end. It’s more like being given a pristine plot of land; you have total freedom to build whatever you want, but you’re also the one pouring the foundation and setting up the security system.
At its core, unmanaged hosting is a “do-it-yourself” world. The provider carves out a slice of a powerful bare metal server and guarantees your resources—CPU, RAM, and storage—but from there, you’re in charge.
The Power of Total Server Control
The absolute game-changer with unmanaged hosting is root access. This isn’t just some admin permission; it’s the master key to your entire server environment. With root, you can:
- Install any OS: Not a fan of CentOS? No problem. Swap it for Debian or Ubuntu on the fly. You can usually do this right from your provider’s control panel or by mounting an ISO.
- Build custom software stacks: You can assemble a finely-tuned LEMP stack (Linux, Nginx, MySQL, PHP) instead of being stuck with a generic LAMP setup.
- How-To Example:
sudo apt install nginx php-fpm mariadb-serveron Ubuntu is the starting point to building a faster web server than the standard Apache.
- How-To Example:
- Optimize performance on a granular level: Go deep and tweak kernel settings via
sysctl, manage memory allocation, or configure custom caching with Varnish to squeeze out every last drop of speed. - Implement specialized security: You dictate the firewall rules with
iptablesor UFW, install the intrusion detection systems you trust like Fail2ban, and manage your own update schedules withcronjobs.
This is exactly why unmanaged VPS is a big deal and continues to grow. Industry forecasts predict the unmanaged VPS market will expand at a CAGR of roughly 16.9% through 2030, driven by developers, game server operators, and hobbyists who refuse to be boxed in by pre-configured environments.
Who Thrives with an Unmanaged VPS?
Let’s be clear: unmanaged hosting isn’t for everyone. It’s built for people who see server management not as a chore, but as an opportunity. You’re trading the convenience of managed support for absolute freedom, raw performance, and serious cost savings. For those ready to take on that responsibility, there are some great resources for understanding the nuances of self-hosting.
The diagram below shows how a single physical server is sliced into multiple, completely isolated virtual servers. Each VPS gets its own operating system and its own dedicated resources.
This is the magic of virtualization—creating distinct, secure environments that live on the same hardware. If you want to get into the nitty-gritty of the technology behind this, you can check out our complete guide on what a cloud VPS is and how it functions.
Decoding the Hardware That Powers Your VPS
When you’re hunting for the best unmanaged VPS hosting, the spec sheet can feel like a foreign language. But those numbers and acronyms aren’t just technical jargon; they’re the DNA of your server, defining its speed, resilience, and raw power. Getting a grip on them is like learning to read a car’s performance sheet—it tells you exactly what kind of muscle you have under the hood.
This infographic gives a solid high-level look at the core principles of unmanaged VPS, breaking down the relationship between control, responsibility, and cost.
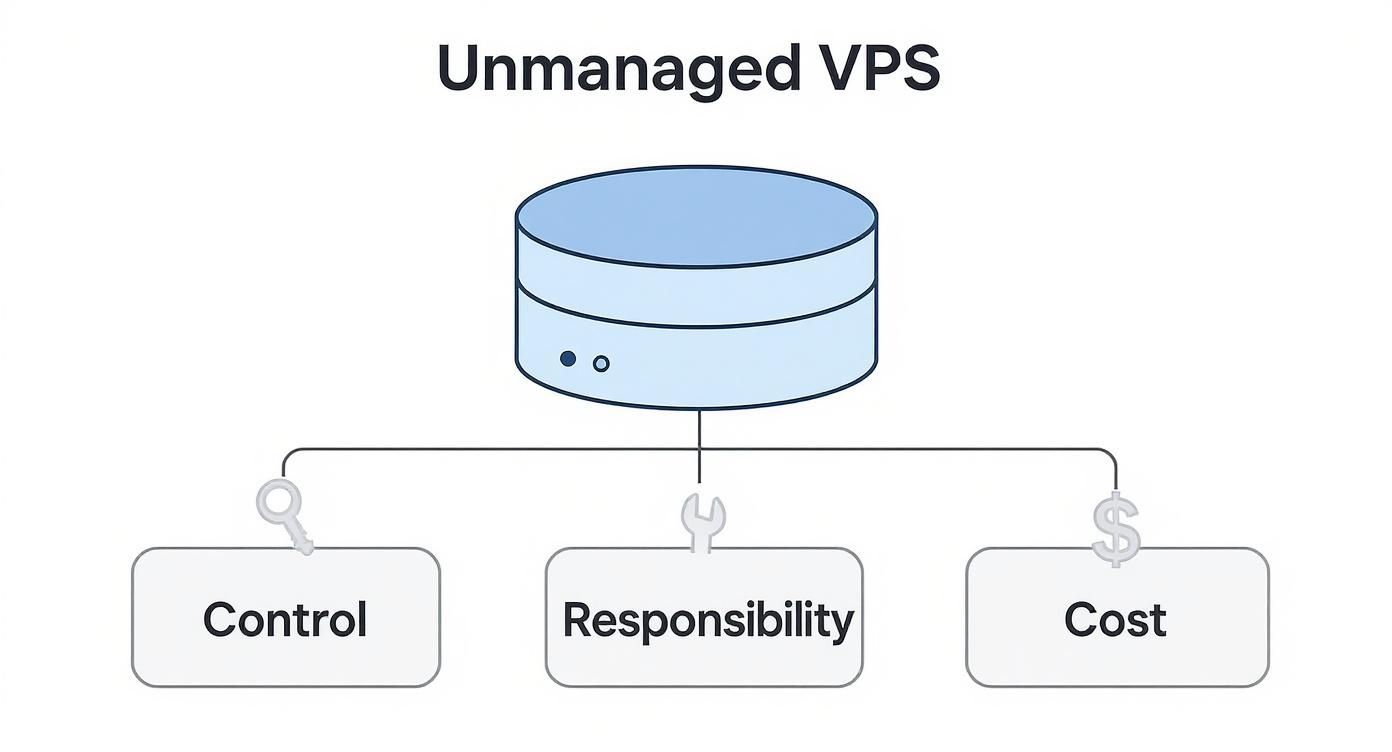
As you can see, these three pieces are totally intertwined. When you take on full control, you also accept full responsibility, and the payoff for that is a much lower price tag.
CPU: The Brains of the Operation
Think of your server’s CPU (Central Processing Unit) cores as its “brains.” Every single core is a processor ready to chew through tasks and calculations. The more cores you have, the more your server can do at once without slowing to a crawl.
This becomes critical in a virtualized world. With some providers, CPU resources are shared across multiple users, which can lead to the dreaded “noisy neighbor” effect—where someone else’s heavy-lifting slows your server to a halt. A hallmark of quality unmanaged hosting is dedicated CPU cores, guaranteeing your processing power is yours and yours alone.
For instance, a VPS with 4 dedicated vCPU cores can juggle a database, web server, and caching service without breaking a sweat. A server with just 1 shared core would likely buckle under that same load, leaving your users staring at a loading screen.
RAM: Your Server’s Short-Term Memory
If the CPU is the brain, then RAM (Random Access Memory) is the server’s short-term memory. It’s the active workspace where your operating system, applications, and scripts live and breathe. More RAM means you can run more things at the same time, smoothly.
Running out of RAM is a classic performance killer. When it’s full, your system starts using a slice of your much slower disk storage as “swap space,” and performance takes a nosedive. For a CMS like WordPress or Magento, not having enough RAM means a sluggish admin panel and painfully long page load times for visitors.
Key Takeaway: A solid rule of thumb is to have enough RAM to handle your busiest traffic spikes without ever touching that swap space. A medium-traffic e-commerce store should start with at least 4 GB of RAM, while a simple blog could get by just fine with 1-2 GB.
Storage Speed: NVMe SSD vs. HDD
Storage isn’t just about how much data you can cram onto a drive; it’s about how fast you can get it back. The type of storage your VPS uses has a massive impact on everything from boot times to how quickly your database can serve up information. The main players are old-school Hard Disk Drives (HDDs) and modern Solid-State Drives (SSDs), especially NVMe SSDs.
- HDDs: These are the traditional mechanical drives with spinning platters. They’re cheap and offer tons of space, but they are painfully slow.
- NVMe SSDs: These use flash memory with zero moving parts, making them incredibly fast. NVMe is the latest and greatest protocol, delivering the fastest data transfer speeds you can get.
An application running on an NVMe SSD can pull data up to 25 times faster than one stuck on an HDD. For database-heavy sites or websites with lots of images and scripts, the difference is night and day.
Let’s look at how these resource choices play out in the real world.
Unmanaged VPS Resource Impact Comparison
This table breaks down how different resource tiers can directly affect your application’s performance. It’s not just about bigger numbers; it’s about tangible results.
| Resource | Low-Tier Spec | High-Tier Spec | Performance Impact |
|---|---|---|---|
| CPU | 1 Shared vCore | 4+ Dedicated vCores | A low-spec server will struggle with concurrent tasks, leading to slow API responses and page loads. A high-spec server can handle many simultaneous requests, keeping your site fast and responsive. |
| RAM | 1-2 GB | 8+ GB | Insufficient RAM forces the server to use slow disk swap, causing sluggishness. Ample RAM keeps applications running entirely in memory, ensuring snappy performance for databases and caches. |
| Storage | HDD | NVMe SSD | HDDs create bottlenecks for database queries and file access, slowing down your entire application. NVMe SSDs provide near-instant data access, dramatically improving load times and user experience. |
| Network | 100 Mbps Port | 1 Gbps Port | A slower port speed can become a chokepoint during traffic spikes, leading to dropped connections. A high-speed port ensures smooth data flow, even when your site gets a sudden rush of visitors. |
As you can see, skimping on a key resource can create a serious bottleneck, while investing in the right hardware keeps everything running like a well-oiled machine.
Network Performance: Port Speed and Bandwidth
Finally, your server’s connection to the internet is what determines how fast users can actually reach you. The two metrics that matter most here are port speed and bandwidth.
- Port Speed: This is the maximum speed of the connection between your server and the internet, usually measured in Gbps (Gigabits per second). A 1 Gbps port is the standard for high-performance hosting.
- Bandwidth: This is the total amount of data you’re allowed to transfer each month, typically measured in terabytes (TB).
Think of port speed as the number of lanes on a highway and bandwidth as your monthly gas allowance. A wide highway (high port speed) keeps traffic moving smoothly, even during rush hour (a traffic spike). A generous gas allowance (high bandwidth) ensures you don’t get stranded on the side of the road before the month is over.
For most projects, Linux is the operating system of choice. In fact, Linux-based VPS deployments dominate with 56% to 61% of the market, mostly thanks to their stability, low cost, and amazing support for modern tools like Docker and Kubernetes. You can review more on these market trends to see how different platforms align with hardware needs.
Your First Hour on a New Unmanaged Server
So, you’ve just spun up a brand-new virtual private server. It’s a clean slate, a blank canvas ready for whatever you’re building next. That initial buzz of excitement is awesome, but it’s quickly followed by a critical question: “Okay… now what?”
Those first sixty minutes are everything. This is your window to lay down a secure and stable foundation for your entire project. Think of it like getting a new house—you wouldn’t move in your expensive furniture before changing the locks and setting up the alarm system, right? Same principle applies here.
This guide will walk you through the essential first steps, turning what might seem like intimidating command-line work into a simple, straightforward checklist. We’ll cover not just what to do, but why each step is so critical for protecting your server from the get-go. By the end of this hour, your server will be locked down and ready for you to start building.

Step 1: Connect to Your Server with SSH
First thing’s first: you need a secure way to talk to your server. Secure Shell (SSH) is the industry standard for remotely managing Linux servers, and for good reason. It creates a fully encrypted tunnel between your computer and the VPS, making sure every command, password, and piece of data you send is scrambled and unreadable to anyone trying to eavesdrop.
Your hosting provider will give you two key pieces of information: the server’s IP address and the initial root password. Using a terminal (built into macOS and Linux) or an SSH client like PuTTY on Windows, you’ll make that initial connection.
# Example SSH connection command
ssh root@YOUR_SERVER_IP
Step 2: Create a New Non-Root User
This one is non-negotiable. Logging in and operating directly as the root user is a massive security risk. Think of root as the god account—it has unlimited power to do anything, including accidentally wiping the entire system with one typo. Worse, automated bots are constantly scanning the internet for servers to attack, and “root” is the very first username they try.
Your first line of defense is to create a new, non-root user for your day-to-day work. You’ll grant this user administrative powers using the sudo command, which temporarily elevates their permissions when needed. It’s a simple step that adds a crucial layer of accountability and safety.
Log in as root and run this command, swapping yournewuser with whatever username you want:
adduser yournewuser
You’ll be asked to set a strong password and fill in some optional info.
Next, you need to give this new user sudo privileges. This lets them run admin commands by just typing sudo in front of them.
usermod -aG sudo yournewuser
This command adds your new user to the sudo group. Now they have the keys to the kingdom, but only when they specifically ask to use them.
Step 3: Disable Direct Root Login
Now that you have a new user with admin powers, there’s absolutely no reason to let anyone log in directly as root anymore. Disabling this is one of the most effective security moves you can make.
It instantly stops all brute-force attacks targeting the root user and forces everyone (including you) to log in with a standard account first.
Crucial Security Tip: Before you do anything else, test your new user! Log out of your root session, then log back in as
yournewuser. Try running a command likesudo apt update. If it works, you’re good to go. If you disable root login before confirming your new user works correctly, you could lock yourself out of your server for good.
Ready to lock it down? You’ll need to edit the main SSH configuration file. Open it with a text editor like nano:
sudo nano /etc/ssh/sshd_config
Find the line that says PermitRootLogin yes and change it to no:
PermitRootLogin no
Save the file and exit. For the change to take effect, you have to restart the SSH service:
sudo systemctl restart ssh
That’s it. Your server will now refuse any direct login attempts for the root user.
Step 4: Set Up a Basic Firewall
A firewall is your server’s digital bouncer. It stands at the door, inspecting all incoming and outgoing network traffic and blocking anything suspicious before it ever reaches your applications. Without a firewall, every single service on your server is just sitting there, exposed to the whole internet.
UFW (Uncomplicated Firewall) is a fantastic, user-friendly tool for managing firewall rules on Linux. It makes securing your server dead simple.
First, you must allow SSH connections. If you don’t do this, the firewall will immediately block your current session when you turn it on, and you’ll be locked out.
sudo ufw allow OpenSSH
Now you can safely switch the firewall on:
sudo ufw enable
Check its status to make sure it’s active and your SSH rule is in place:
sudo ufw status
Later on, when you install something like a web server, you’ll need to open up ports for it. For example, to allow web traffic for Nginx, you’d run:
sudo ufw allow 'Nginx Full'
With these four steps done, you’ve turned a vulnerable, factory-fresh server into a hardened, secure base. This initial hour of work will pay you back tenfold in long-term stability and peace of mind. To take things a step further and automate these setups, it’s worth exploring the top configuration management tools that can apply these settings consistently every time you launch a new server.
How to Choose the Right VPS Provider
Picking the best unmanaged VPS hosting provider goes way beyond just comparing the flashy CPU and RAM numbers on a pricing page. The things that really matter—what separates a rock-solid server from a constant headache—are buried in the technical details of a provider’s infrastructure.
To make a smart choice, you need a practical framework for digging into those details. Let’s break down what truly counts.
Location and Network Reliability
Where your server physically lives has a direct impact on how fast your users can access your stuff. Every click, every page load has to travel a real-world distance. More distance means more latency, which translates to slower load times. A provider with data centers spread across the globe lets you park your server right next to your primary audience, a simple move that dramatically improves their experience.
The biggest markets for VPS hosting are North America, Europe, and the booming Asia-Pacific region. North America still leads the pack, with over 51% of hosting providers based in the US, offering top-tier infrastructure built for speed. Choosing a provider with a data center in the right region is step one.
But location is only half the story. You also need to confirm their network is reliable. A serious host will have a public status page or offer a Service-Level Agreement (SLA) that guarantees uptime—usually 99.9% or higher. Think of this as your insurance policy against the nightmare of downtime.
The Virtualization Technology Matters
Here’s a crucial detail most people overlook: not all VPS servers are created equal. The underlying technology that carves up the physical server and creates your virtual one—the virtualization tech—dictates how your resources are allocated. It directly impacts your performance and stability.
- KVM (Kernel-based Virtual Machine): This is the modern gold standard. KVM provides true hardware virtualization, meaning the CPU and RAM you pay for are completely isolated and dedicated to you. It eliminates the “noisy neighbor” problem, where another user on the same machine can hog resources and slow your server down.
- OpenVZ: This is an older, container-based approach. While it can be efficient, it shares the host machine’s core software (the kernel) among all users. This design makes it easy for providers to oversell resources, which can lead to your server bogging down when the physical machine gets busy.
Key Takeaway: Always, always go with a provider that uses KVM virtualization. It guarantees the resources you’re paying for are actually yours, giving you a stable, predictable environment for your applications.
Control Panel and Emergency Access
“Unmanaged” means you handle the software, but your provider should still give you powerful tools to manage the hardware layer of your VPS. A good control panel is your lifeline when things go sideways, letting you perform critical actions yourself without waiting on a support ticket.
Look for a control panel that lets you:
- Reboot the Server: A hard reset for when your VPS becomes completely unresponsive.
- Reinstall the OS: The ultimate escape hatch. Quickly wipe and deploy a fresh operating system if a bad configuration locks you out.
- Access an Out-of-Band Console: This is a game-changer. It gives you direct, terminal-level access to your server, even if you’ve messed up the network settings. It’s essential for troubleshooting boot issues.
A provider’s control panel should empower you, not hold you back. The ability to handle these emergencies on your own is the mark of a truly great unmanaged host. As you weigh your options, it’s smart to review all these different angles; our guide on the 5 key factors to consider when choosing a hosting provider can help you build a complete checklist.
Real-World Projects Powered by Unmanaged VPS
It’s one thing to talk about CPU cores and RAM; it’s another to see what that raw power can actually build. Once you get past the spec sheets, the true value of the best unmanaged VPS hosting comes alive. This is where your technical freedom translates directly into high-performance projects that simply aren’t possible in a locked-down environment.
Let’s dive into some tangible examples of what you can accomplish when you have total control over your server.

Think of an unmanaged environment as the ultimate sandbox. These use cases show just how creative you can get when there are no arbitrary limits holding you back.
High-Performance WordPress on a Custom LEMP Stack
Most shared hosting shoves your WordPress site onto a standard LAMP (Linux, Apache, MySQL, PHP) stack. It works, but it’s far from the fastest setup. With root access on your own VPS, you can ditch Apache for a much leaner, faster alternative and build a custom LEMP stack.
By swapping Apache for Nginx, you get a web server that excels at handling tons of simultaneous connections without hogging memory—perfect for busy sites. You can then compile Nginx with specific modules like FastCGI caching, letting you serve pages straight from RAM and bypass slow PHP and database queries for returning visitors.
For a high-traffic e-commerce store, this isn’t just a minor optimization; it’s a complete game-changer. A properly tuned LEMP stack can slash server response times by up to 80%, which has a massive impact on both user experience and your SEO rankings.
Here’s the basic game plan:
- Install Nginx: A lightweight web server built for speed and concurrency.
- Configure PHP-FPM: A more efficient way to handle PHP requests compared to older methods.
- Optimize MariaDB: A high-performance, drop-in replacement for MySQL that you can tune to your specific needs.
- Set up server-level caching: Use tools like Redis or Memcached to keep frequently accessed data in super-fast RAM.
Good luck trying to pull that off in a shared hosting account. This level of granular control is exactly why people choose unmanaged hosting.
Your Own Private and Secure VPN Server
In an era of prying eyes and sketchy public Wi-Fi, a personal VPN is a powerful privacy tool. Why pay a monthly fee to a commercial provider (and hope they honor their “no-logs” policy) when you can build your own? An unmanaged VPS gives you the power to create a private, encrypted tunnel to the internet that you control completely.
WireGuard is a modern, ridiculously fast VPN protocol that’s surprisingly easy to set up on a VPS. Since you own the server, you can be 100% certain that absolutely no logs of your online activity are being kept.
The setup is more straightforward than you might think:
- Install the WireGuard software package on your server (
sudo apt install wireguard). - Generate cryptographic keys for the server and each device you want to connect (your phone, laptop, etc.) using
wg genkey. - Create a simple config file (
/etc/wireguard/wg0.conf) to define the network rules.
For the price of a small VPS, you can secure the internet connection for your whole family or small team. No more worrying about who’s watching your data at the coffee shop or airport.
Hosting a High-Performance Minecraft Server
Running a popular Minecraft server is a classic resource-hog that perfectly illustrates the benefits of an unmanaged VPS. Shared hosting plans will crumble under the constant CPU and RAM demands. A KVM-based VPS with dedicated cores, on the other hand, provides the stable, predictable power needed to support dozens of players without frustrating lag.
This is how the server specs translate directly to gameplay:
- High single-core CPU speed is king. The main game loop is largely single-threaded, so a CPU with a fast clock speed will deliver a much smoother experience than one with more, but slower, cores.
- Ample RAM is non-negotiable for loading the world and handling player data. A server with 8 GB of RAM or more can easily support a bigger world, more players, and more plugins.
- NVMe SSD storage makes all the difference. It ensures the world loads quickly and players don’t experience stuttering when they’re exploring new chunks.
With root access, you can install the exact Java version you need, fine-tune memory allocation, and install powerful management panels like McMyAdmin to make administration a breeze.
Running Modern Applications with Docker
For anyone building modern applications, Docker has become an indispensable tool. It lets you package your apps and their dependencies into isolated containers, ensuring they run the same way everywhere. An unmanaged VPS is the perfect playground for a Docker workflow because it gives you the kernel-level control needed to manage containers effectively.
With root access, you can install the Docker Engine and use tools like Docker Compose to spin up complex, multi-container applications with a single command. Imagine a web app with its own database, a caching server, and a message queue—each running in its own neat container. This approach makes development, testing, and deployment incredibly predictable and pain-free.
Unmanaged VPS: Your Questions Answered
Stepping into the world of unmanaged VPS hosting can feel a little daunting at first. It’s a space that offers incredible freedom, but with that freedom comes responsibility. Let’s clear up some of the most common questions people have before they take the leap.
What’s the Real Difference Between a Managed and Unmanaged VPS?
It all boils down to one simple question: who’s the system administrator?
When you choose an unmanaged VPS, you are the admin. You’re in charge of everything—installing software, running security updates, setting up the firewall, and fixing anything that goes wrong on the software side. The provider just keeps the hardware and network running.
With a managed VPS, the hosting company handles all of that for you. Think of it like this: unmanaged hosting hands you the keys to the entire building, letting you build and decorate however you want. Managed hosting gives you a fully furnished, serviced apartment where maintenance is included. Unmanaged offers total control for less money; managed provides convenience for a higher price.
Is Unmanaged VPS Hosting a Good Idea for Beginners?
Honestly? No, not really. Unmanaged hosting is built for people who are already comfortable working in a Linux command-line environment and know their way around basic server administration.
If you’re new to servers, critical tasks like hardening security and configuring software can be completely overwhelming. A simple mistake could leave your server wide open to attacks. For someone just starting out, a managed VPS or even a high-quality shared hosting plan is a much safer bet. That said, if you’re determined to learn and ready to dive into documentation and tutorials, an unmanaged VPS can be a fantastic (if challenging) way to build serious skills.
What Are the First Things I Need to Do to Secure My Unmanaged VPS?
Securing your server isn’t just a recommendation; it’s your absolute top priority the second it goes live. Ignoring these first steps is like leaving your front door unlocked and wide open in a bad neighborhood.
Crucial Reminder: Your new unmanaged server is a blank slate. By default, it is not secure. Automated bots start scanning for vulnerable new servers almost instantly, so you need to act fast.
Here are the non-negotiable first actions you must take:
- Use SSH Keys for Login: Ditch passwords completely and switch to far more secure cryptographic keys.
- Create a Sudo User: Immediately create a new, non-root user with
sudoprivileges for your daily tasks. - Disable Direct Root Login: This is a huge security win. It instantly stops the endless barrage of brute-force bots that hammer servers trying to guess the “root” password.
- Configure a Firewall: Use a tool like
ufw(Uncomplicated Firewall) to block all incoming connections by default, then open only the specific ports you actually need. - Run System Updates: The very first command you should run is a full system update to patch any known security holes in the default software.
Can I Install cPanel or Plesk on an Unmanaged VPS?
Yes, absolutely! This is one of the best parts of having root access—you can install any compatible software you want. That includes popular control panels like cPanel and Plesk, as well as fantastic free alternatives like HestiaCP or CyberPanel.
Installing a control panel can dramatically simplify day-to-day server management. It gives you a clean graphical interface for jobs that would otherwise require command-line wizardry, such as:
- Setting up new websites and domains
- Managing email accounts
- Configuring DNS records
- Handling file transfers and FTP users
This approach lets you combine the raw power and guaranteed resources of an unmanaged VPS with the user-friendly experience of a control panel. It’s the best of both worlds.
Ready to take full control of your server environment? At ARPHost, LLC, we provide high-performance, KVM-based unmanaged VPS hosting built on enterprise-grade hardware. Get the dedicated resources and root access you need to build, deploy, and scale your projects without limits. Explore our customizable plans.