


When you hear the term best unmanaged VPS hosting, it really boils down to one thing: control. For developers, system administrators, and anyone who wants to get their hands dirty with the server's internals, it’s the ultimate playground. You get the keys to the kingdom, with the freedom to build, configure, and fine-tune your server environment exactly how you want it, with zero restrictions.
What Unmanaged VPS Hosting Really Means
The best way to think about unmanaged VPS hosting is like leasing a high-performance workshop. You get the raw space, all the power tools, and the keys to the front door. But how you arrange those tools, what you decide to build, and how you keep everything running is completely on you. In technical terms, this means you get dedicated server resources—CPU, RAM, and storage—and complete root access, giving you total command over the machine.
This is a world away from other hosting models. Managed VPS is like a fully serviced workshop where a pro handles all the setup, maintenance, and security for you. And shared hosting? That's like renting a single workbench in a crowded, noisy room where you have limited tools and have to follow someone else's strict rules.
Who Thrives with Unmanaged Control
Let's be clear: unmanaged VPS isn't for everyone. It's a specialized tool for people who see a blank command-line interface not as an intimidating void, but as an open canvas of opportunity.
This is the perfect fit for:
- Developers and System Administrators: Professionals who need to spin up custom server environments for specific applications, create development sandboxes, or run complex testing scenarios. For example, a developer might install a specific version of PHP and a Redis cache that a managed provider wouldn't support.
- Tech-Savvy Entrepreneurs: Business owners with the technical chops to manage their own infrastructure. They can cut significant costs while still getting top-tier performance by handling security updates and software installs themselves.
- Hobbyists and Power Users: Anyone running game servers, personal cloud storage (like Nextcloud), or other passion projects that demand very specific software configurations not found in standard hosting packages.
This infographic paints a great picture of that workshop analogy, showing the tools and control you get with an unmanaged VPS.
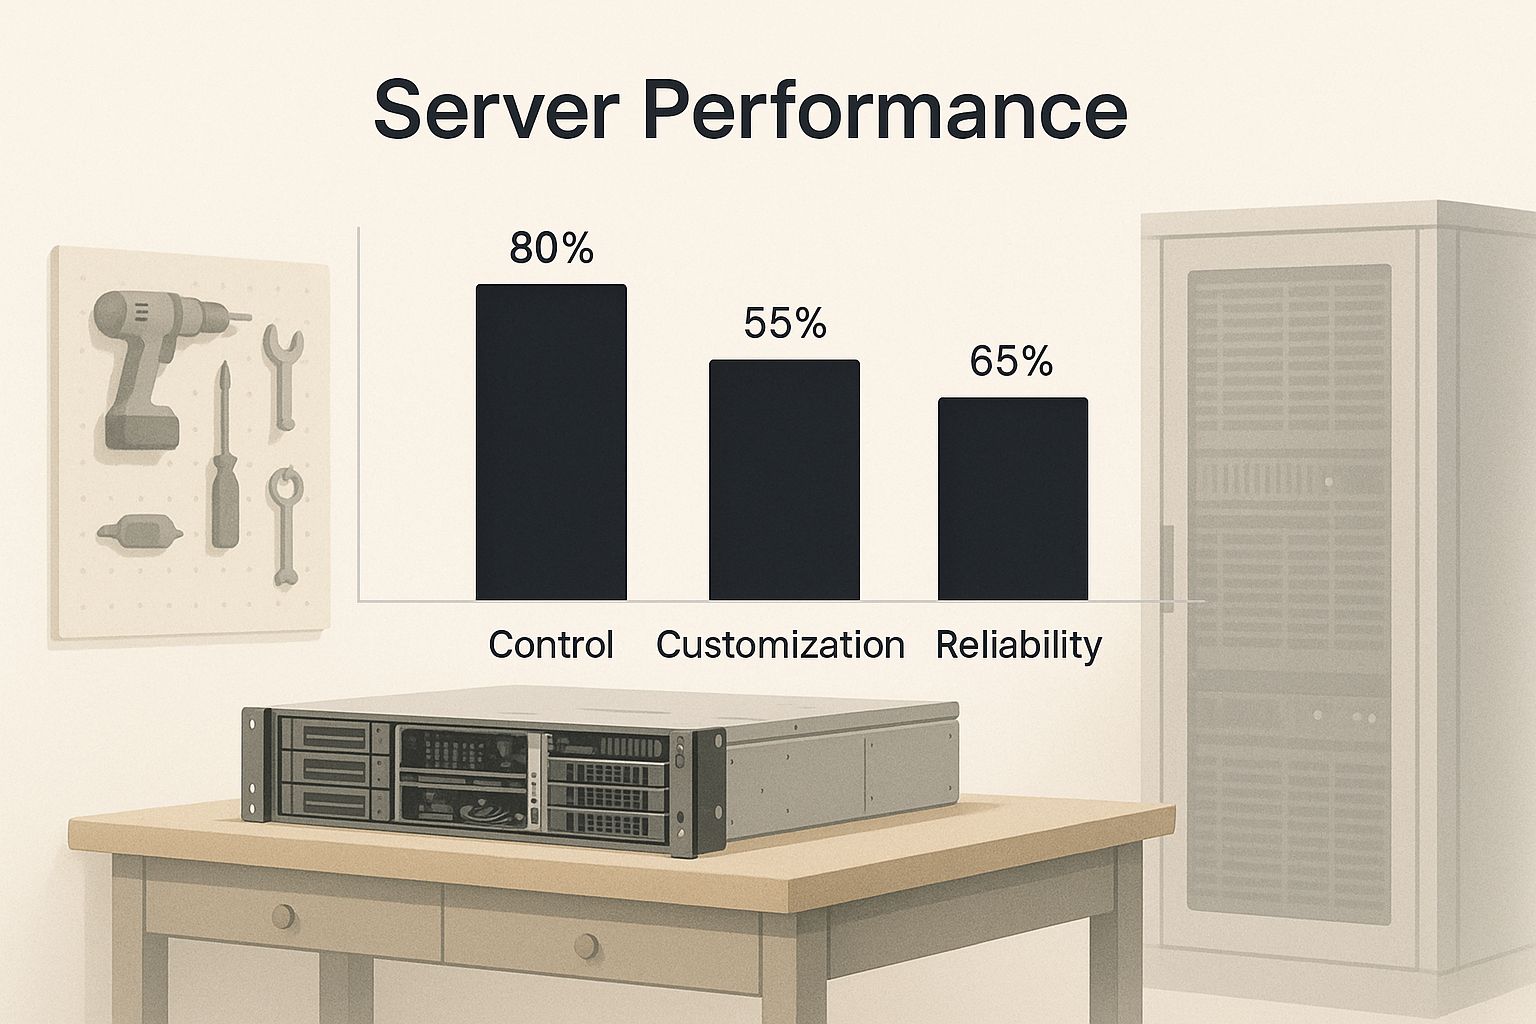
It perfectly captures the deal: you get powerful hardware and the keys, but you’re the one who has to build and maintain everything inside.
So how do these models stack up side-by-side? This table breaks down the key differences in control, cost, and the skills you'll need.
Choosing Your Hosting Control Level
| Feature | Unmanaged VPS | Managed VPS | Shared Hosting |
|---|---|---|---|
| Control Level | Full root access. You control everything. | Limited. Provider handles core management. | Very limited. You only manage your site files. |
| Technical Skill | High. You are the system administrator. | Medium. Basic web skills are enough. | Low. Designed for beginners. |
| Cost | Low to moderate. You're paying for hardware. | High. You're paying for hardware + expertise. | Very Low. You share resources and costs. |
| Performance | High. Dedicated, customizable resources. | High. Dedicated resources, but less customization. | Variable. Can be slow due to "noisy neighbors." |
Ultimately, your choice depends on how much you want to be in the driver's seat versus how much you're willing to pay someone else to handle the technical heavy lifting.
The Trade-Off Between Freedom and Responsibility
The biggest draw of unmanaged hosting is, without a doubt, the freedom. You can install any operating system you want, tweak every last server setting, and optimize every resource to perfectly suit your application. This level of customization is something you simply can't get with managed or shared plans.
But with great power comes great responsibility.
With unmanaged VPS hosting, you become the system administrator. You are solely responsible for software updates, security patches, firewall configuration, backups, and troubleshooting any issues that arise.
The demand for this level of control is surging. The global virtual private server (VPS) market is on a steep climb, with the unmanaged VPS segment alone projected to hit USD 3.52 billion by 2030. That’s a compound annual growth rate (CAGR) of 16.9% starting in 2025. This growth is being fueled by users like hobbyists and game server admins who demand root-level access and don't want a provider meddling with their setup. You can dig into more data on the VPS market trends in the full report.
In the end, choosing the best unmanaged VPS hosting comes down to an honest assessment of your skills and project needs. If you're comfortable working in the command line and are ready to take full ownership of your server's health, the benefits are massive.
Decoding Server Specs for Maximum Performance
Picking the right hardware for your unmanaged VPS is the single most important decision you'll make. Think of it like building a custom race car—what’s under the hood directly determines how fast and reliably it handles the track. Choosing the best unmanaged VPS hosting is all about matching the server's engine, workbench, and warehouse to your project's specific demands.

This isn’t about just grabbing the biggest numbers you can find. It’s about understanding what each component actually does and how they all work together. Get this balance right from the start, and you’ll save yourself a world of headaches from performance bottlenecks and expensive upgrades down the road.
CPU: The Engine of Your Server
The CPU (Central Processing Unit) is the raw horsepower of your server, and its cores are the pistons. Each core can handle a specific task or process at the same time. The more cores you have, the better your server can multitask, which is critical for handling a flood of user requests or running multiple applications at once.
Consider these scenarios:
- High-Traffic Website: A site juggling hundreds of simultaneous visitors needs multiple CPU cores to process every user's request without creating a digital traffic jam. For example, a WordPress site with many plugins generates multiple PHP processes per visitor, which can be distributed across cores.
- Database Server: An intense database constantly crunching complex queries gets a huge boost from more cores, letting it execute those queries in parallel.
- Build Server/CI/CD: A server compiling code or running automated test suites (like Jenkins or GitLab Runners) benefits greatly from more cores to run jobs in parallel and reduce build times.
For most general-purpose websites, starting with 2-4 vCPU cores is a solid baseline. But if you’re running a busy e-commerce store or a complex web app, you’ll definitely want to aim higher.
RAM: Your Server's Workbench
If the CPU is the engine, then RAM (Random Access Memory) is the server's workbench. It’s a super-fast, temporary workspace where your server keeps all the applications, data, and files it's actively using. More RAM means a bigger workbench, allowing you to handle more tasks at once without things slowing to a crawl.
When your server runs out of RAM, it starts using the much slower storage drive as temporary workspace (a process called "swapping"). This is like moving your project from a clean workbench to the floor—everything grinds to a halt.
Figuring out your RAM needs is crucial. A simple blog might be perfectly happy with 2 GB of RAM, but a high-traffic server running a database and caching services could easily chew through 8 GB or more to keep things running smoothly. For instance, a Redis or Memcached instance may require several gigabytes of dedicated RAM just for caching database queries and objects.
Storage: Your Data Warehouse
Storage is your server’s warehouse, where the operating system, applications, and all your precious data are permanently kept. But not all warehouses are created equal. The type of storage you choose has a massive impact on how quickly your server can find and retrieve data.
Think of it like this:
- HDD (Hard Disk Drive): This is like a classic warehouse with a manual forklift. It’s spacious and cheap, but finding a specific item takes time. Best for large-scale, low-cost backups.
- SSD (Solid-State Drive): An SSD is an automated warehouse. It's far faster and more organized, slashing data retrieval times. A great all-around choice.
- NVMe SSD (Non-Volatile Memory Express SSD): This is the ultimate warehouse, with a dedicated robotic arm for every single shelf. Data retrieval is nearly instantaneous, making it the top choice for databases and high-I/O applications.
For any serious project today, NVMe SSDs are the gold standard. They deliver a performance leap that users will feel instantly in page load times. You can learn more about how these core components fit into the bigger picture by reviewing these 5 key factors to consider when choosing a hosting provider.
Monitoring Your Resources in Real-Time
With an unmanaged VPS, you have the power—and the responsibility—to monitor these resources directly. This lets you spot bottlenecks early and make smart, data-driven decisions about when it’s time to upgrade. A couple of simple command-line tools are all you need to get started.
1. Check CPU and RAM with htop:
The htop command fires up a live, color-coded dashboard of your server's performance. You'll likely need to install it first: sudo apt install htop on Debian/Ubuntu.
htop
You'll see a list of every running process, with clean bar graphs at the top showing the real-time usage for each CPU core and your total RAM. It's the fastest way to see what's eating up your resources.
2. Check Disk Space with df -h:
To see how much warehouse space you're using, the df -h command gives you a quick, human-readable summary.
df -h
The output lists each storage partition, its total size, how much is used, and the percentage remaining. Keeping an eye on this ensures you never run out of room unexpectedly. Mastering these simple commands is a fundamental step toward managing your own server with confidence.
Choosing Your Server's Operating System
The operating system (OS) is the soul of your server. Think of it as the foundation and the master blueprint for everything you want to build. It determines which tools you can run, how they all work together, and ultimately, how secure and stable your entire setup will be. Getting this choice right from the start is one of the most important decisions you'll make.
When it comes to the best unmanaged vps hosting, the conversation almost always starts and ends with Linux. And for good reason. Linux distributions are famous for their rock-solid stability, powerful security features, and an open-source model that means no licensing fees. It’s the perfect recipe for anyone who values control, performance, and cost-efficiency.
This isn't just a niche preference; it's a global standard. It's expected that Linux-based systems will account for 61.5% of the total VPS market revenue by 2025. This massive adoption is fueled by its open-source philosophy and sheer affordability—qualities that resonate with users needing a powerful, no-nonsense foundation. You can dig into the market data to see the full trend.
The Top Linux Contenders
While there are hundreds of Linux "distros" out there, a few have risen to the top in the server world. They’ve earned their place through massive community support, fantastic documentation, and reliable, predictable updates. Each one brings a slightly different flavor to the table.
Ubuntu Server: If you're looking for a great all-rounder, Ubuntu is your go-to. It’s known for being incredibly user-friendly (for a server OS) and has a gigantic community behind it. It expertly balances fresh, up-to-date software with long-term stability, making it a solid choice for just about anything—web servers, development boxes, you name it.
Debian: As the project that Ubuntu is built upon, Debian is legendary for its unwavering focus on stability and security. Its release schedule is slower and more deliberate, which is exactly what you want for a server where reliability is non-negotiable. For those looking to streamline deployments, you can even learn to create a Debian cloud-init template.
AlmaLinux: Born from the ashes of the original CentOS, AlmaLinux is a bit-for-bit clone of Red Hat Enterprise Linux (RHEL). This makes it the champion for enterprise-level environments that need guaranteed long-term stability and security updates, but without the hefty price tag of a commercial license.
When to Consider Windows Server
While Linux clearly dominates the field, there are times when Windows Server isn't just an alternative—it's the only tool for the job. If your entire workflow or application stack is built on Microsoft technologies, you’ll need a Windows environment to make it all run.
The primary reason to choose Windows Server is for proprietary Microsoft software. This includes hosting applications built on the .NET Framework, running MSSQL databases, or deploying other Windows-exclusive services like Active Directory.
The catch? Cost. Unlike its open-source cousins, Windows Server requires a license, which adds a recurring fee to your hosting bill. It’s a niche choice, but an absolutely essential one for a specific set of users.
Your First Commands on a New Linux Server
So you've picked a Linux distro and your VPS is up and running. What now? Your first few commands are crucial for laying down a secure and stable groundwork. These initial steps are pretty much universal for any Debian-based system, like Ubuntu and Debian.
1. Update Your System
First things first. Before you do anything else, update your system's package list and upgrade all installed software. This simple command pulls in the latest security patches and bug fixes.
sudo apt update && sudo apt upgrade -y
2. Create a New Secure User
Running commands as the 'root' user is like walking a tightrope without a net—one wrong move can be catastrophic. The best practice is to create a new user for your day-to-day work and give it administrative powers. Just replace yournewuser with a username you'll remember.
adduser yournewuser
Next, add your new user to the sudo group to grant it those admin privileges:
usermod -aG sudo yournewuser
With those two steps done, you've built a secure, up-to-date foundation. Now you're ready to start building your project with confidence.
Mastering Your Server's Network and Security
When you go with an unmanaged VPS, you're the one holding the keys to the kingdom. Once you've sorted out the CPU, RAM, and OS, your attention needs to turn outward. You're in charge of two things that will make or break your setup: the network connection that plugs you into the world and the security that keeps the bad actors out. Think of these not as settings, but as the walls and gateways of your digital fortress.
Your server’s network connection is its lifeline, and you need to know what you’re working with. Port speed is a good starting point. Think of it like the size of the door to your server—a 1 Gbps port is a standard door, while a 10 Gbps port is like a massive loading bay door, letting way more data move in and out at once.
Then you have bandwidth. This is the total amount of data you're allowed to push through that door every month. If you’re running a busy site or serving up large files, a generous bandwidth allowance is non-negotiable. You don't want to hit your cap and suddenly find yourself offline.

Building Your First Line of Defense: The Firewall
The second your server is online, it’s visible to the entire internet—the good and the bad. Your very first security task should be setting up a firewall. A firewall is like a bouncer at the door, checking every piece of traffic trying to get in or out and deciding whether to let it pass based on a set of rules you create.
For Linux servers, especially Ubuntu or Debian, the Uncomplicated Firewall (UFW) is a lifesaver. It takes the normally painful process of configuring firewall rules and boils it down to a few simple commands. It makes basic server hardening accessible to just about anyone.
Here’s a quick rundown on getting UFW up and running:
- Allow Essential Connections: Before you flip the switch, you have to poke a few holes for the traffic you do want. The absolute most important one is SSH, which is how you’ll access your server remotely.
sudo ufw allow ssh - Permit Web Traffic (If needed): If you're hosting a website, you’ll also need to let people visit it by allowing HTTP and HTTPS traffic.
sudo ufw allow http sudo ufw allow https - Activate the Firewall: With your essential rules in place, it’s time to turn it on. This command starts the firewall and tells it to launch automatically every time your server reboots.
sudo ufw enable
With just those few steps, you've dramatically shrunk your server's attack surface by blocking everything except the specific services you’ve approved. This is just the beginning, of course. For true peace of mind, layering on robust anti-malware protection is another crucial step to keep your data safe.
Planning for Future Growth and Scalability
Let's be honest, your project probably isn't going to stay the same size forever. As your traffic grows and your needs change, you're going to need more power. The whole point of a VPS is that you can scale, but how easily you can do it is entirely up to your hosting provider.
Scalability isn't just about the ability to upgrade; it's about the ease of upgrading. A great unmanaged VPS provider allows you to add CPU, RAM, and storage with minimal downtime, often through a simple control panel interface without needing a complex and risky server migration.
When you're shopping around, keep an eye out for these key scalability features:
- Seamless Upgrades: Can you boost your server’s specs on the fly? Or are you going to have to manually migrate everything to a new box? The former is what you want.
- Resource Pools: Does the provider actually have the capacity to handle your growth, or are they cramming too many customers onto their hardware? Look for providers using modern cloud and bare metal infrastructure.
- Clear Upgrade Paths: Is the pricing for the next tier up clear and predictable? You need to be able to budget for your future success.
Choosing a provider with a simple, clear upgrade path from day one is a smart move. It means your infrastructure can grow right alongside your project. That kind of foresight is what separates a good hosting choice from the best unmanaged VPS hosting—it sets you up not just for today, but for wherever your ambitions take you tomorrow.
Why ARPHost Excels in Unmanaged VPS
Knowing what makes a high-performance server is one thing. Actually finding a provider that delivers on all those promises is a whole different ballgame. This is where the hunt for the best unmanaged vps hosting stops being theoretical and starts delivering real results. At ARPHost, we’ve built our entire infrastructure around a few core beliefs: raw power, true resource isolation, and an unwavering, stable network.
A lot of providers build their VPS offerings on complex virtualized platforms. This often leads to overselling—a shady practice where more resources are sold than are physically available on the server. We just don't do that. Our entire unmanaged VPS platform is built directly on high-performance bare metal infrastructure.
What does that mean for you? It means your virtual server gets its horsepower from a dedicated, physical machine, not some convoluted software layer fighting for attention. The result is true, guaranteed resource isolation. The CPU cores, RAM, and storage you pay for are yours and yours alone. This delivers consistent, predictable performance without the "noisy neighbor" effect that plagues so many other hosting environments.
Built on Elite Hardware
The foundation of any great server is the hardware it runs on. We don't cut corners here. Our commitment to performance starts with powerful AMD EPYC processors, which are legendary for their exceptional multi-core performance. They are absolute workhorses, perfect for handling demanding applications and heavy multitasking without breaking a sweat.
We pair that raw processing power with enterprise-grade NVMe storage. As you've learned, NVMe technology delivers lightning-fast I/O speeds, which translates directly into faster website load times, quicker database queries, and more responsive applications. When every millisecond counts, our hardware gives you a serious competitive edge.
By combining the raw power of bare metal with top-tier components like AMD EPYC CPUs and NVMe storage, ARPHost delivers a foundational advantage that ensures your unmanaged VPS performs at its peak potential from day one.
A Robust and Secure Network
Your server’s performance is only as good as the network it’s connected to. Our network architecture was designed from the ground up for both speed and resilience. We provide more than enough bandwidth to handle huge traffic spikes and ensure your projects stay online and accessible, no matter what you throw at it.
Security isn't an afterthought or a pricey add-on, either. We include built-in DDoS protection at no extra cost with every single plan. This fundamental security layer helps shield your server from malicious traffic designed to knock it offline, giving you some essential peace of mind.
This combination of superior hardware and a secure, resilient network is what makes our unmanaged VPS hosting plans a standout choice for developers and businesses who simply refuse to compromise on performance.
Finally, we believe in transparent and predictable pricing. You won’t find any hidden fees or surprise charges on your invoice. The price you see is the price you pay, which allows you to budget effectively as your project grows. By matching ideal server specs with superior, tangible technology, ARPHost provides a powerful, reliable, and straightforward solution for your hosting needs.
Your First Steps with an Unmanaged VPS
So, you've got your server IP address and password. Congratulations! What you have now is a raw piece of digital real estate, a blank slate ready for you to build upon. The first hour is crucial. This is when you'll turn that empty space into a secure, operational environment and set up a solid workflow from the very beginning.
First thing's first: you need to connect to your new server. We'll do this using SSH (Secure Shell), a protocol that creates a secure, encrypted link between your computer and the VPS. It sounds technical, but it’s actually pretty straightforward, no matter what operating system you're on.
- For macOS and Linux: You're in luck. The Terminal application comes with SSH built right in.
- For Windows: Modern versions have OpenSSH included in PowerShell. Alternatively, you can use the Windows Subsystem for Linux (WSL).
To get connected, pop open your terminal or PowerShell and type the following command, swapping in your actual server IP.
ssh root@your_server_ip
You’ll be asked for the root password your host provided. Punch that in, and just like that, you're in with full administrative control.
Establishing Secure User Access
Now for a critical security tip: never operate directly as the root user for your day-to-day tasks. Why? Because a single typo or a misplaced command can cause irreversible damage. It's like having the master key to a skyscraper—you only want to use it when absolutely necessary.
The standard practice is to create a new user for your daily work and give it administrative powers using the sudo command.
Let's start by changing that default root password to something incredibly strong.
passwd
Next up, create your new user. Just replace yournewuser with whatever username you want.
adduser yournewuser
Now, we'll grant this new user the ability to run commands as an administrator by adding them to the sudo group.
usermod -aG sudo yournewuser
The screenshot below shows a perfect example of sudo in action. A regular user is trying to run a command that requires elevated privileges.
Think of sudo as a security checkpoint. It steps in, asks for a password, and only then grants temporary root-level access for that one specific task.
Hardening Your SSH Configuration
The final, and perhaps most important, step in this initial setup is to completely disable direct root login over SSH. This is a game-changer for security.
By doing this, you force everyone—including yourself—to first log in with a standard user account. From there, you can use sudo for any administrative tasks. This simple change adds a vital security layer and creates a clear audit trail of who did what.
Here is a quick technical how-to for disabling root login:
- Open the SSH config file using a text editor like
nano:sudo nano /etc/ssh/sshd_config - Find the line that says
#PermitRootLogin prohibit-passwordorPermitRootLogin yes. - Change it to
PermitRootLogin no. Make sure to remove the#at the beginning if it's there. - Save the file (Ctrl+O in nano) and exit (Ctrl+X).
- Restart the SSH service to apply the change:
sudo systemctl restart sshd
Important: Before you log out, open a new terminal window and make sure you can log in with your new user (ssh yournewuser@your_server_ip). This ensures you don't lock yourself out.
Nailing these fundamentals is what separates a vulnerable server from the best unmanaged vps hosting experience. As you get more comfortable, you'll find that managing your server's configuration becomes second nature. To make life even easier down the road, it's worth exploring some of the top configuration management tools that can help automate and streamline your setup.
By following these first few steps, you've successfully hardened your server. You're now ready to start building your project on a secure and stable foundation.
A Few Final Questions About Unmanaged VPS Hosting
Even after you've weighed the pros and cons, a few lingering questions often pop up when you're on the verge of choosing an unmanaged VPS. Getting these cleared up is the final step to making a decision you won't regret. Let's tackle the most common ones we hear.
What Level of Technical Skill Is Really Required?
Let’s be direct: you need to be comfortable working without a graphical interface. This means logging in via SSH, knowing your way around the command line with commands like ls and cd, and being able to edit configuration files with a text editor like nano or vim. If those terms sound foreign, a managed VPS is probably a much better fit for you right now. For example, you should be able to install a web server like Nginx or Apache, configure its virtual hosts, and set up a basic firewall without a step-by-step guide for every command.
What Does "Support" Actually Cover on an Unmanaged Plan?
Think of it this way: your hosting provider guarantees the foundation is solid. We ensure the physical server has power, the network is connected, and your VPS instance is online and reachable.
However, everything inside that virtual server is your domain. The operating system, software installations, security patches, and troubleshooting any application errors—that's all on you. Direct support for those tasks simply isn't part of an unmanaged plan.
Can I Install a Control Panel Like cPanel?
Yes, you absolutely can. With full root access, your VPS is a blank canvas. You are free to install any compatible software you need, and that includes popular control panels like cPanel or Plesk. A control panel can definitely make managing websites and server tasks a lot easier.
Just keep in mind that you're responsible for purchasing the license, handling the entire installation, and keeping it configured and updated.
Unmanaged VPS hosting remains the go-to choice for developers and system administrators who want maximum control without the cost of a dedicated server. Entry-level plans typically run between $13.41 and $15.57 per month, making it a powerful and affordable middle ground. For a broader look at the industry, check out these web hosting statistics.
Ready to take the reins and build on a server environment you completely control? Explore ARPHost's unmanaged VPS solutions and get the high-performance hardware and reliable network your project deserves. https://arphost.com
Article created using Outrank
[…] For instance, if you require absolute control over your hardware stack and need to meet strict data residency or security compliance, an on-premise bare-metal server is the superior choice. It offers raw, uncontended performance and is physically isolated in your environment. Conversely, a cloud-based Virtual Private Server (VPS) delivers exceptional flexibility, enabling you to scale resources up or down programmatically. If this agility is a priority, you can find detailed comparisons by exploring options for the best unmanaged VPS hosting. […]
[…] business owners try to save a few bucks with options like unmanaged VPS hosting, not realizing it’s like buying a car engine and a box of parts. Sure, it’s cheaper, but now […]